Clerk: Identity as a Service


Recently, I helped my friend set up an application with user and subscription management. After thorough shopping, we agreed to use the Clerk service, a provider that offers identity management, authorization, and subscriptions as a single offering. Let's walk through a common scenario: adopting external services into a Flask/Python/PostgreSQL stack.
Before we go into the specific integration details, let's pause and discuss why you may want to externalize the identity management and payments. Well, the reason is the same as using libraries and frameworks: somebody has done the heavy lifting and written the code, run all the tests, and passed all certifications. It sounds banal, but you pay for the service and add what really matters for you and your client base, yet another consideration: security and industry-standard compliance. With outsourced identity management and payments, you don't need to worry about risks related to losing your customer database, protecting personal information, or meeting card industry compliance requirements, such as PCI-DSS. Your service provider would take care of it. Of course, we are all humans, and storms happen all the time, but you will only blame yourself for the unwise provider choice. However, industry standards help developers avoid vendor lock-ins and simplify provider replacement.
Now let's go back to technology and talk fun stuff only. While Clerk offers plenty for developers, it's very JS/TS-forward and targets primarily Node-based frameworks. Of course, the company provides a Python SDK, but it focuses on the backend implementation and Clerk API access. Well, let's walk through the initial steps and build the first Flask application using Clerk as the identity provider.
I'll start with the new application to illustrate how easy the identity federation could be.
Create a Demo Application
I use UV to create a new application. If you already have one, you may skip this step and start with Clerk registration and configuration.
[chronicler-examples]$ uv init --name flask_with_clerk \
--description "Integrate the external authentication into the Flask application" \
flask-with-clerk
Initialized project 'flask-with-clerk' at '~/projects/chronicler-examples/flask-with-clerk'
chronicler-examples $ cd flask-with-clerk
flask-with-clerk $ ls
main.py         pyproject.toml  README.md
[flask-with-clerk]$
The new Python application
Add the required packages. I added Clerk SDK straight off the bat, but you could add it to your existing codebase.
[flask-with-clerk]$ uv add flask
Using CPython 3.13.9
Creating virtual environment at: .venv
Resolved 9 packages in 166ms
Installed 7 packages in 11ms
 + blinker==1.9.0
 + click==8.3.1
 + flask==3.1.2
 + itsdangerous==2.2.0
 + jinja2==3.1.6
 + markupsafe==3.0.3
 + werkzeug==3.1.3
[flask-with-clerk]$ uv add clerk-backend-api
Resolved 26 packages in 339ms
Prepared 2 packages in 140ms
Installed 17 packages in 18ms
 + annotated-types==0.7.0
 + anyio==4.11.0
 + certifi==2025.11.12
 + cffi==2.0.0
 + clerk-backend-api==4.0.0
 + cryptography==45.0.7
 + h11==0.16.0
 + httpcore==1.0.9
 + httpx==0.28.1
 + idna==3.11
 + pycparser==2.23
 + pydantic==2.12.4
 + pydantic-core==2.41.5
 + pyjwt==2.10.1
 + sniffio==1.3.1
 + typing-extensions==4.15.0
 + typing-inspection==0.4.2
[flask-with-clerk]$ uv add PyJWT
Resolved 28 packages in 10ms
Audited 26 packages in 3ms
Now, let's build the Flask boilerplate application. Use your existing templates, or write the new one your own. While I'm going to use the AI power, the place where it really shines is boilerplating.
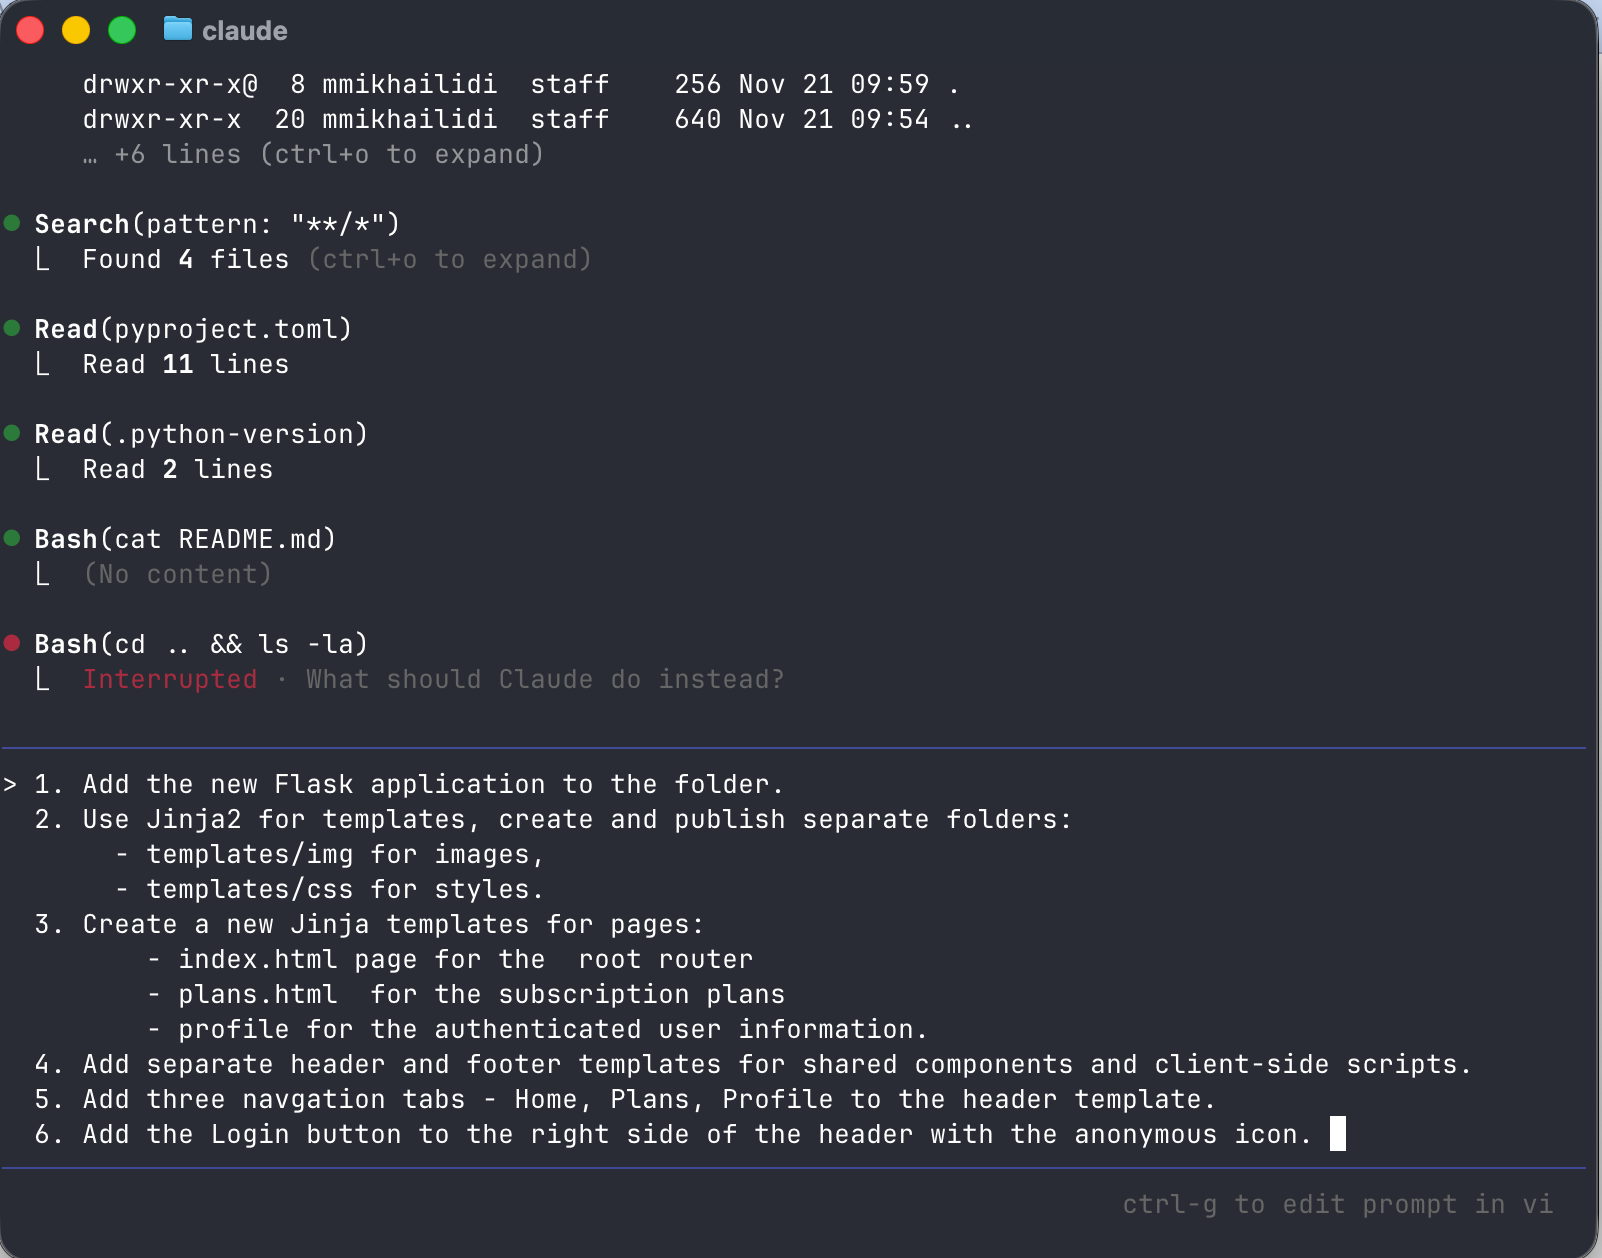
When Claude worked through the tasks, all I had to do was change the listening port to 5001 (to resolve a macOS AirDrop conflict) and run the application.
[flask-with-clerk]$ uv run python main.py
 * Serving Flask app 'main'
 * Debug mode: on
WARNING: This is a development server. Do not use it in a production
deployment. Use a production WSGI server instead.
 * Running on all addresses (0.0.0.0)
 * Running on http://127.0.0.1:5001
 * Running on http://192.168.1.1:5001
Press CTRL+C to quit
 * Restarting with stat
 * Debugger is active!
 * Debugger PIN: 478-128-611
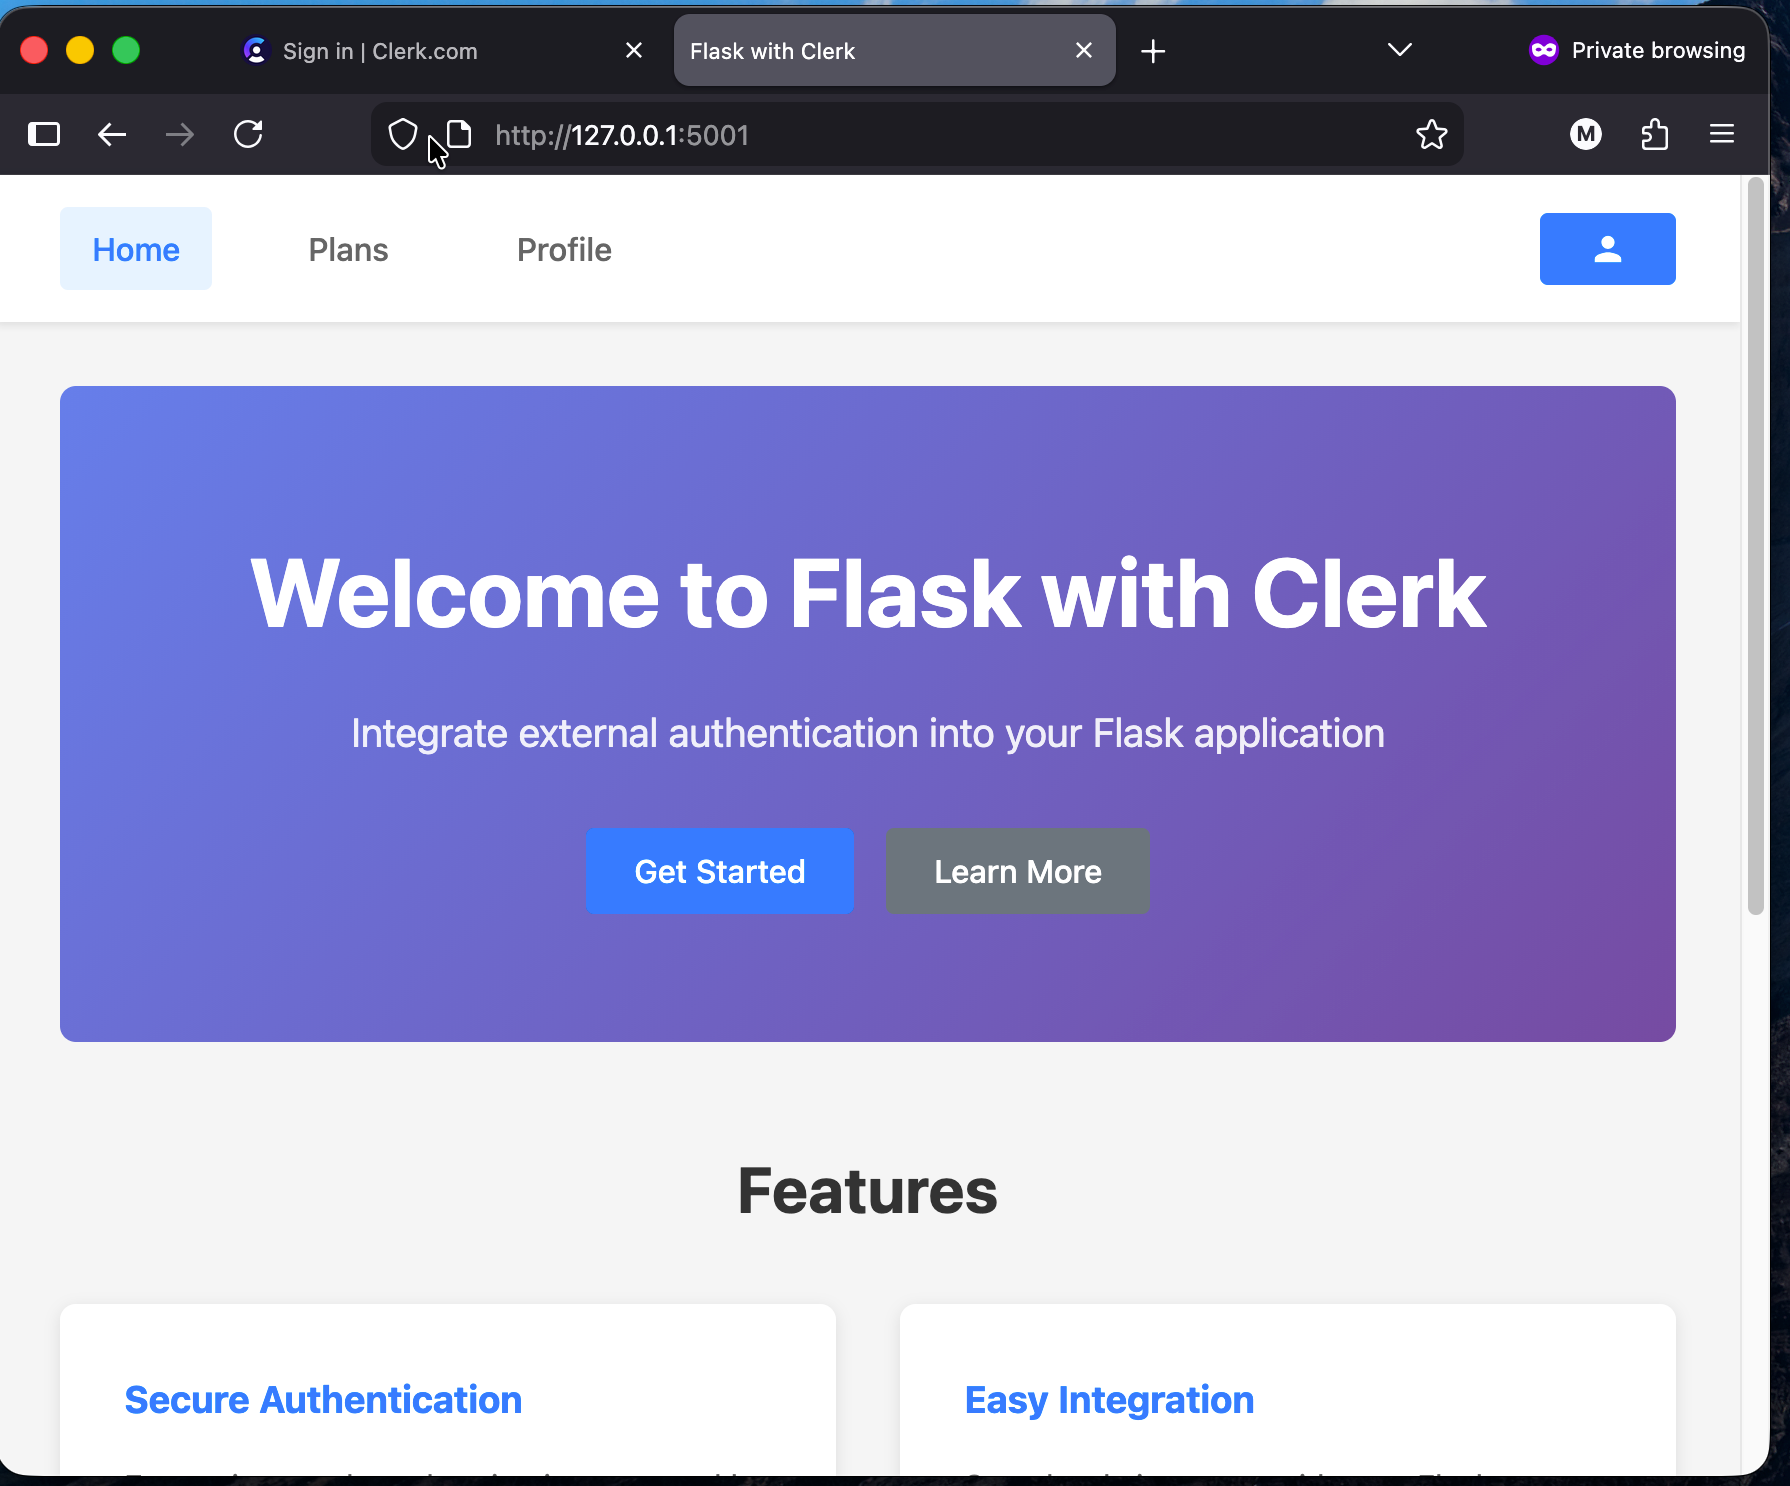
Start the Dlask application
The final application look and feel will differ depending on what you do or which LLM you prefer to generate the code. My three-pager is shown in the screenshot below. Not that bad for a free-of-charge LLM and a few steps of instructions.
It is time to create the new Clerk application.
Clerk Application Provisioning
Starting a new project is straightforward, and for a while, it will cost you nothing. Start by creating a new account. The good thing is, you don't even need to go through the pages of registration and email validations. Use the existing identity provider of your choice. In my case, I pick Google.
After the registration, you get access to the dashboard and the default organization "My Workspace", with no applications. You could create multiple workspaces, change their names and logos. To manage the workspace, click the double-arrow button next to it, then select "Manage" from the drop-down menu. On the screen below, you see my personal workspace with no applications defined.
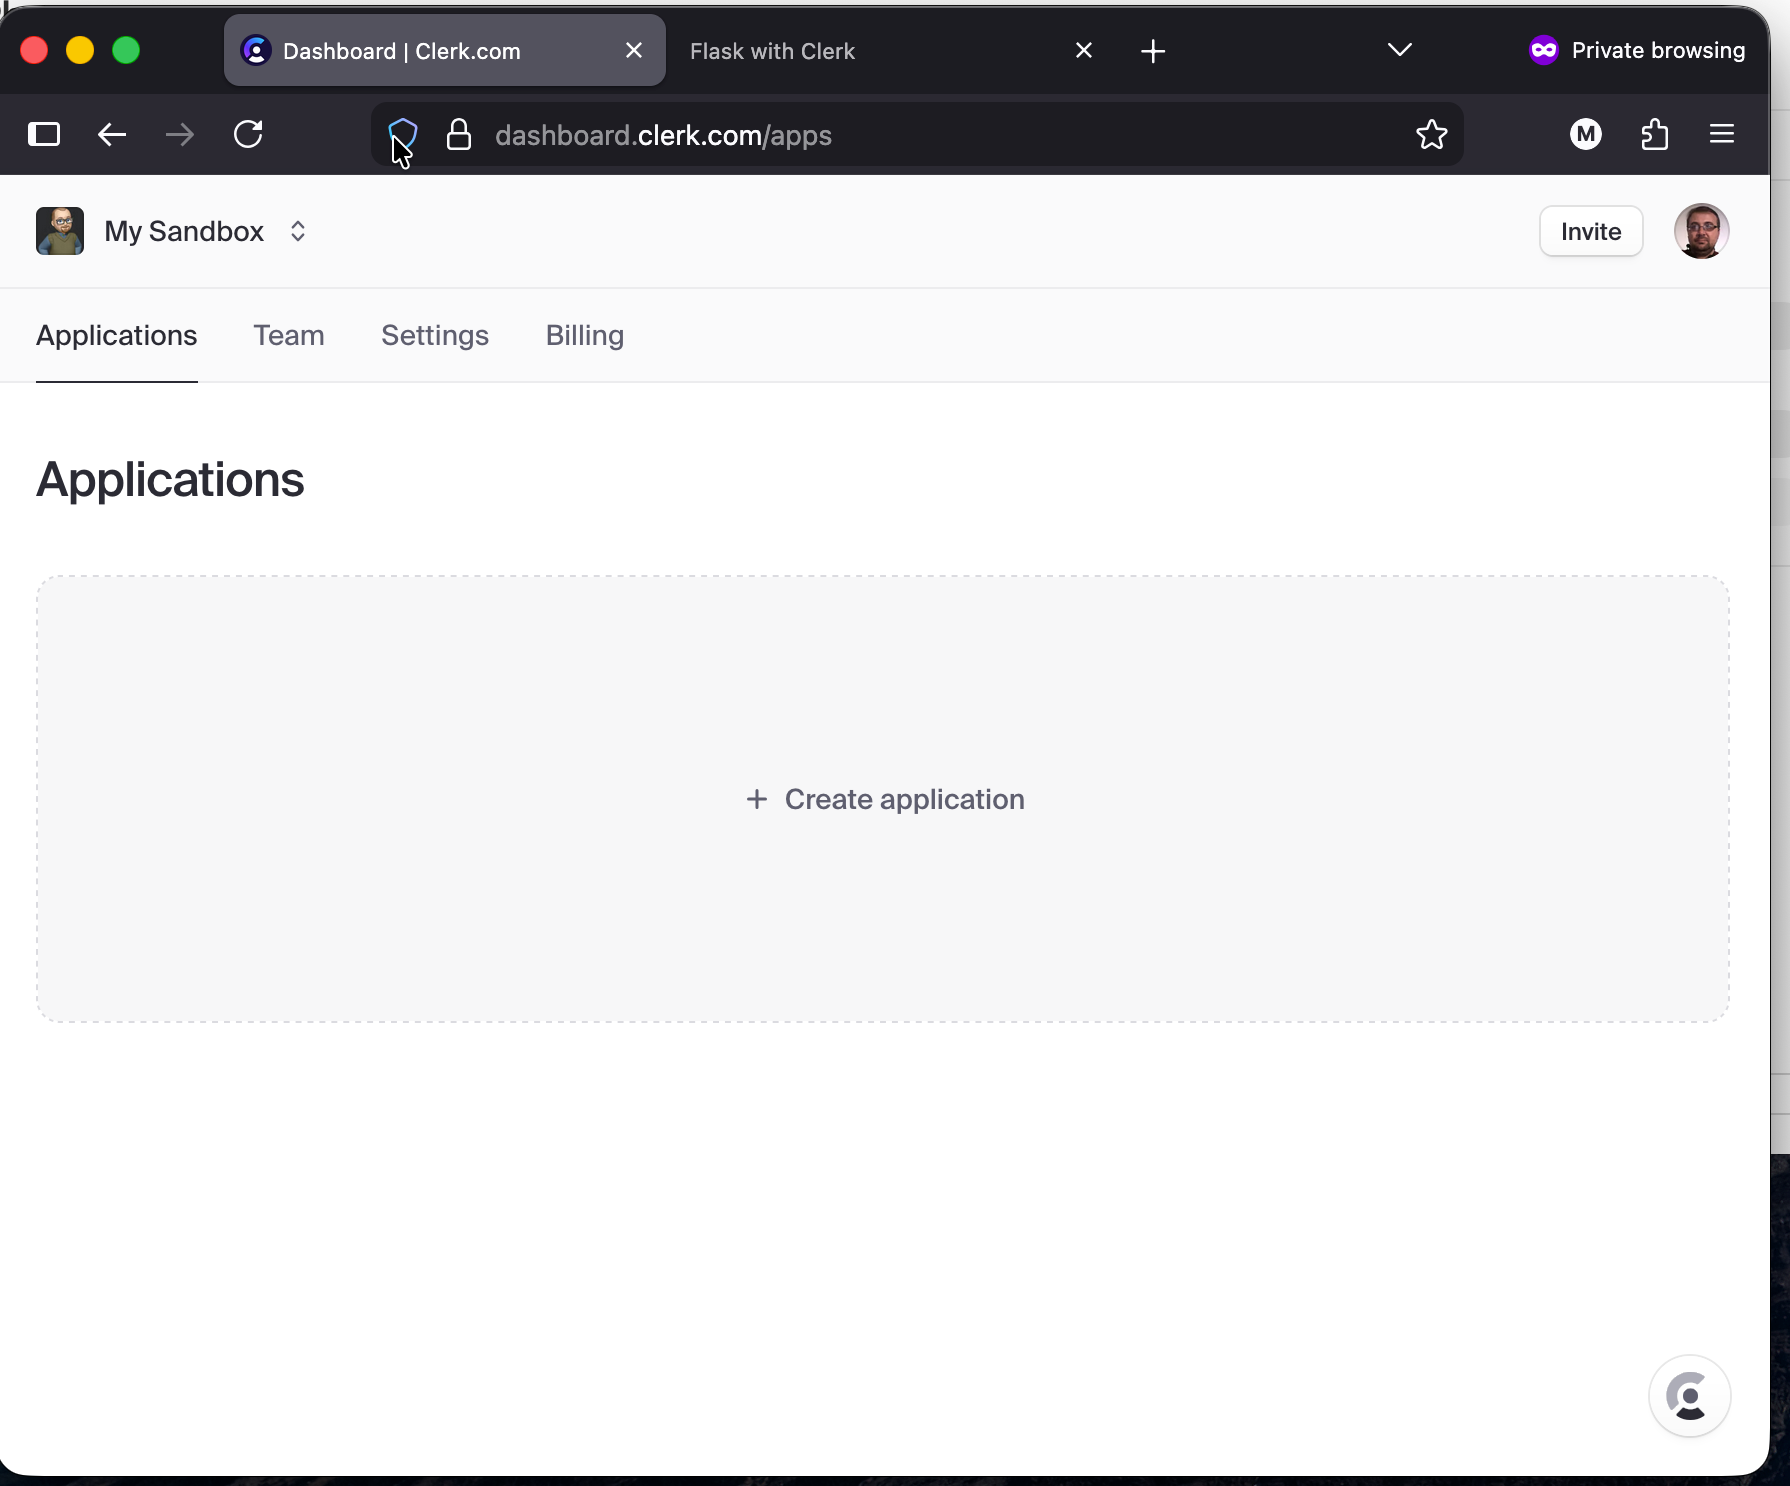
Click on the "+ Create Application" link in the middle of the screen, and configure your first Sign In Screen. The Clerk configurator gives you an idea of what the Sign-In/Sign-On block would look like. The wide range of third-party services lets you tune your application to your target audience.

Click on the "Create Application" button, and in a few seconds, the new application profile will be ready for use. On the application overview page, Clerk offers step-by-step guides and LLM prompts. Unfortunately, all that is not for Python applications. Switch to the Configure tab, then pick API Keys under the Developers section on the left navigation panel.
Select the Next.js option in QuikCopy, then copy the application keys using the Clipboard icon.
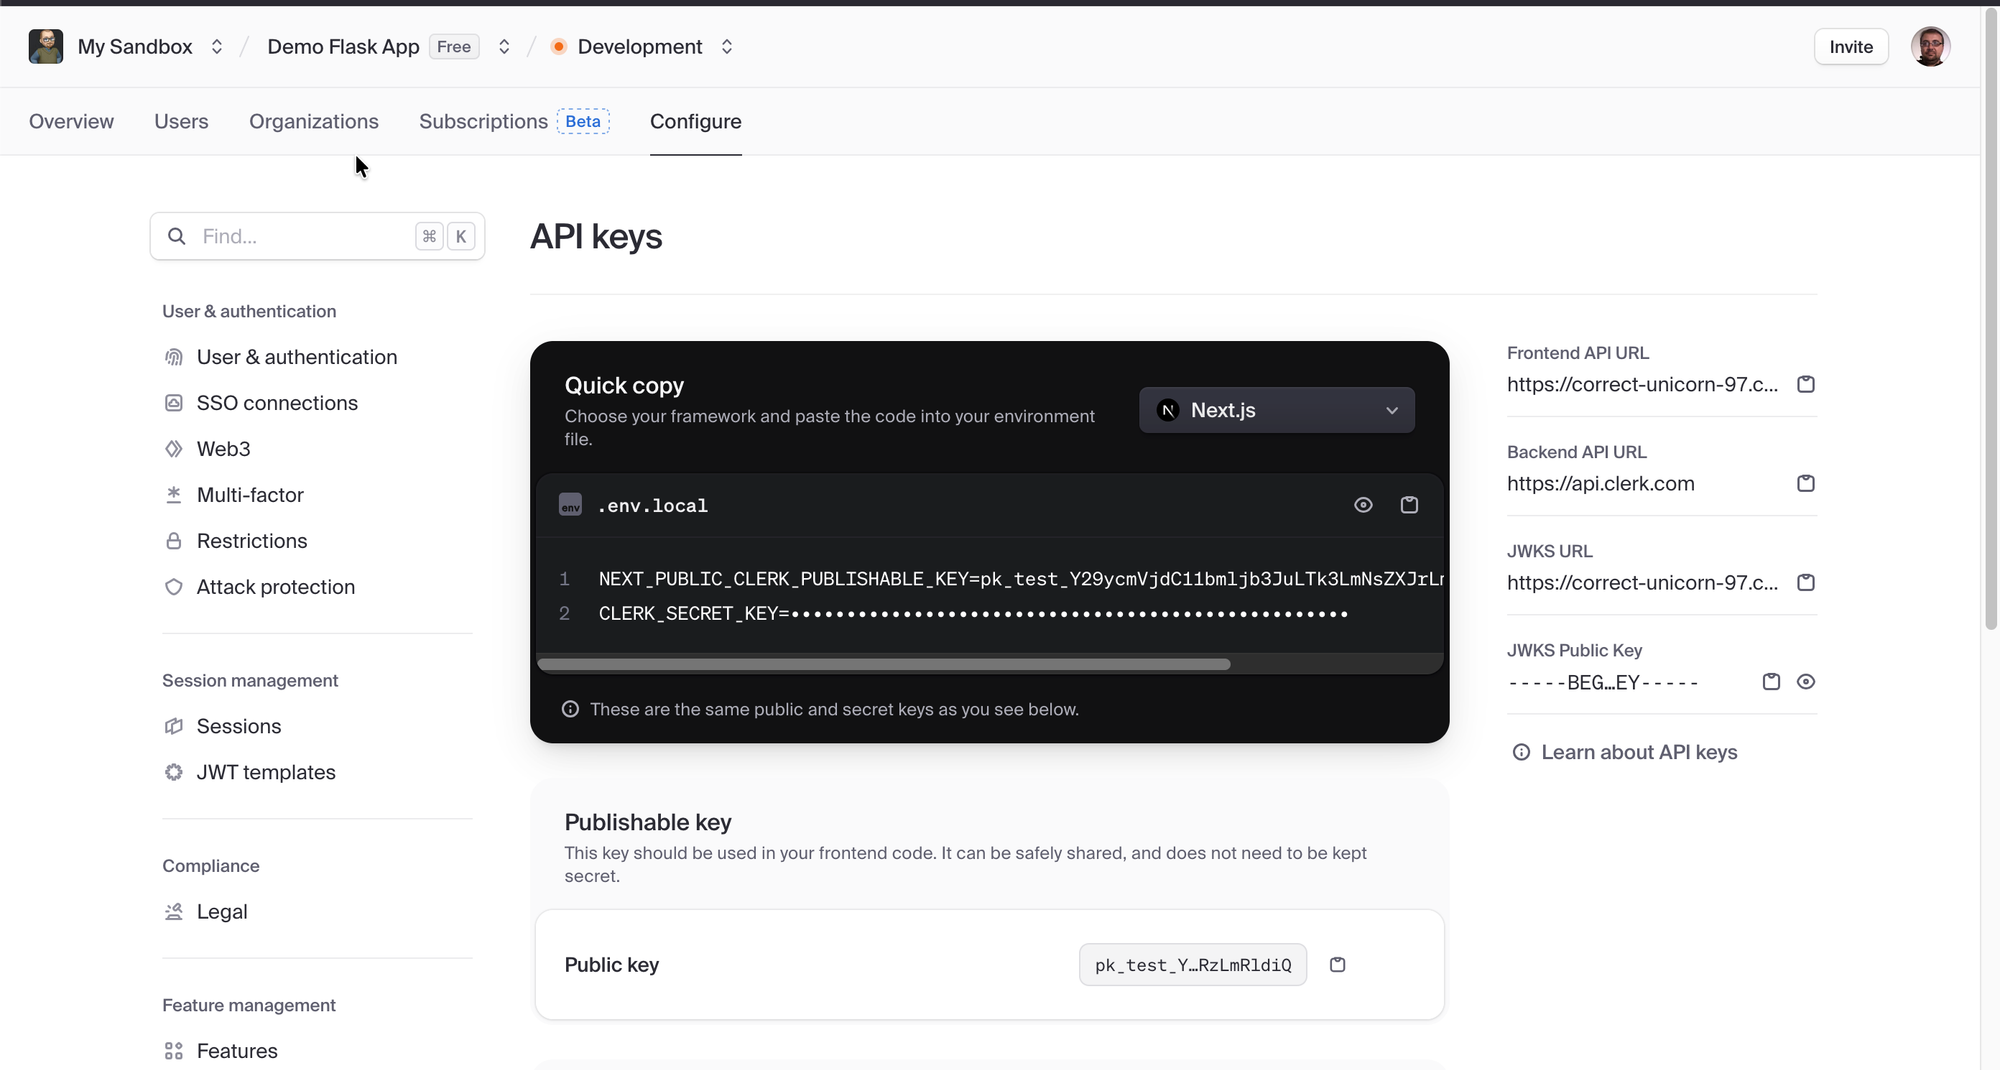
Get back to your project and create the .env configuration file. Paste the application keys here and adjust the variable names. Add a few more keys and save the values.
CLERK_PUBLISHABLE_KEY=pk_test_##########################
CLERK_SECRET_KEY=sk_test_#############################
FLASK_SESSION_SECRET=flask-session-secret-key
APP_URL=http://localhost:5001
FLASK_DEBUG=True
Save the environment parameters, then adjust your project code to use them.
# previous imports
# ...
from dotenv import load_dotenv

load_dotenv()

app = Flask(__name__)
app.config['SECRET_KEY'] = os.getenv('FLASK_SESSION_SECRET')

# ...
# Route handlers.
At this point, you have a working Flask application, a Clerk account, and an application profile with initial settings. In the following publications, we walk through the backend and frontend adjustments to complete the integration and protect your application.
This Post: https://chronicler.tech/clerk-identity-as-a-service/
Adding Security: https://chronicler.tech/clerk-secuirty-injection/
Clerk Session and Plans: https://chronicler.tech/clerk-session-and-plans/