X.com: Webmethods Custom Connector
The main reason I started this automation project was X integration. The changes in the social network API were an excuse for many automation tools to move X integration to premium plans. Webmethods.io offers code-free integration, and here is a recipe.


The main reason I started this automation project was X integration. The changes in the social network API were an excuse for many automation tools to move X integration to premium plans. Webmethods.io offers code-free integration, and here is a recipe.
Most social platforms offer extensive integration capabilities and multiple authentication protocols. The platform may set rate limits for a free tier, but this is more than enough to cover basic needs. Let's define and complete the steps for X.com (aka Twitter).
- To access the platform API, you must complete a developer registration. For X, the developer portal URL is https://developer.x.com/en.
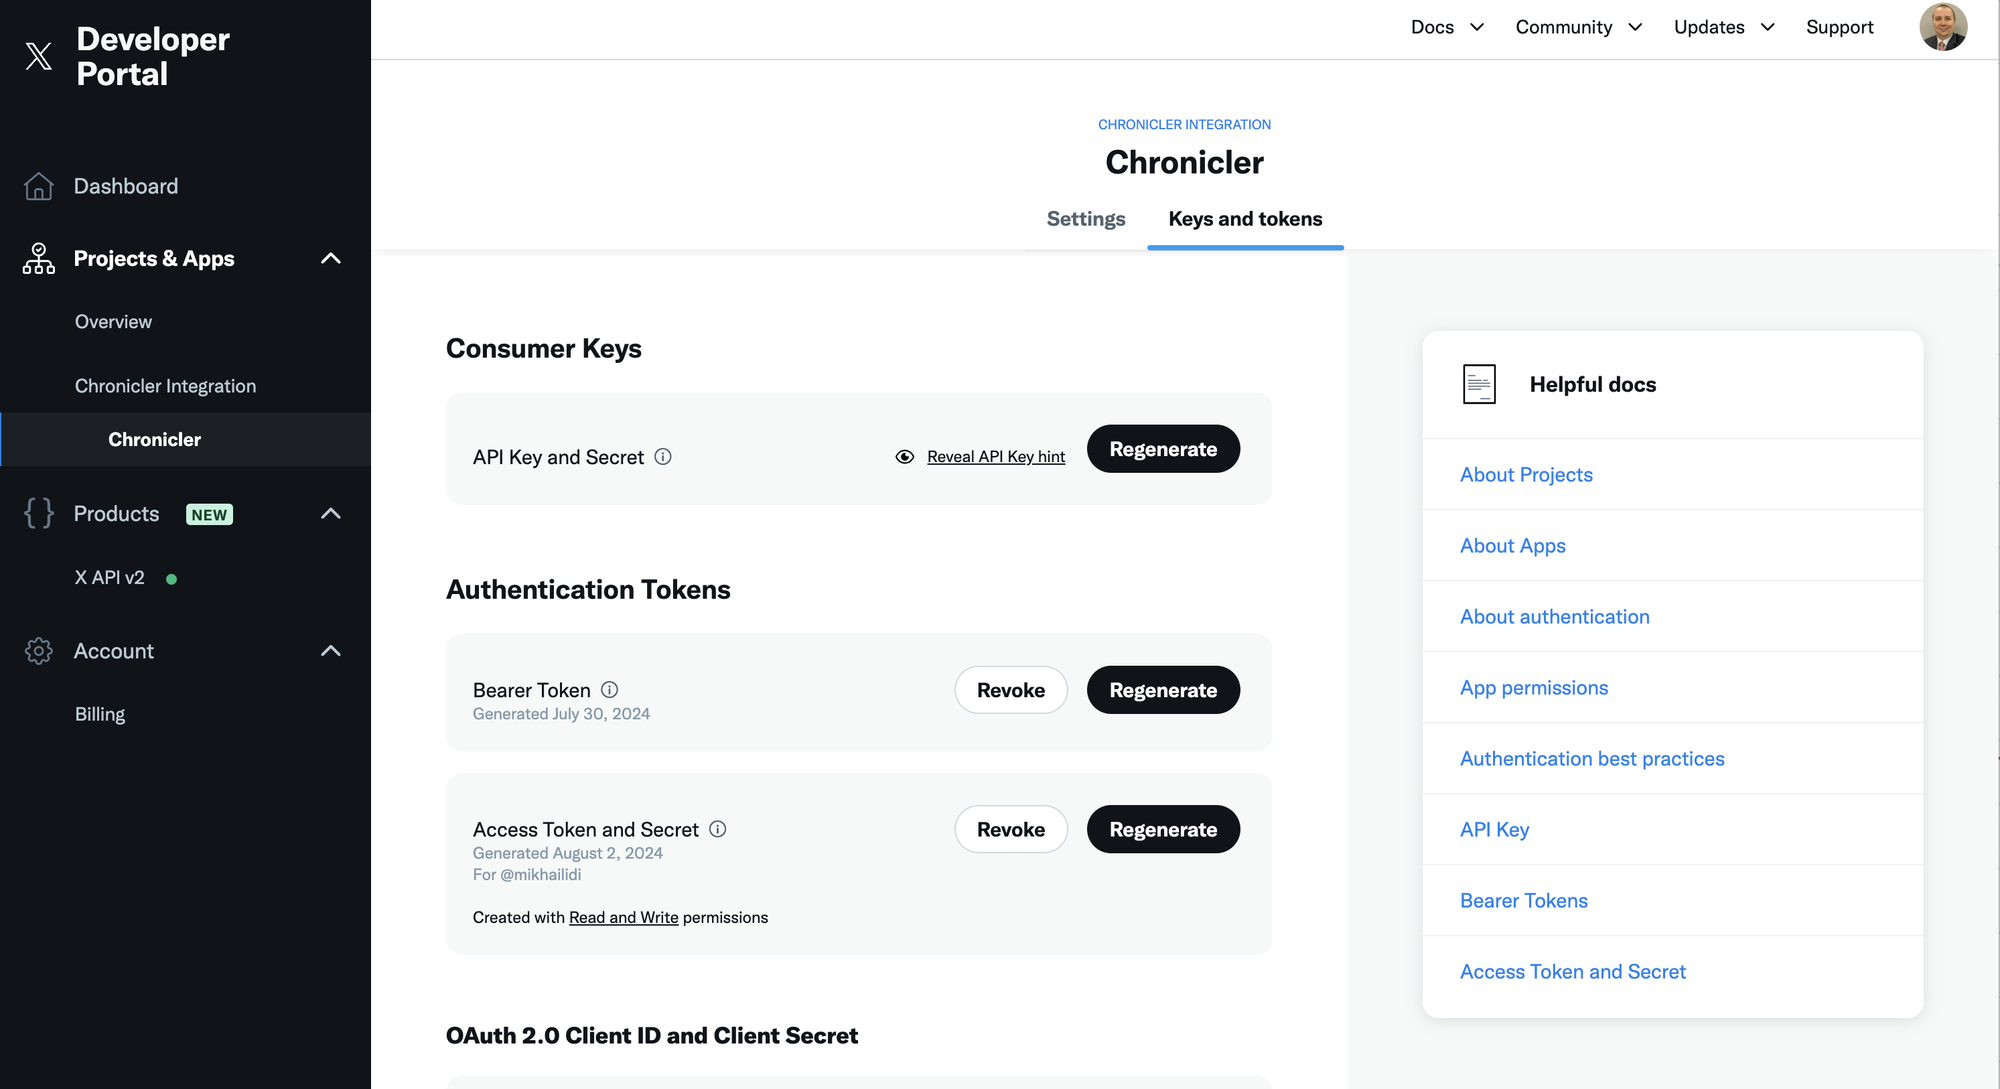
- With access to the developer portal, you should create a project and application to generate an API key—the very thing we are looking for.
- Create a custom RESTful connector in your Webmethods.io Integration project.
- Configure custom connector actions and documents.
- Use the action step in your integration flow.
After obtaining access and creating an application, your application page should look similar to mine.
While you complete steps 1 and 2, remember to securely store your tokens and secrets; you will need them to define authentication for a custom connector. Let's complete the steps as follows to create X API v2 Integration:
- Login to your Webmethods.io Integration environment and the "First Steps" project.
- Select the Connectors tab and navigate to the REST section.
- Click the small blue "Add Connector" button at the top right corner of the section, next to the search section.
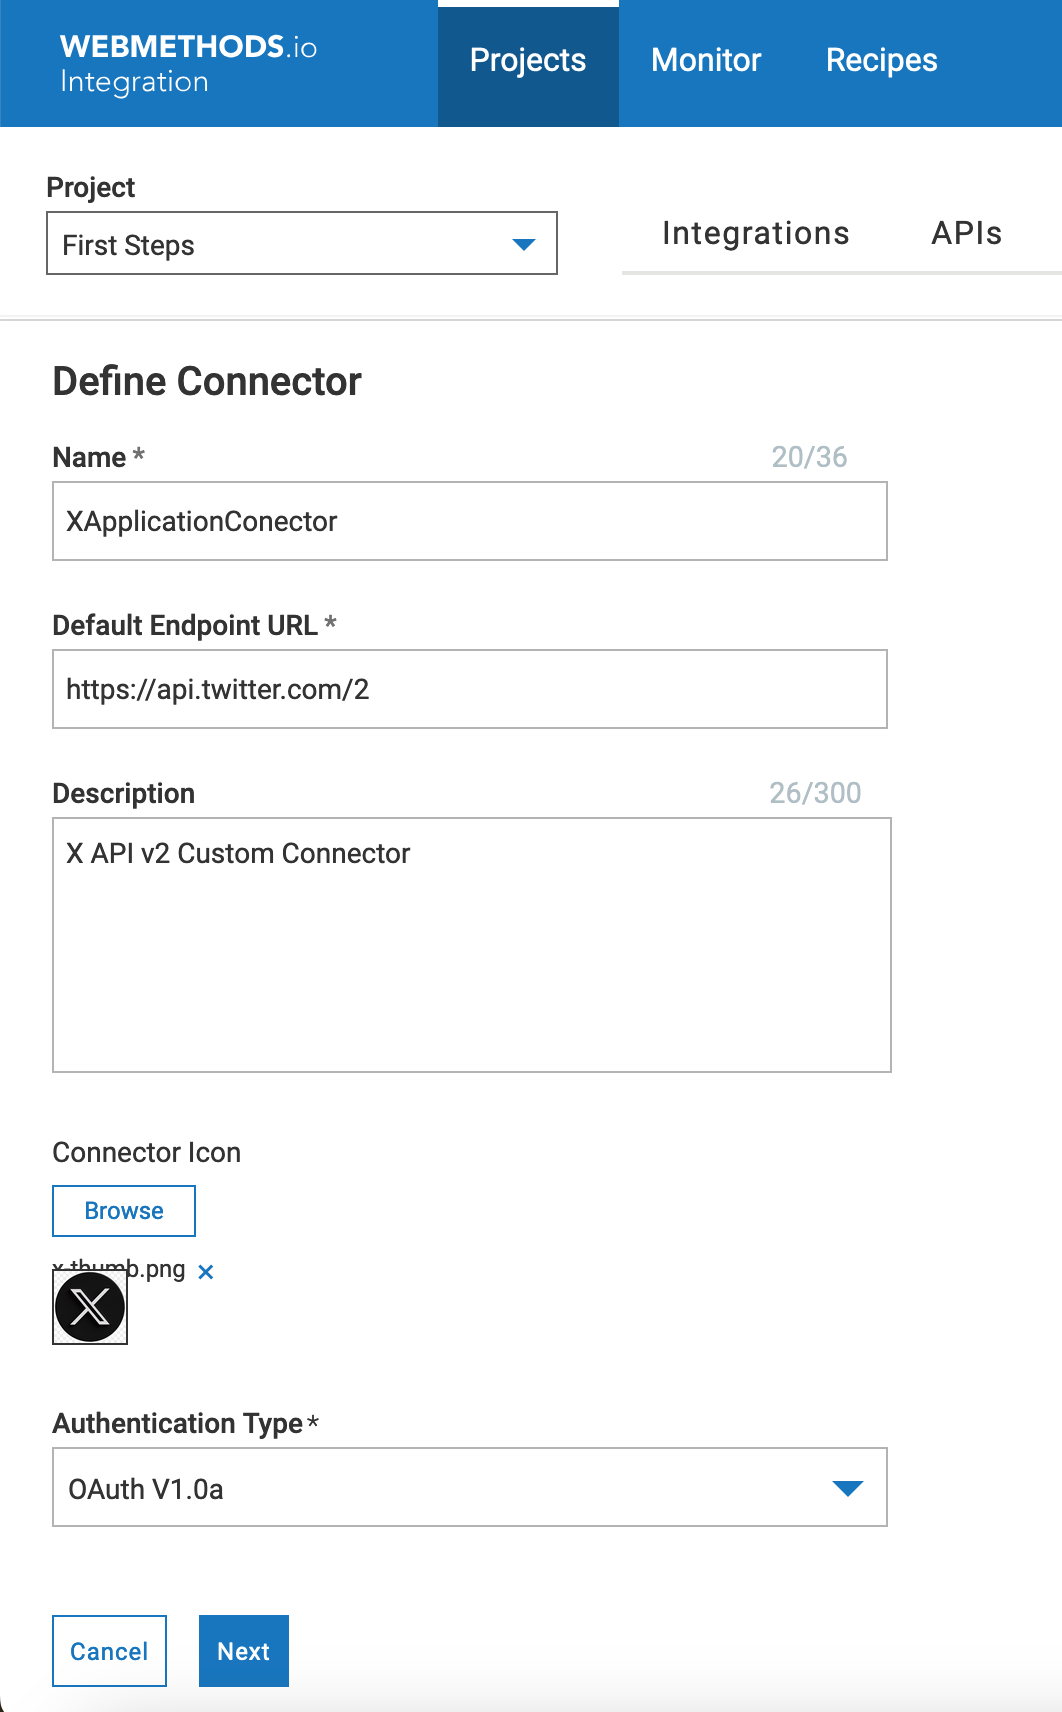
- Fill out new connector details. Similar to the list below. and click next.
- Name: XAppConnector
- Default Endpoint URL: https://api.twitter.com/2
- Description: X.com API v2 Custom Connector
- Connector Icon: Left it as default or set an icon of your preference.
- Authentication Type: OAuth V1.0a
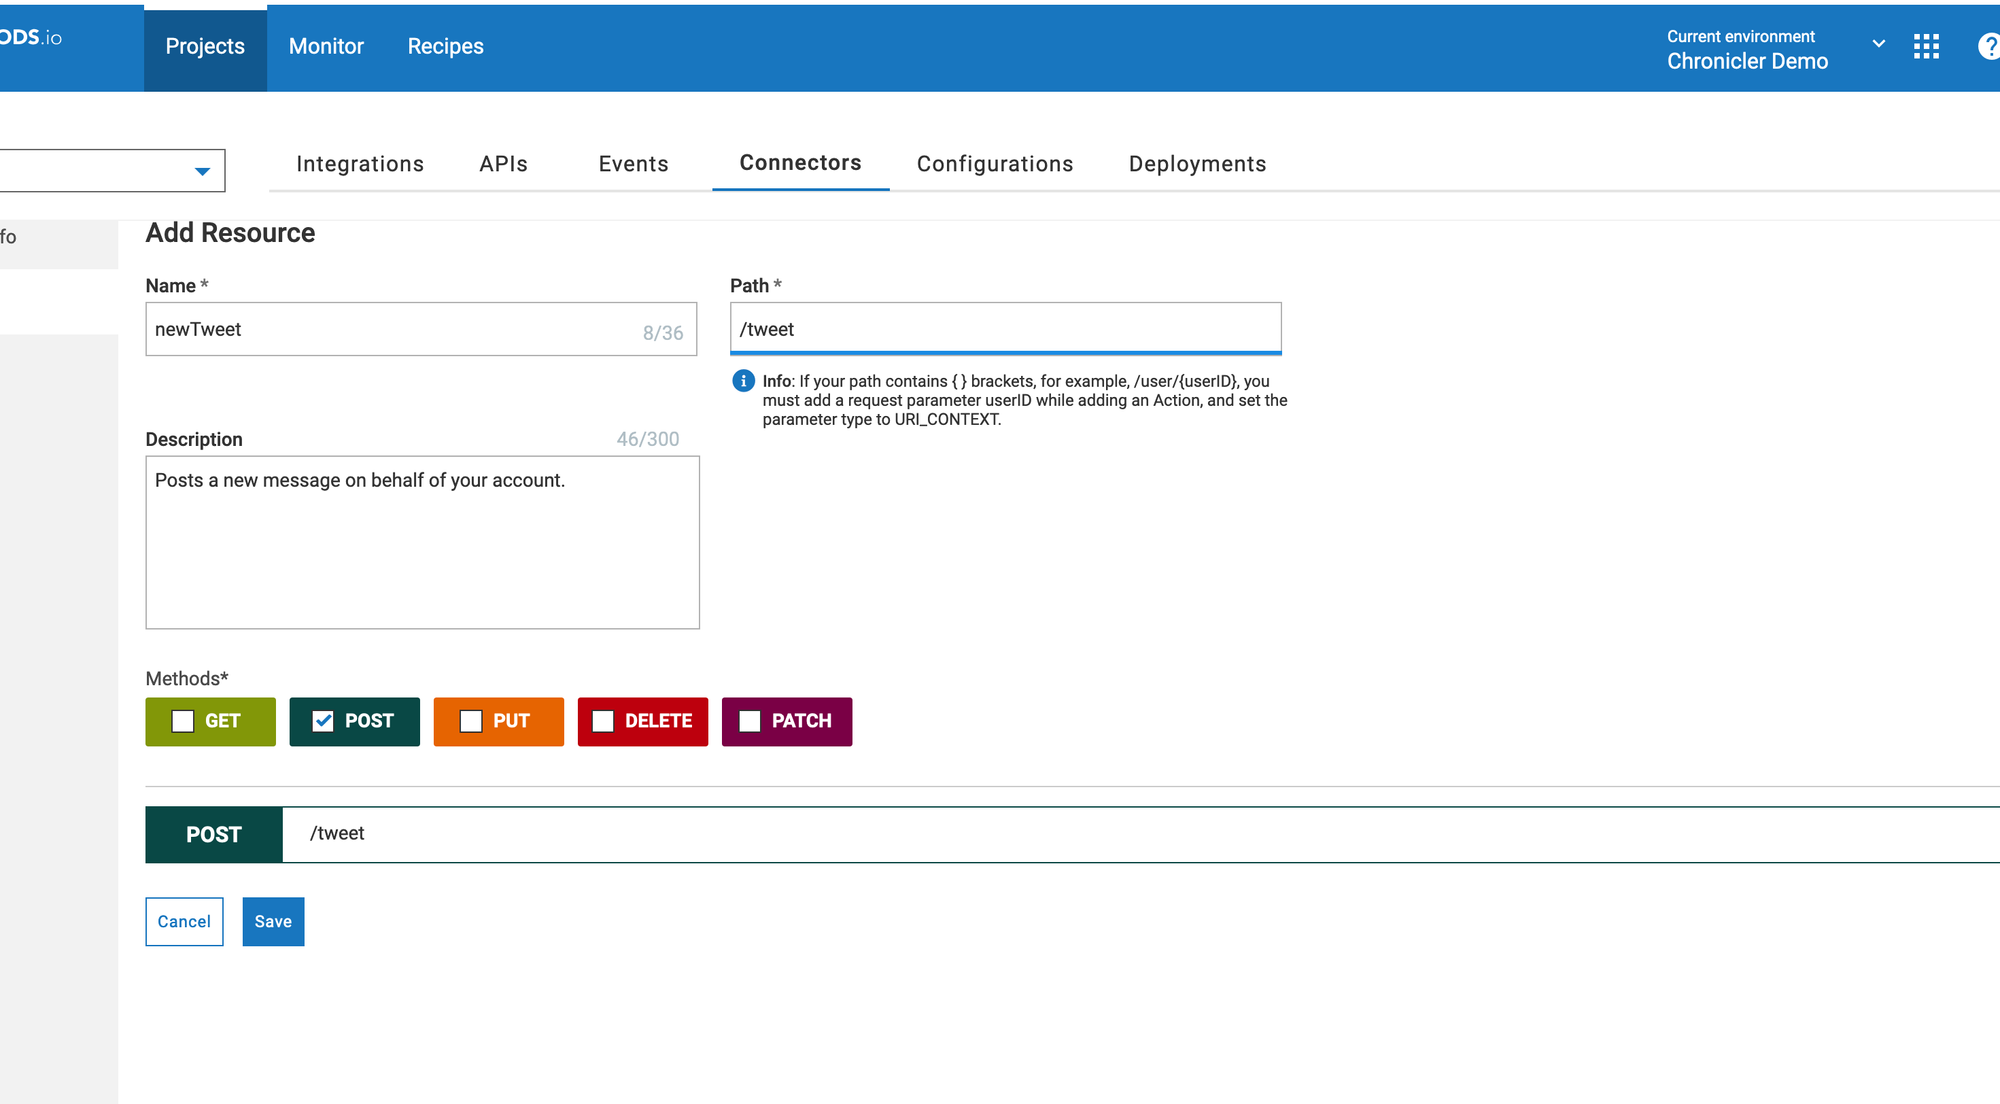
- the list of resources is empty. Click the "Add resource" to define a new POST operation.
- Name: newTweet
- Resource: /tweets
- Description: Post a new tweet on behalf of your account
- Click the POST tag below the operation form to complete the resource definition.
- For the operation request definition, do not add parameters or headers. For the body part, set the content type as "application/json" and click the plus icon next to the Document Type drop-down.
- Set the document type name and optional description. Then click the "Load JSON" button to provide a sample JSON message.
 {
  "text": "Hello World!"
 }
- Your sample document will be parsed, and a single string field with the name "text" will be added.
- Click the "Save" button to save the new document definition, then select the new document type for the body definition.
- Keep the value for Array as "No" and click "Next" to define the response.
- For the response body, set fields as
- HTTP Code: 201
- Content Type: application/json
- Document type: tweet_response
- Create a new document type with the name tweet_response, using the JSON below as a template.
{
  "data": {
    "id": "1445880548472328192",
    "text": "Hello world!"
  }
}- Click the "Next" button to complete the operation definition.
- Click "Save" to save the new REST connector in your project.
The longest part is completed. Yet, we need to finish two more: create an account and publish our new resource as an operation.
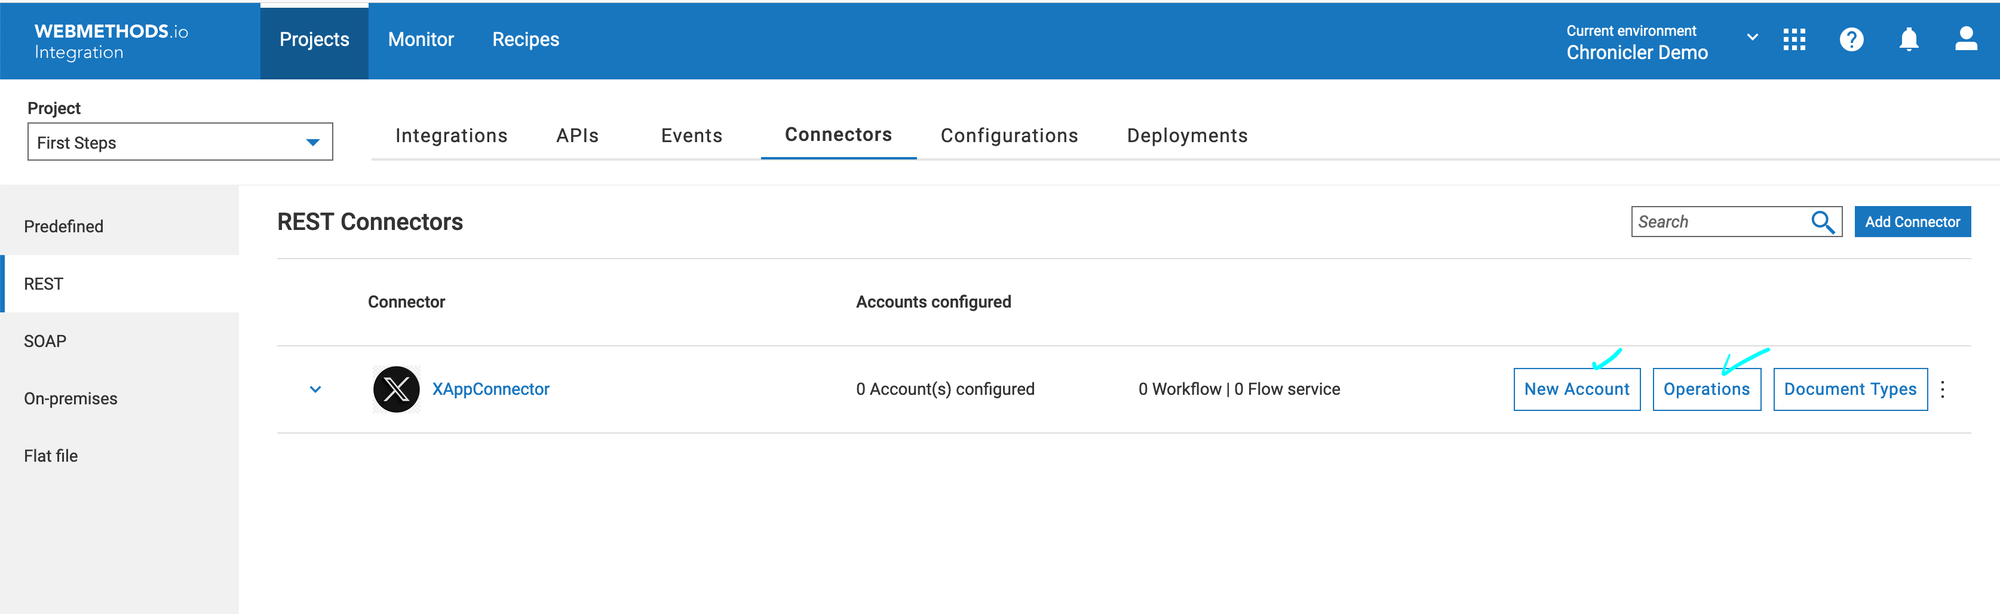
- Return to the list of the REST connectors with your XAppConnector entry.
- Hover a mouse pointer over it and click the "New Account" button.
- On the pop-up form, fill out the values below:
- Account Name: XAppConnector_1
- Server URL: https://api.twitter.com/2
- Consumer ID: Access token value from "Access Tokens and Secrets" of the X application.
- Consumer Secret: Access Token Secret value from your X application.
- Access Token: Consumer API Key from your X application
- Access Token Secret: Consumer API Secret from your X application.
- Keep the rest as is and click "Add." After a second or two, your connector will show a 1 Account(s) Configured.
The last step is to expose our POST resource with the Connector operation.
- Hover the mouse pointer over the connector line and click the "Operations" button.
- On the new screen, either click the "New operation" button at the top right corner or click the "Create custom operation" icon in the center.
- In the first step, fill out the form values as below and then click "Next."
- Connect to XAppConnector: XAppConnector_1
- Name: newPost
- Description: "Publish a new post on X."
- Check the radio button next to the "postnewTweet" operation.
- Click the button "Headers" and add the new header:
- Content-Type: application/json
- Save headers and advance to the confirmation screen with the "Next" button.
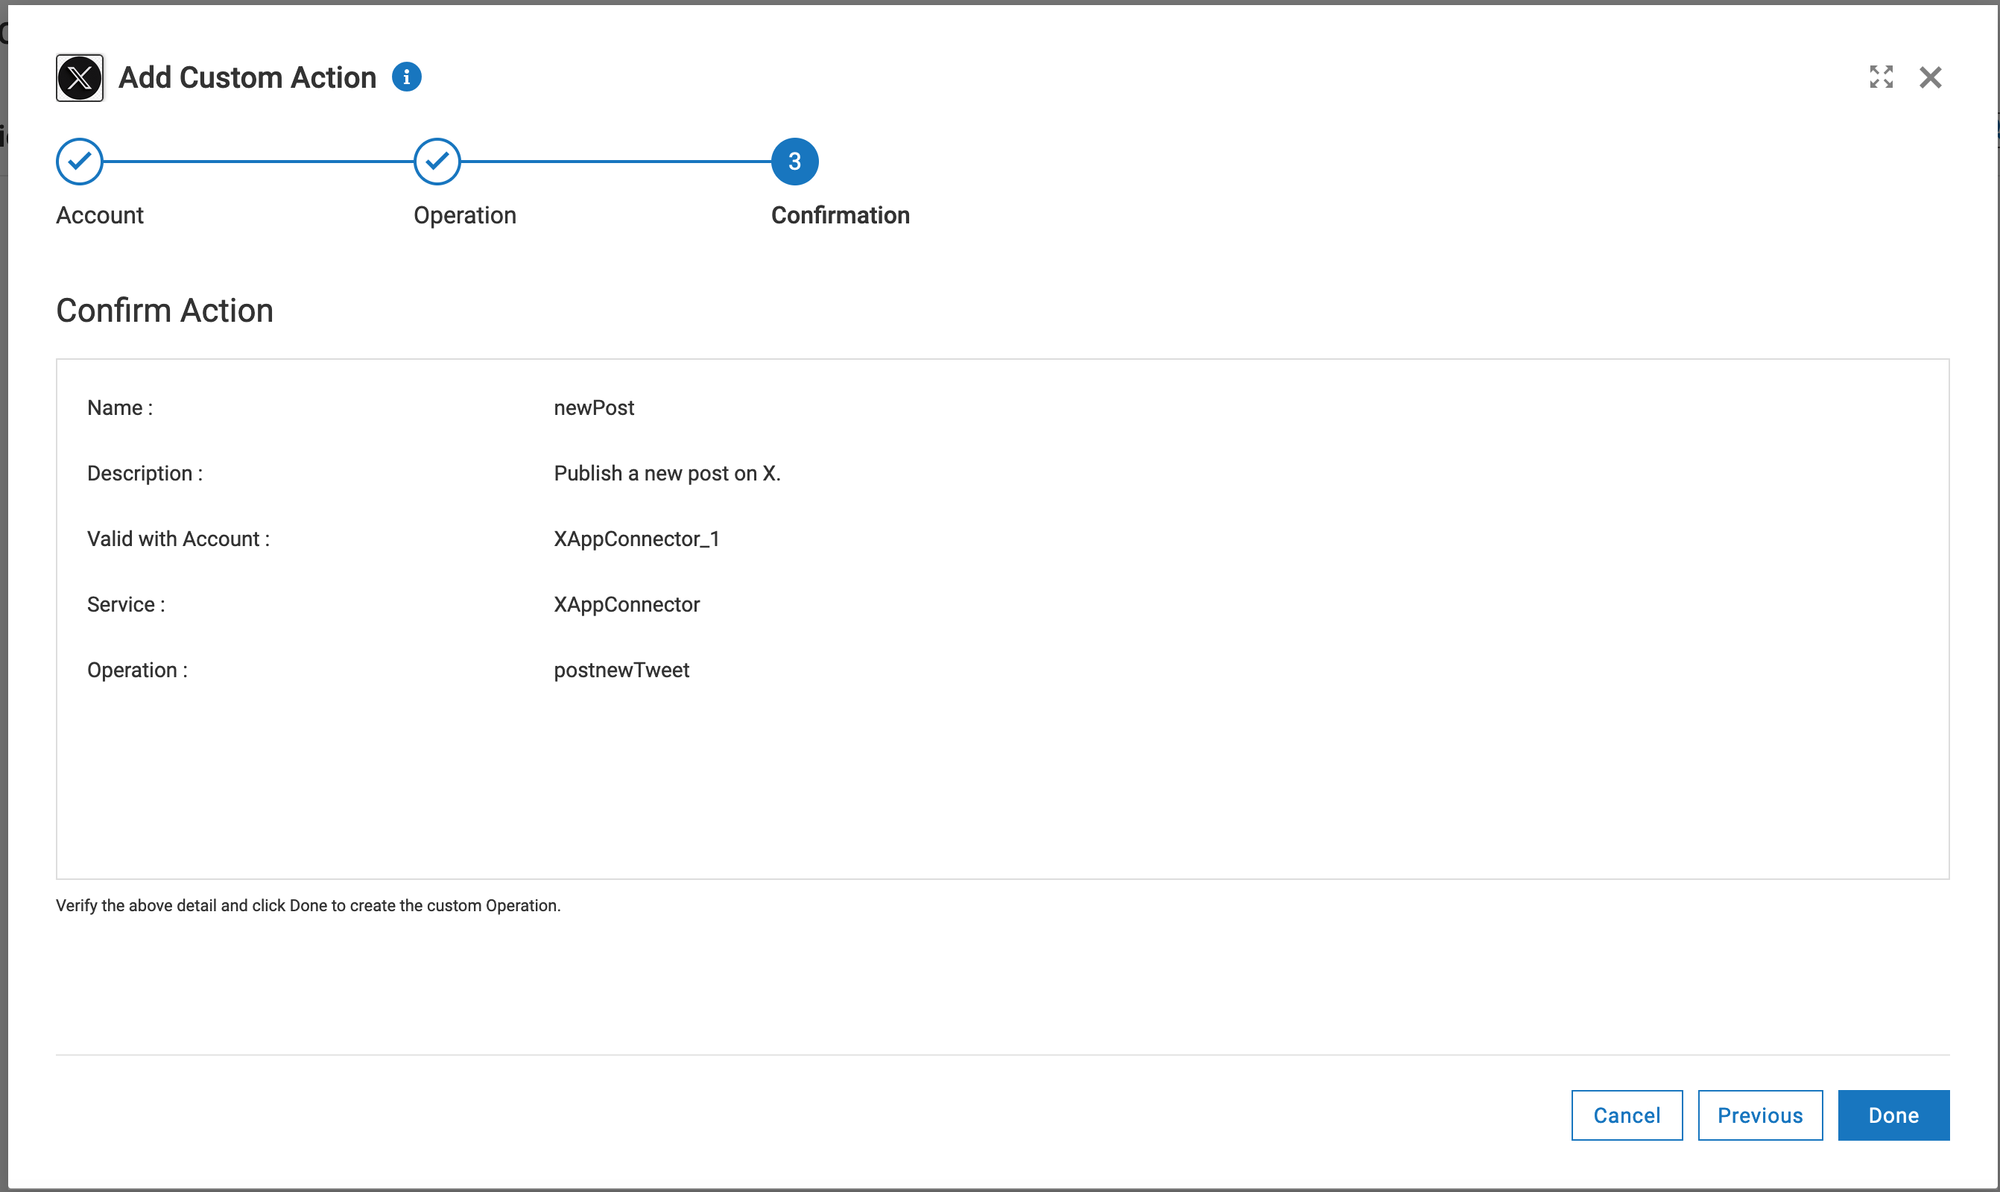
- Review your setup and save the configuration with the "Done" button.
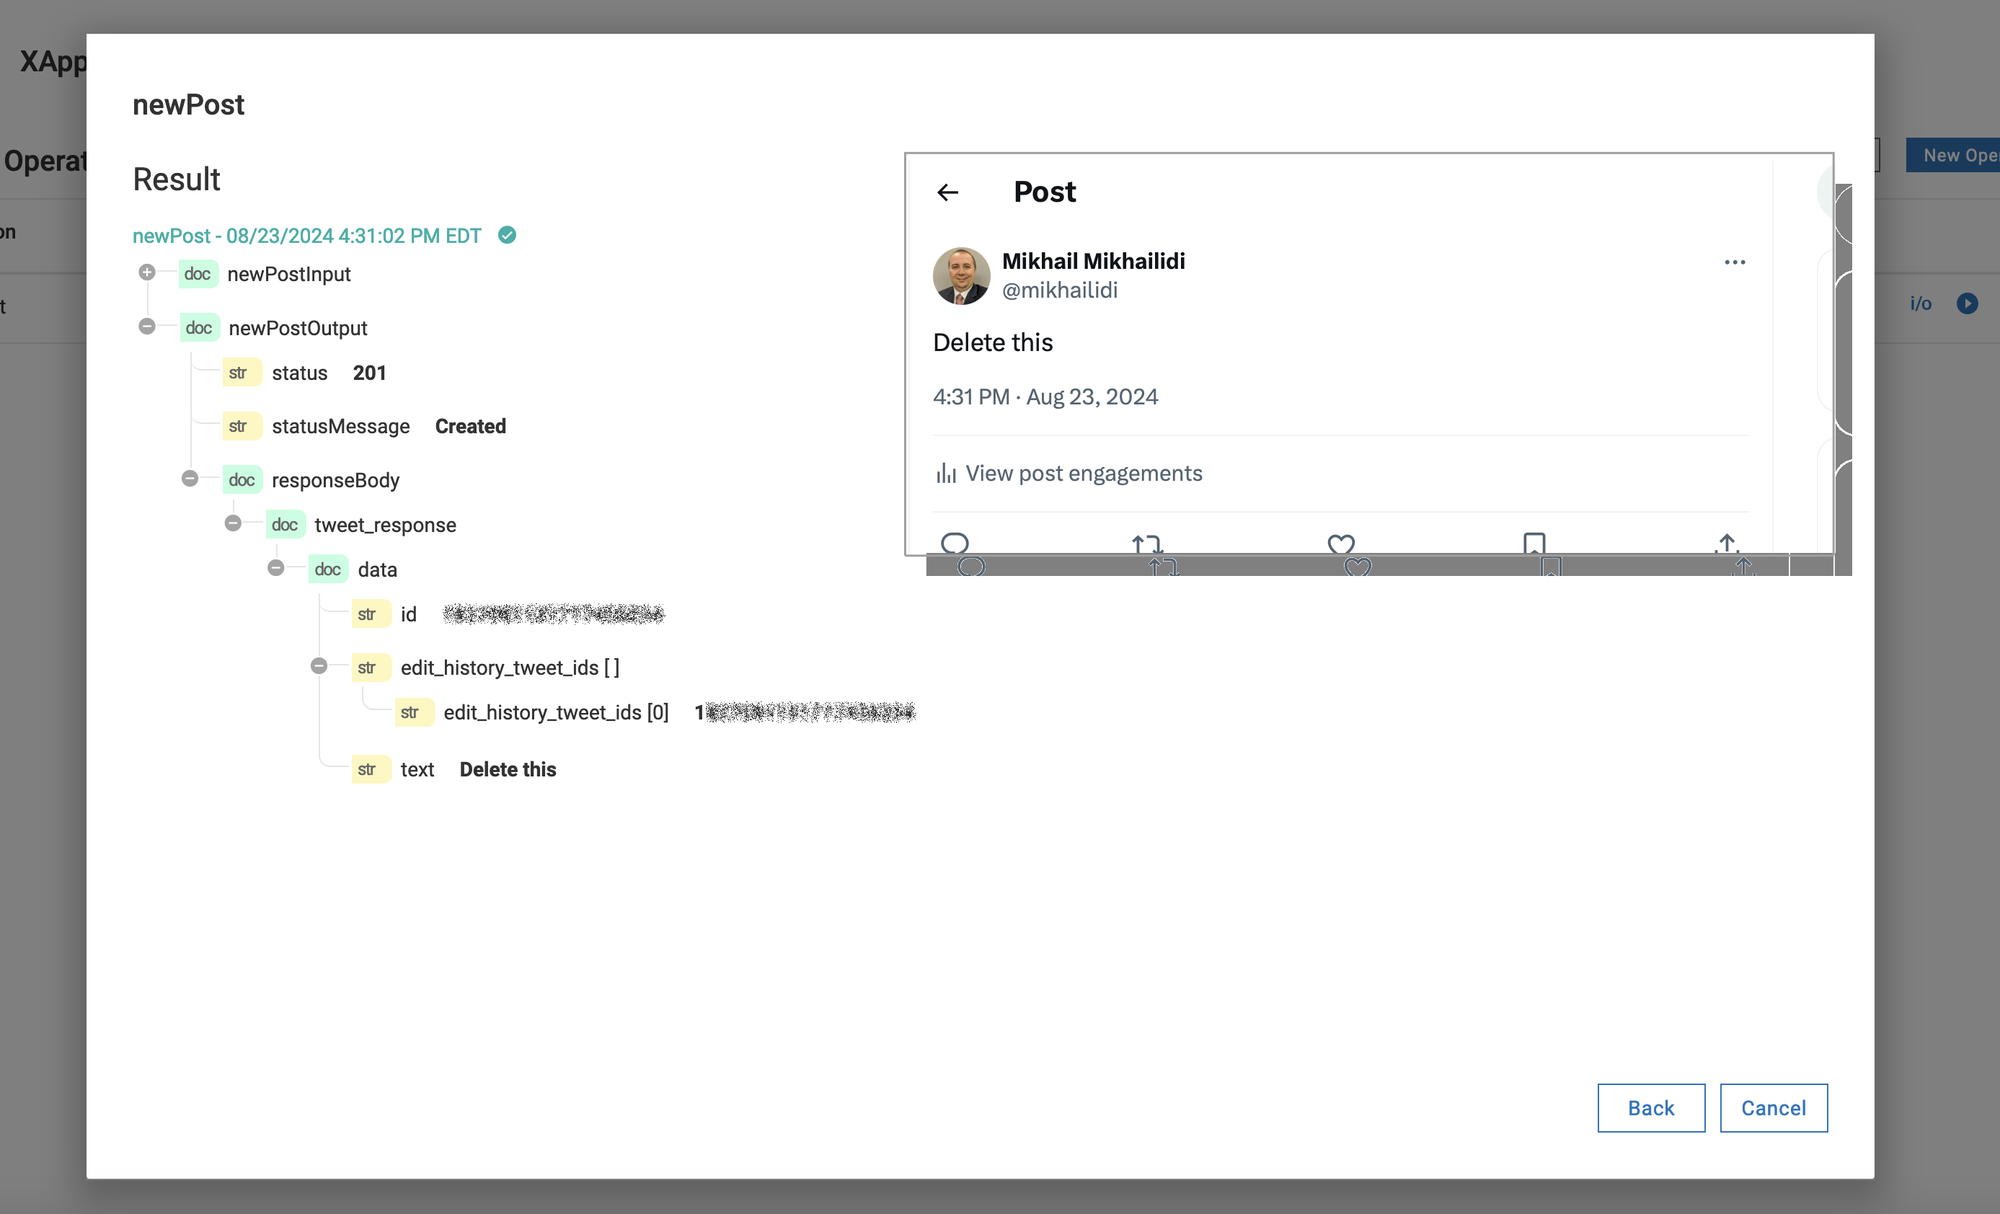
Finally, we have a chance to test your new connector. click on the ▶️ next to the newPost operation. In the popup dialog, select an account and enter the text you want to share.
When you hit run, your text will be published under your name.
Now you know how to configure custom connectors for REST interfaces. The platform offers multiple authentication options, and I'd love to hear back if you could post a message on X with the OAuth 2.0 authentication.
Previous publications: