Webmethods.io meets ChatGPT
Creating the integration, I think we should make a stop for deep diving into the connector configuration to illustrate how traditional information systems meet large language models (LLM).


Creating the integration, I think we should make a stop for deep diving into the connector configuration to illustrate how traditional information systems meet large language models (LLM).
For several years, my social network announcements were simple, dull cookie-cutter texts with the post URL, recently surrounded by extracted metadata. It would be nice to have different, human-sounding texts. And nothing as far from human as large language models could do my bid.
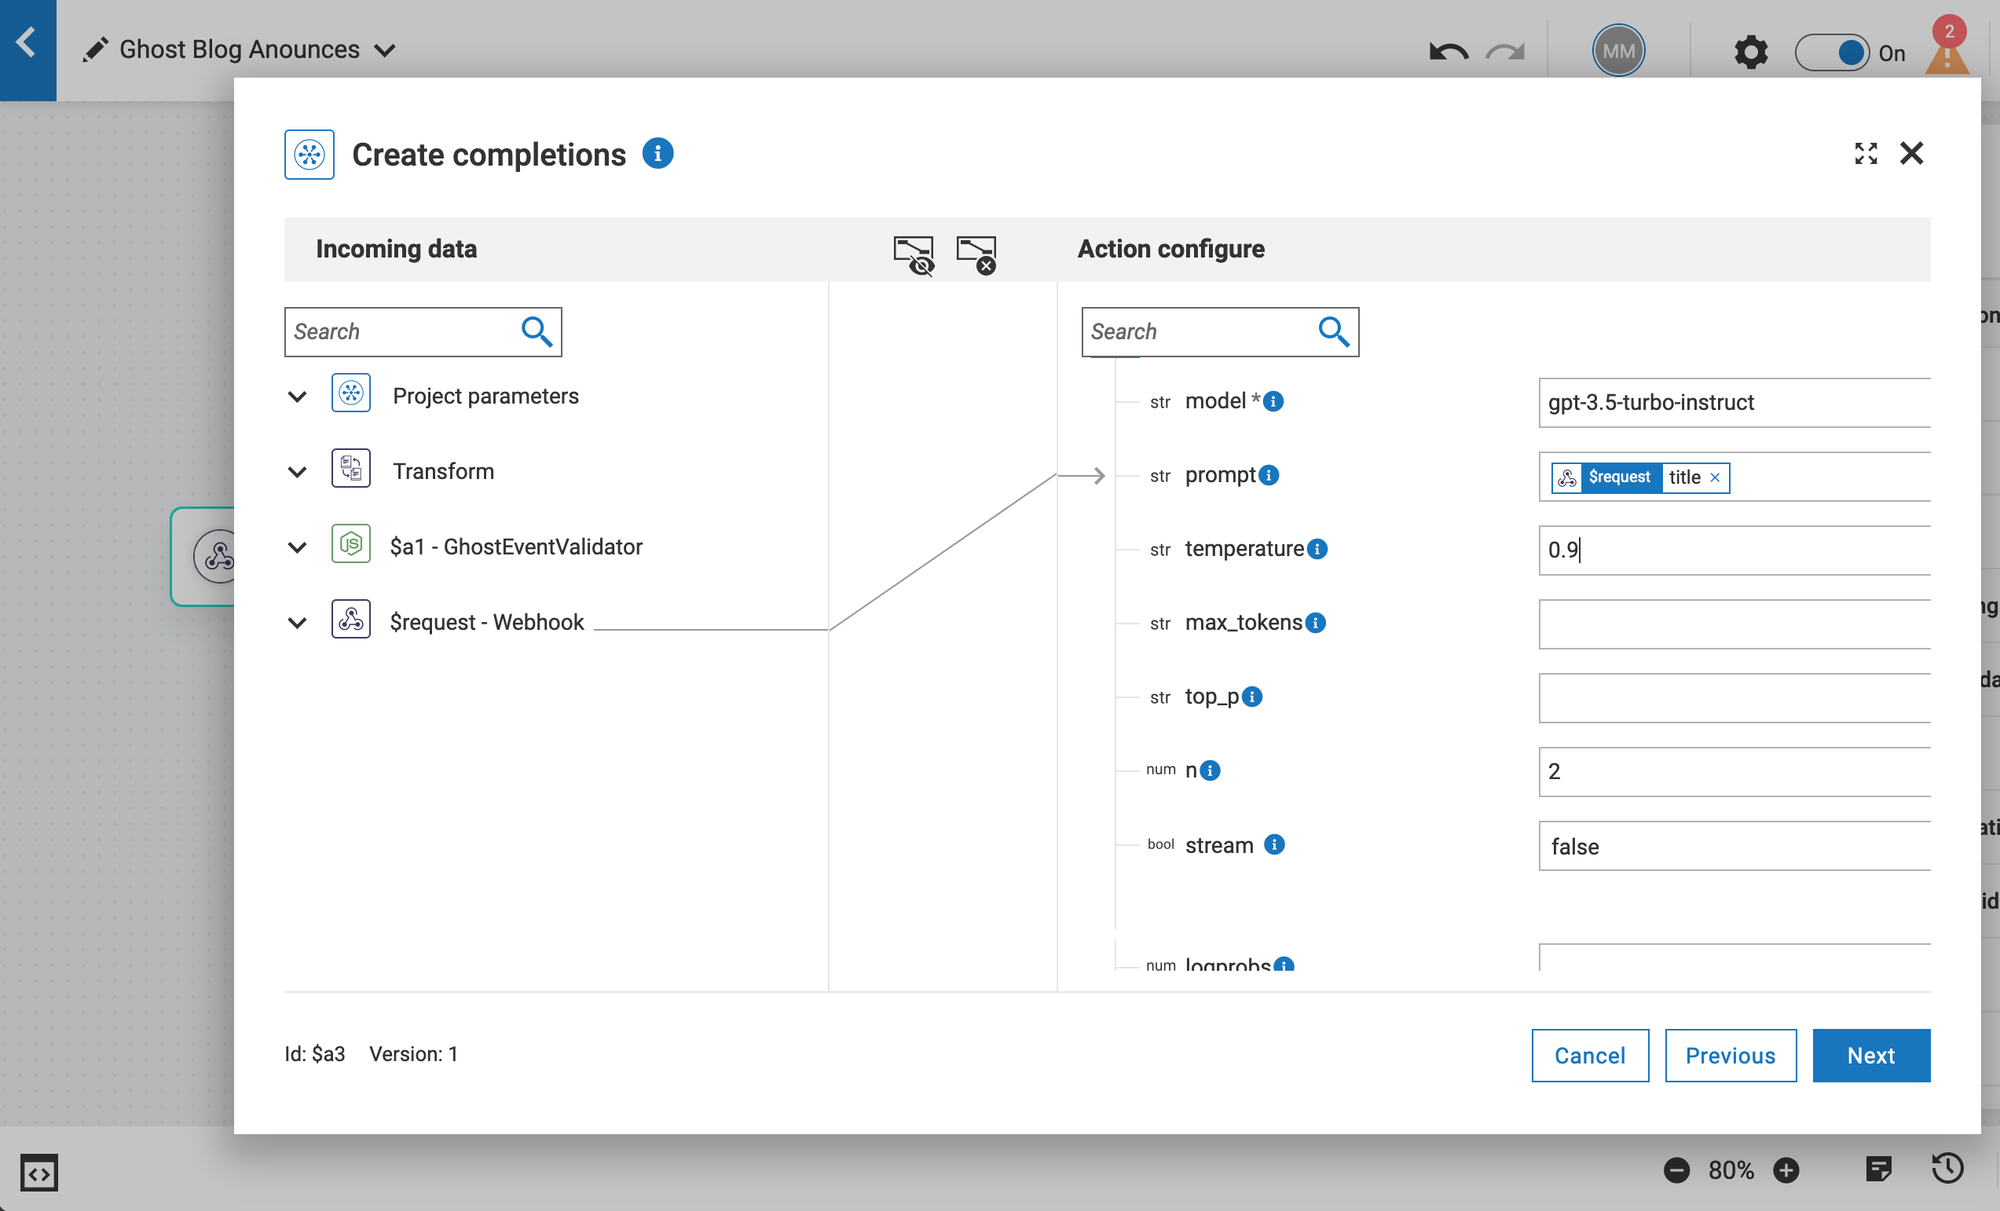
Let's look at the WebMethods.io ChatGPT connector configuration. You may notice that the only required field is the "model." I use a few more parameters to control the resulting message. The parameters with the custom values are:
- model — You can find the list of all current models on the OpenAI current model page. Unfortunately, SoftwareAG released the Webmethods.io connector in 2023. And today, it supports only one current model - gpt-3.5-turbo-instruct.
- Prompt — Critical parameter since the content of the prompt will define what GPT-3.5 would produce. In the screenshot below, it's just a title that does not give much of the result. We will talk later about how to build an effective prompt.
- temperature — This parameter controls the "creativity" of the result. As a high temperature drives human brains to hallucinate, a higher temperature will drive GPT further from your prompt and content. I ended up with the temperature just above the average — 1.2. A temperat re below .9 will guarantee identical, "public PR" style announcements.
- max_tokens — Defines how many tokens are allowed per API call. You may wa t to set this parameter because, in my experience, the default limit is not enough, even for a short Twitter message. My product on integration parameters is 180 tokens.
- n — The default value is empty; in that case, GPT-3.5 will generate one response. Since I send publications into two separate connectors, I want two variations of the same message, so I choose 2.
Good thing is GPT-3.5 is very price-efficient model.
We briefly discussed the meaning and approximate values for all parameters except the critical prompt. Let's retr ce my thoughts and actions to generate a reasonable LLM prompt and turn it into the connector parameter. Let's start with the definition of done:
- The generated text should mention the author's name or full name
- It should be relevant to the blog post content.
- It may contain hashtags from the post meta data
- It must contain the blogpost URL.
- It must be less than 280 characters (the X post hard limit.)
Like most LLM providers, OpenAI offers the model playground. As you can see from the screenshot, it offers controls that match our connector parameters.
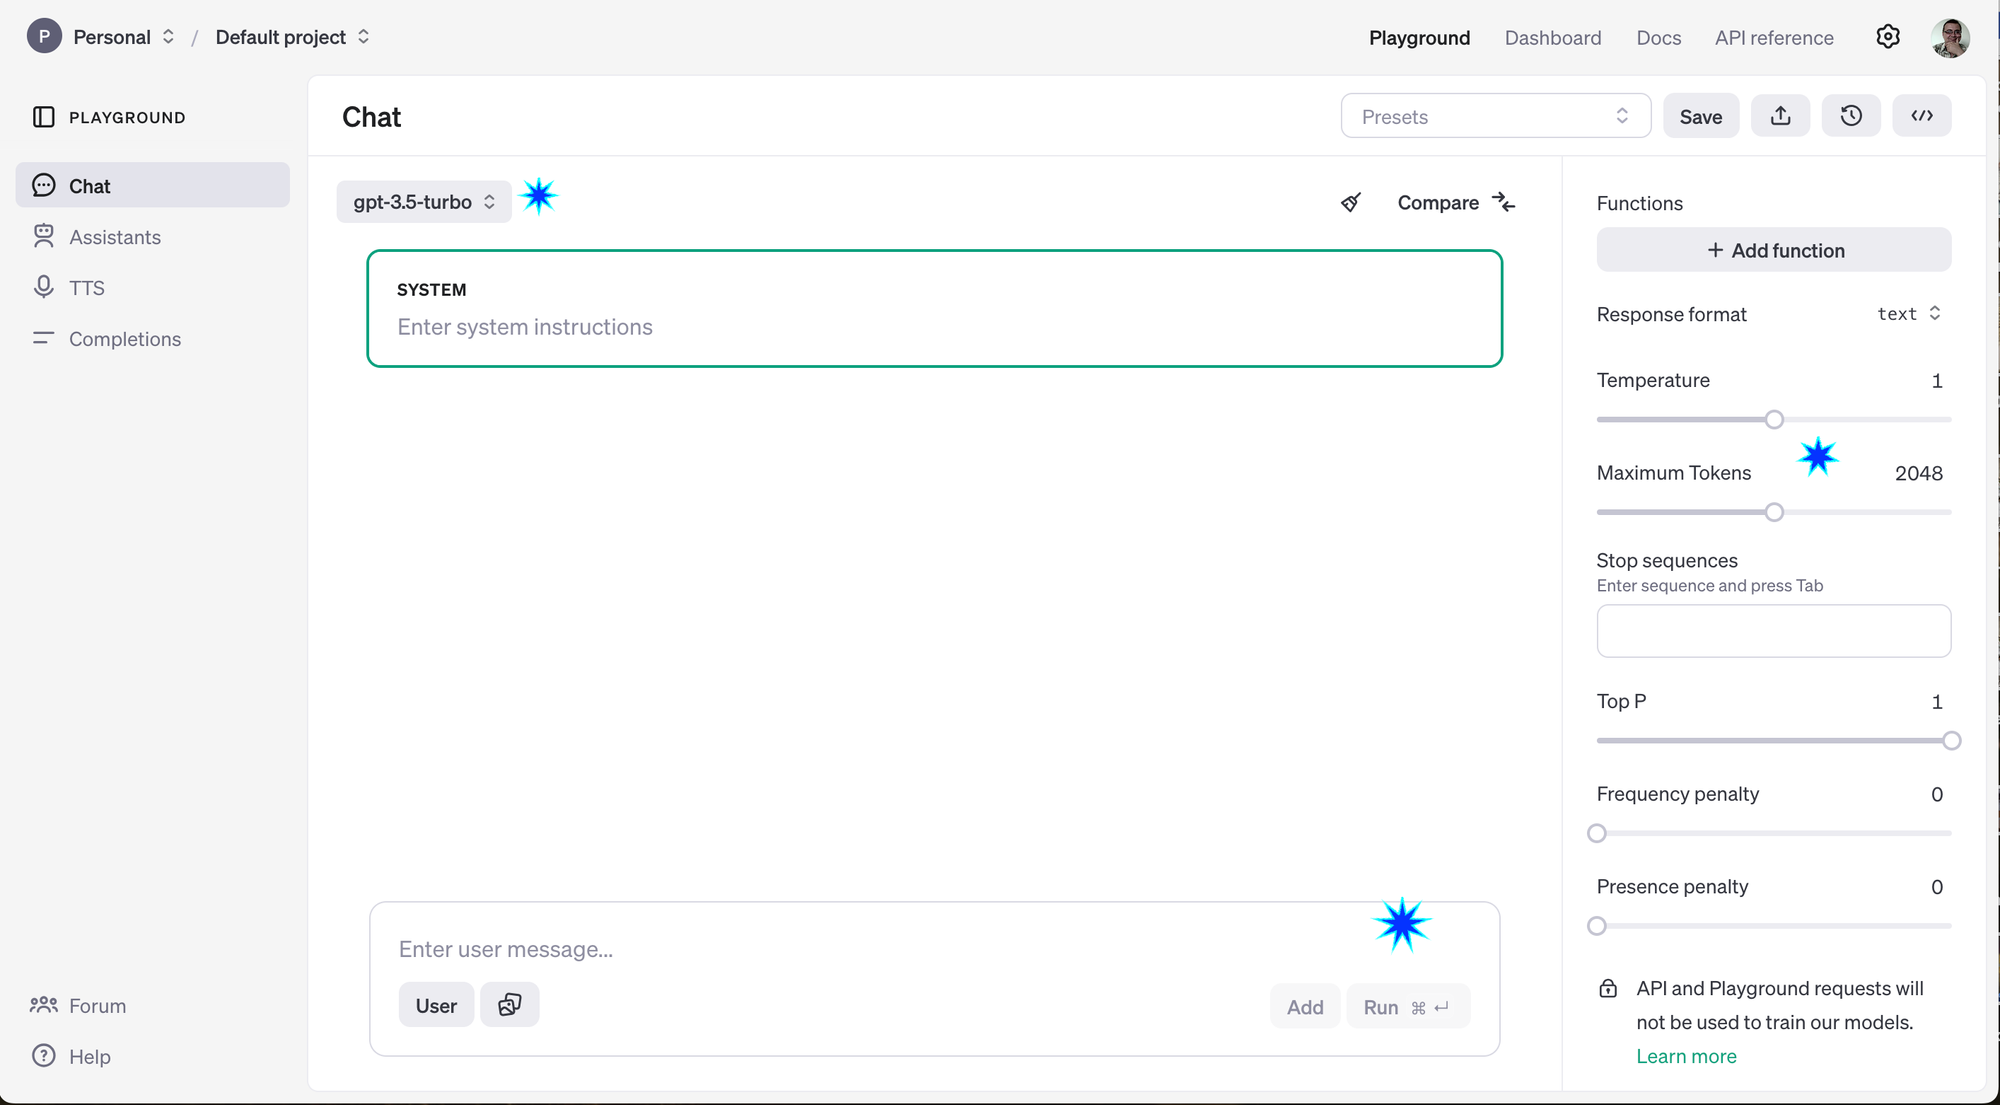
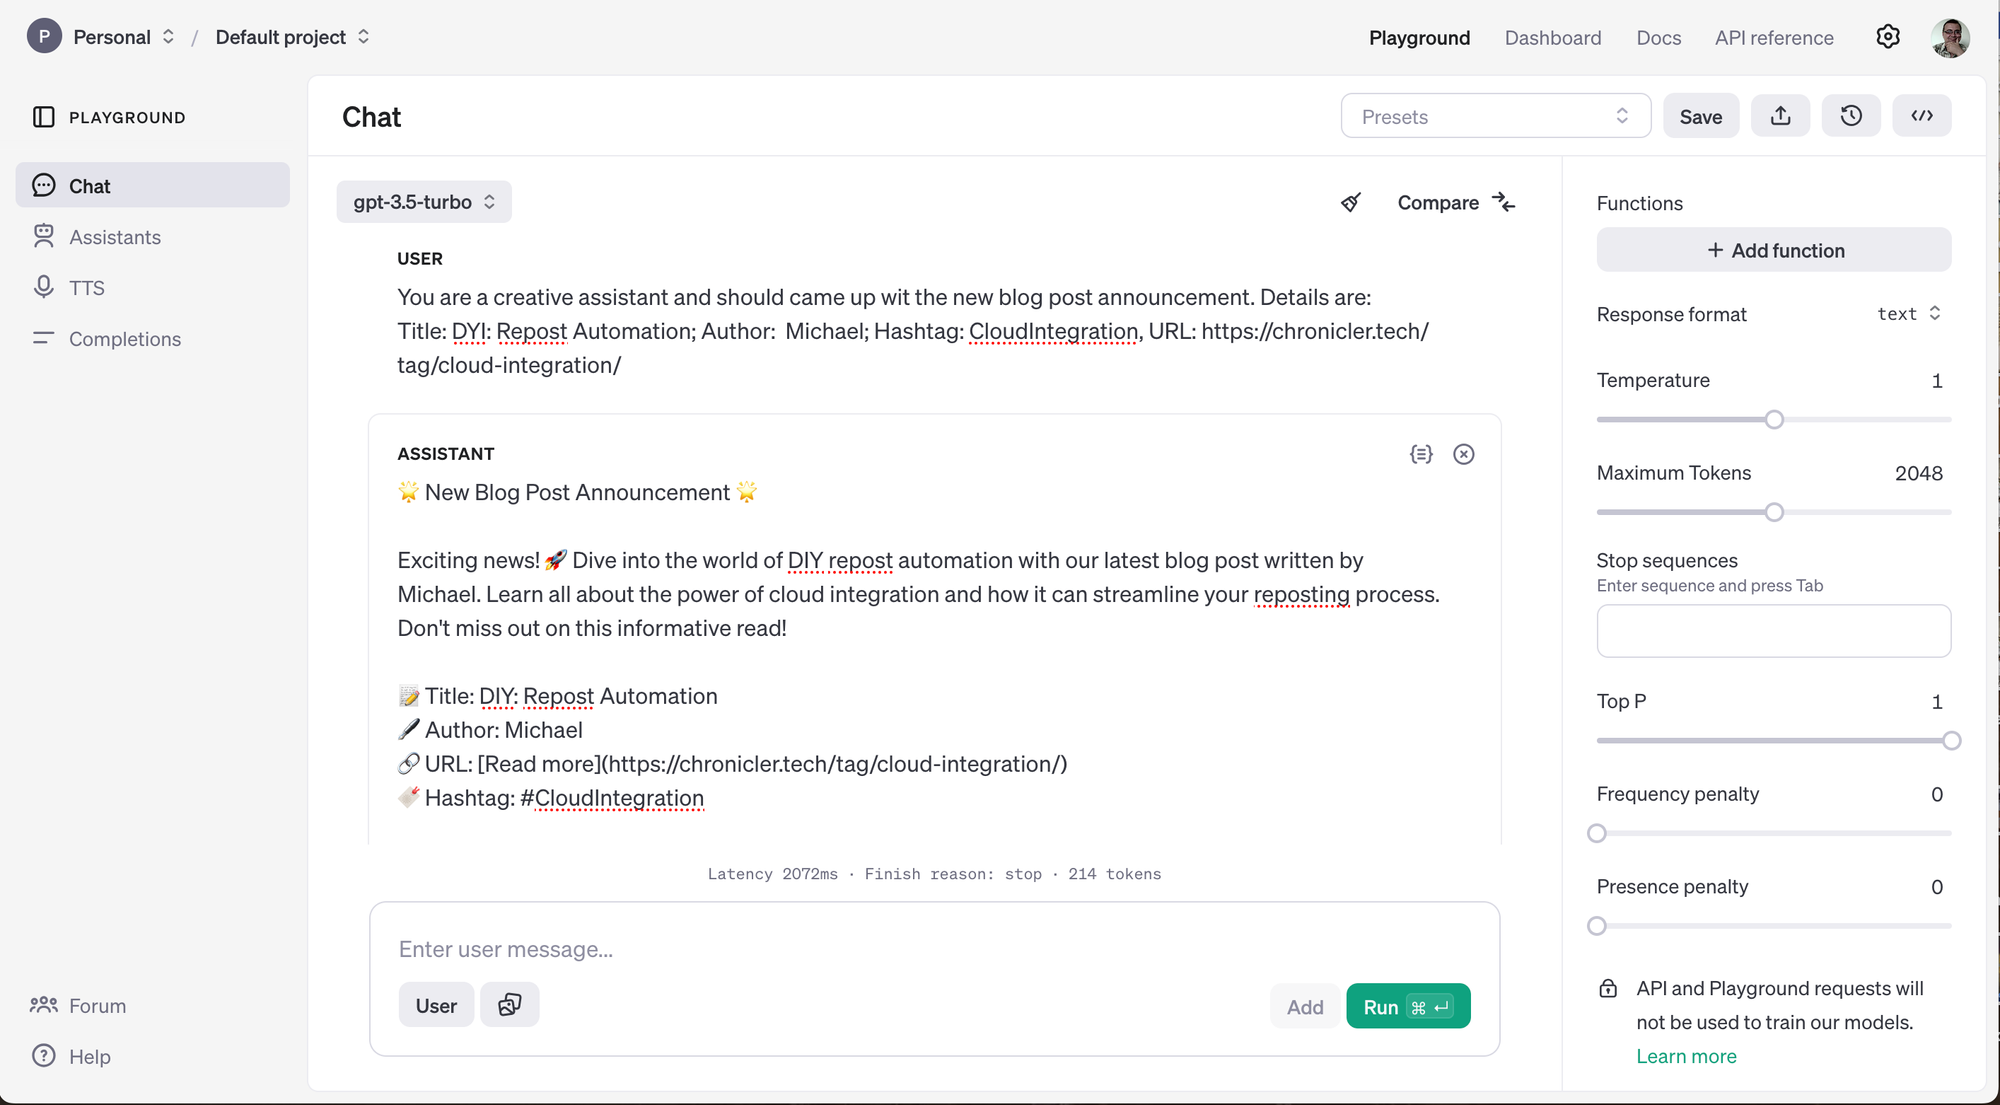
The system part of the prompt allows you to apply additional parameters and limitations outside of user interaction. We don't have system input and will not use it for prompt generation. Now, let's ask the model to generate an announcement for the first blog in this series - DYI: Repost Automation.
Let's limit the model with direct instruction and with the maximum tokens limitation.
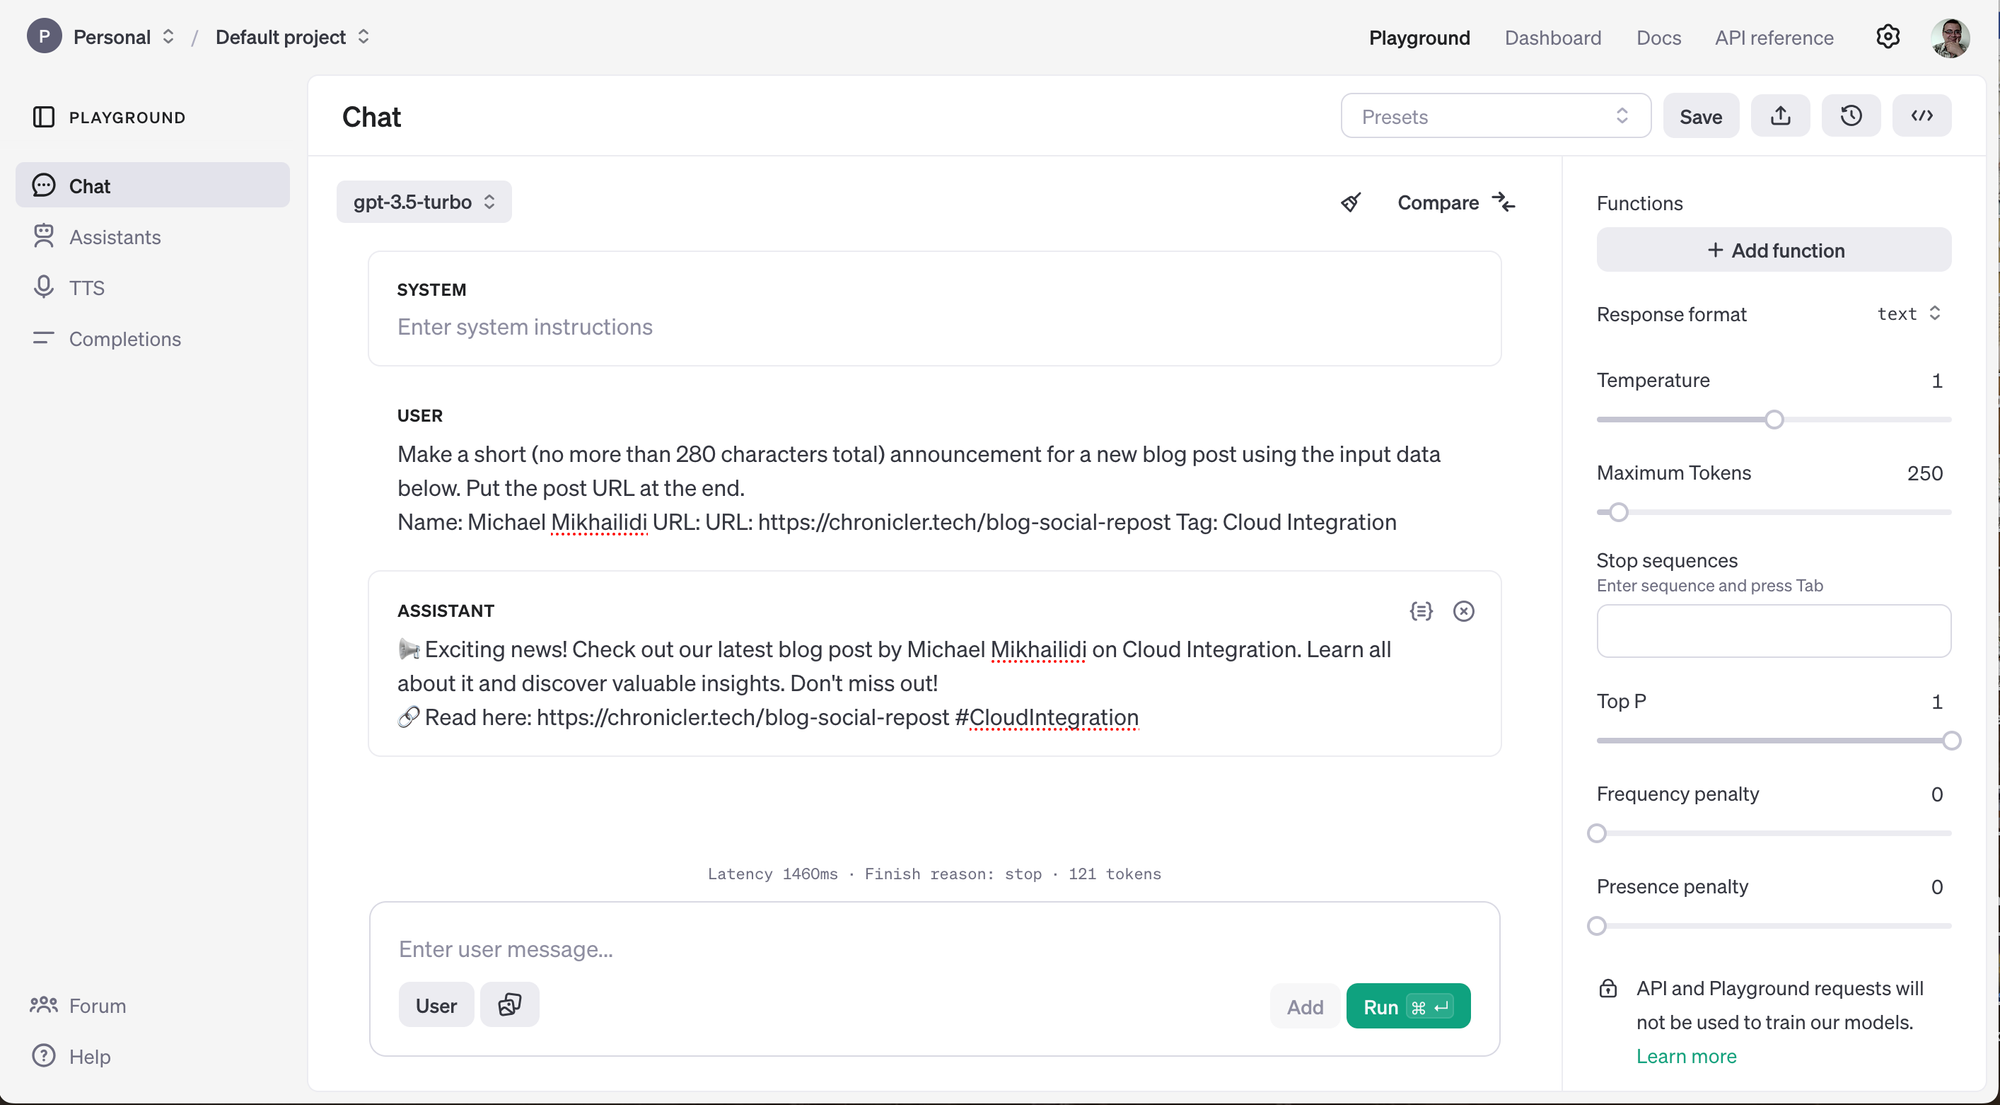
After several iterations, you will get a result that fits your goals. Let's turn it into a Prompt template for the CahtGPT connector. My prompt template looks close to the example below.
Make a short (no more than 280 characters total) announcement
For a new blog post, use the input data below.
Put the post URL at the end.
Name: ##PRIMARY_AUTHOR##  Tag: ##PRIMARY_TAG## Tags: ##ALL_TAGS##,
URL: ##POST_URL##.
If the message is longer than 280 characters, you may drop
the list of tags or the author's last name, but always keep the URL at the end.
GPT Prompt Template.
To replace template placeholders, our event has all the details except the string with the tag list. To create one, I used the Transform action for the ChatGPT connector. To generate a string with tags:
- Hover the mouse cursor over the ChatGPT connector and click the gear icon.
- Walk through the first configuration and go to the data mapping screen.
- Expand the "Transform" branch on the right side.
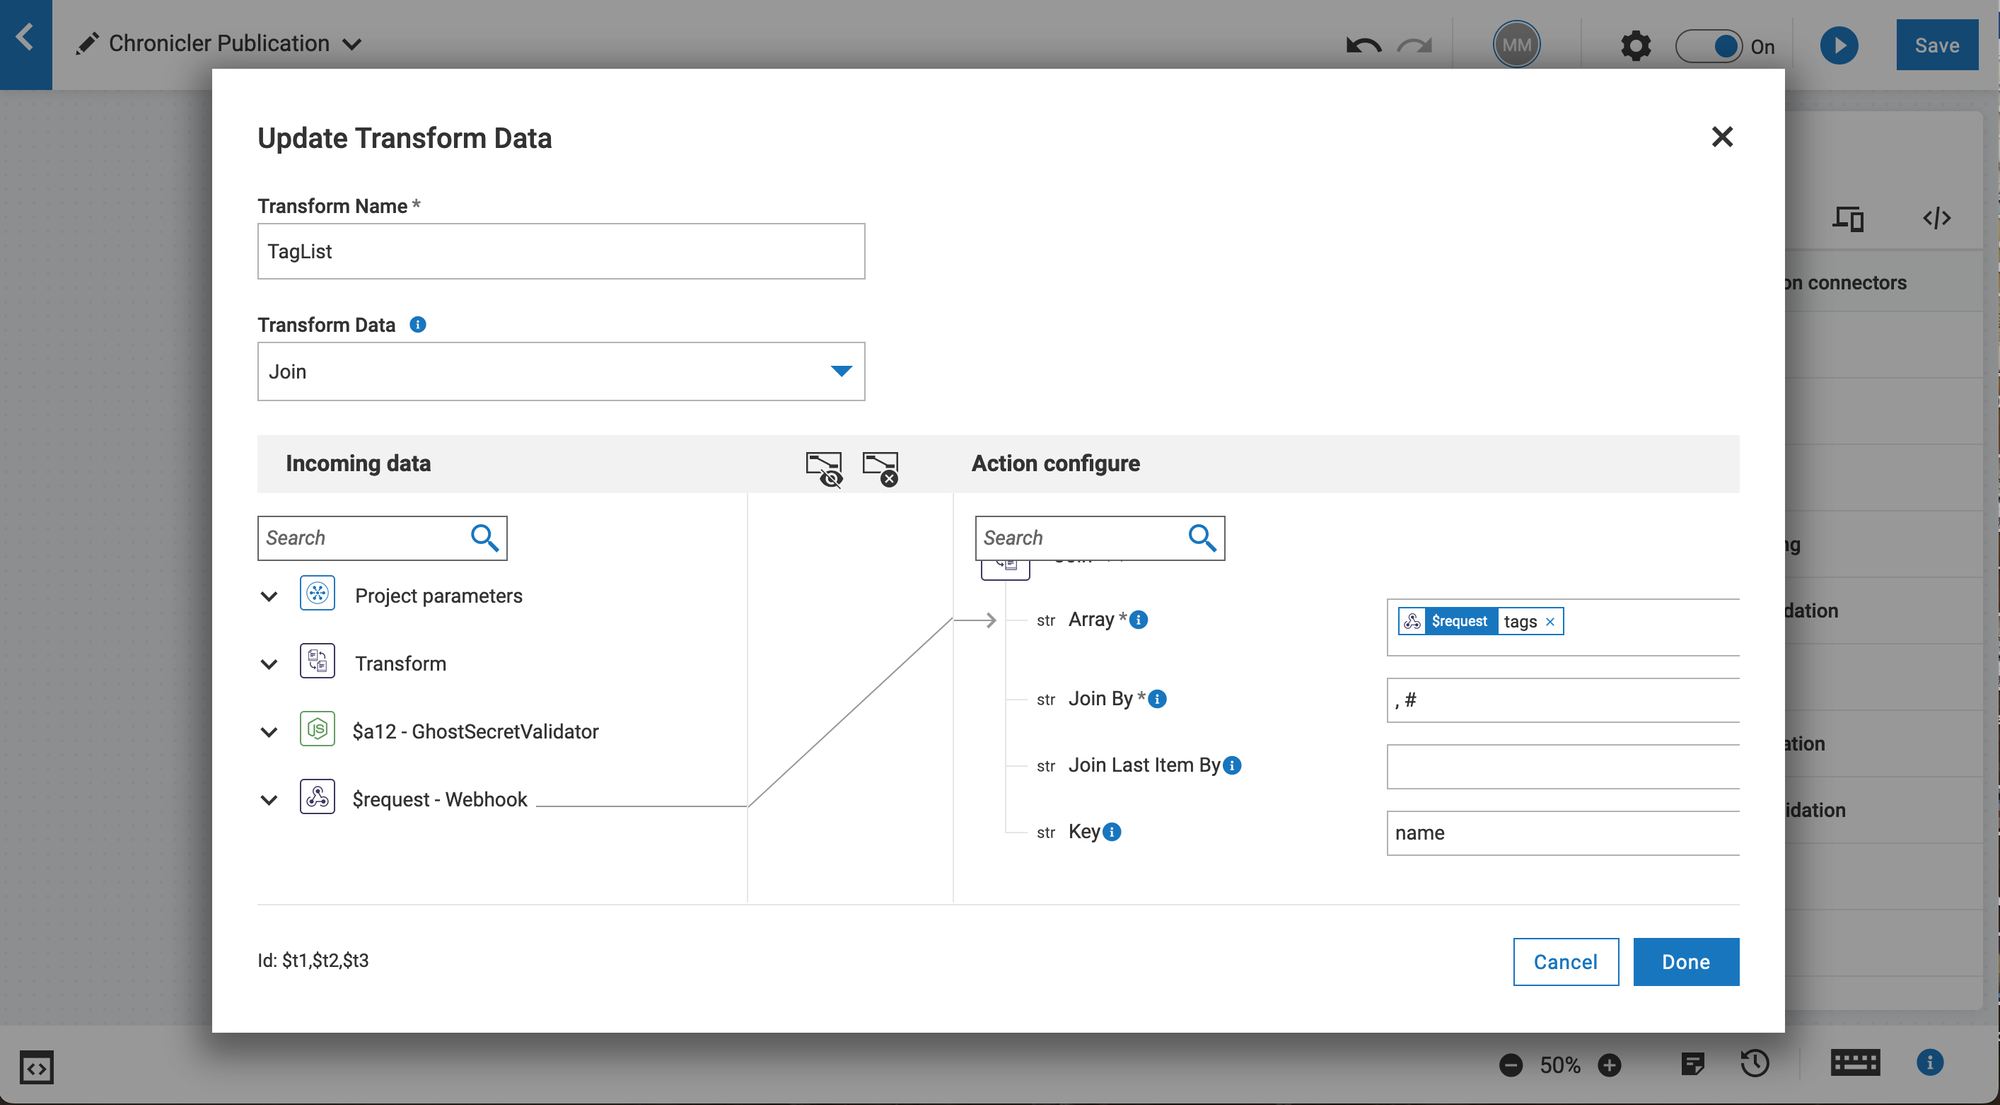
- Give the name for the transformation, i.e., TagList.
- From the available transformers, locate "Join" in the JSON section.
- Map the "tags" list to the "Array" input - this list contains tag objects assigned to the post.
- Set values:
- Set ",#" characters as a value for the "Join By" field. This sequence will be used as a tag separator.
- Use "name" for "Key" input. Transformer fetches this attribute for the resulting string.
The Transform Data configuration should look similar to the screenshot below.
Click "Done" to complete the transformer configuration. We now have all the strings needed to complete the ChatGPT dynamic prompt.
- Copy your prompt with placeholders and paste it to the prompt field as text.
- Expand the "$request - Webhook" data structure to locate the following metadata entries.
- primary_author.name - The name of the blog post author.
- primary_tag.name - The main hashtag for the publication. Ghost grabs the first tag from the post tag list and uses it as a primary one.
- url - The blog post permalink.
- TagList.value - the string with the joined list of all post tags.
The resulting prompt with the WebMethods.io integration variables looks similar to my example below:
Make a short (no more than 280 characters total) announcement
For a new blog post, use the input data below.
Put the post URL at the end.
Name: {{$request.body.post.current.primary_author.name}}  Tag: #{{$request.body.post.current.primary_tag.name}},
Tags: #{{$transform.t1.value}},  URL: {{$request.body.post.current.url}}.
If the message is longer than 280 characters, you may drop
the list of tags or the author's last name, but always keep the URL at the end.
Templated prompt with substitutions.
- Make sure that all your variables are set and input data are mapped.
- Click next and examine the input JSON data.
- Click the "Test" button to validate the connector configuration and prompt performance.
- Click "Done" to complete the connector setup.
Since we can only expect but not predict the desired outcome, you may need more than one iteration to adjust model parameters and prompt wordage. However, after a few iterations, you will usually have acceptable output.
In case you missed previous publications: