WebMethods.io: Custom Transformers
In previous integration posts, I briefly touched on the powerful mechanism of the Webmethods.io Transformers. Let's explore the data manipulation tools using a real-life example.


In previous integration posts, I briefly touched on the powerful mechanism of the Webmethods.io Transformers. Let's explore the data manipulation tools using a real-life example.
Transform allows you to customize the workflow output or data you send to the subsequent actions. Webmetohds.io Integration will enable you to define one or more Transforms for a connector or a link. Workflow elements with Transform definitions display a small blue icon, as in the diagram below.
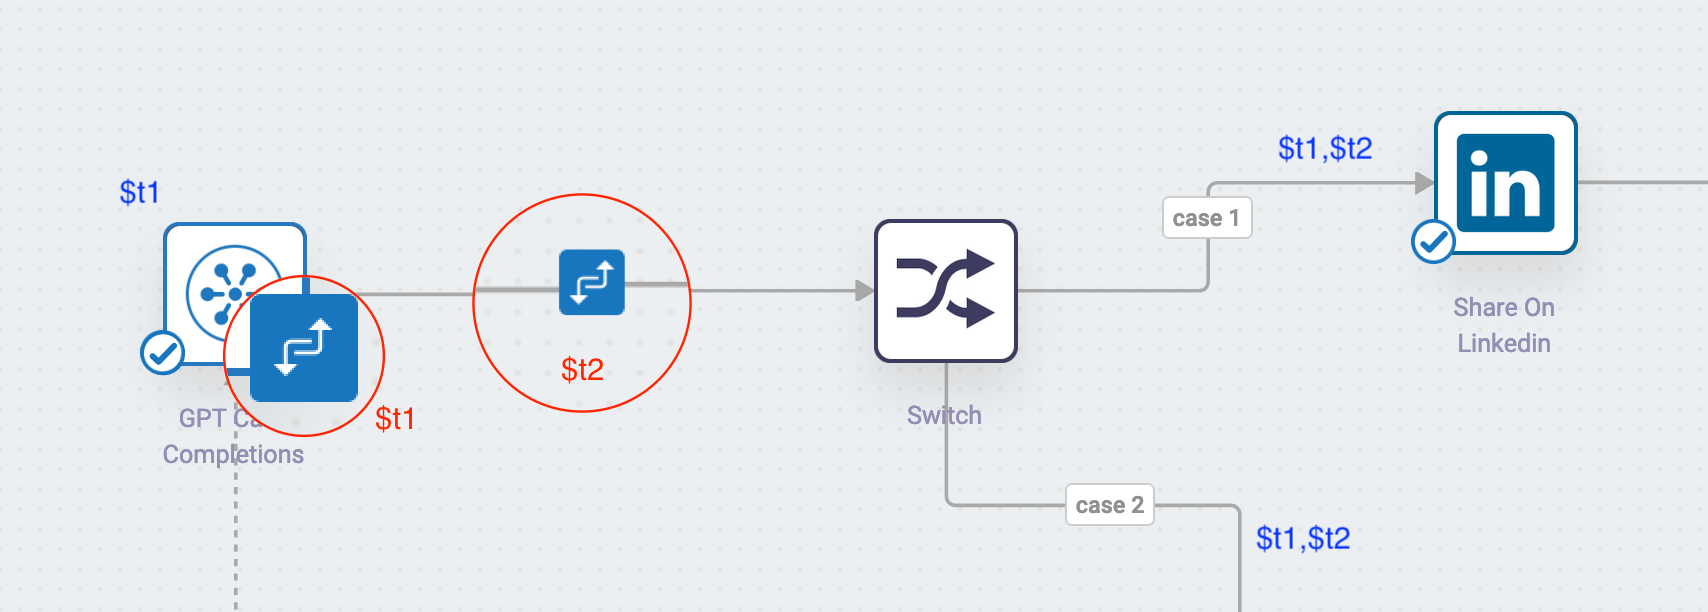
As you may see, the GPT Chat connector and the link between GPT Chat and Switch have defined connectors - red $t1 and $t2 labels on the diagram below.
The GPT Could use Transform $t1 output (blue label) for the OpenAI API interactions, but $t2 output is unavailable because the declaration is further down the flow. However, all components after the Swith could benefit from both Transform outputs.
The Webmethods.io Integration offers a long list of predefined transformations. The list below contains only categories of Transforms:
- Array - List manipulation operation
- Custom - Node.js custom code.
- Date - Date/Time manipulations
- JSON - JSON - String transformations
- Math - Mathematical functions
- Object - Object operations
- String - String type functions
- Util - Transforms with no categories.
The document provides a detailed outline of general Transform usage. I'll focus on using the Node.js transformation and be brief on creating and mapping a new Transform.
I should rely on the existing toolset by adding a few steps to use standard operations to remove spaces and quotes. But I'm all for efficiency and custom transformation with a few "spaghetti" code lines that solve my formatting problem with a single operation.
The steps below use the integration workflow I designed for this blog. If you haven't seen it before, check my previous posts on this topic for more context on operations below.
- To open the configuration dialog, click on the link to the right of the GPT Chat connector and select the ⛭ icon.
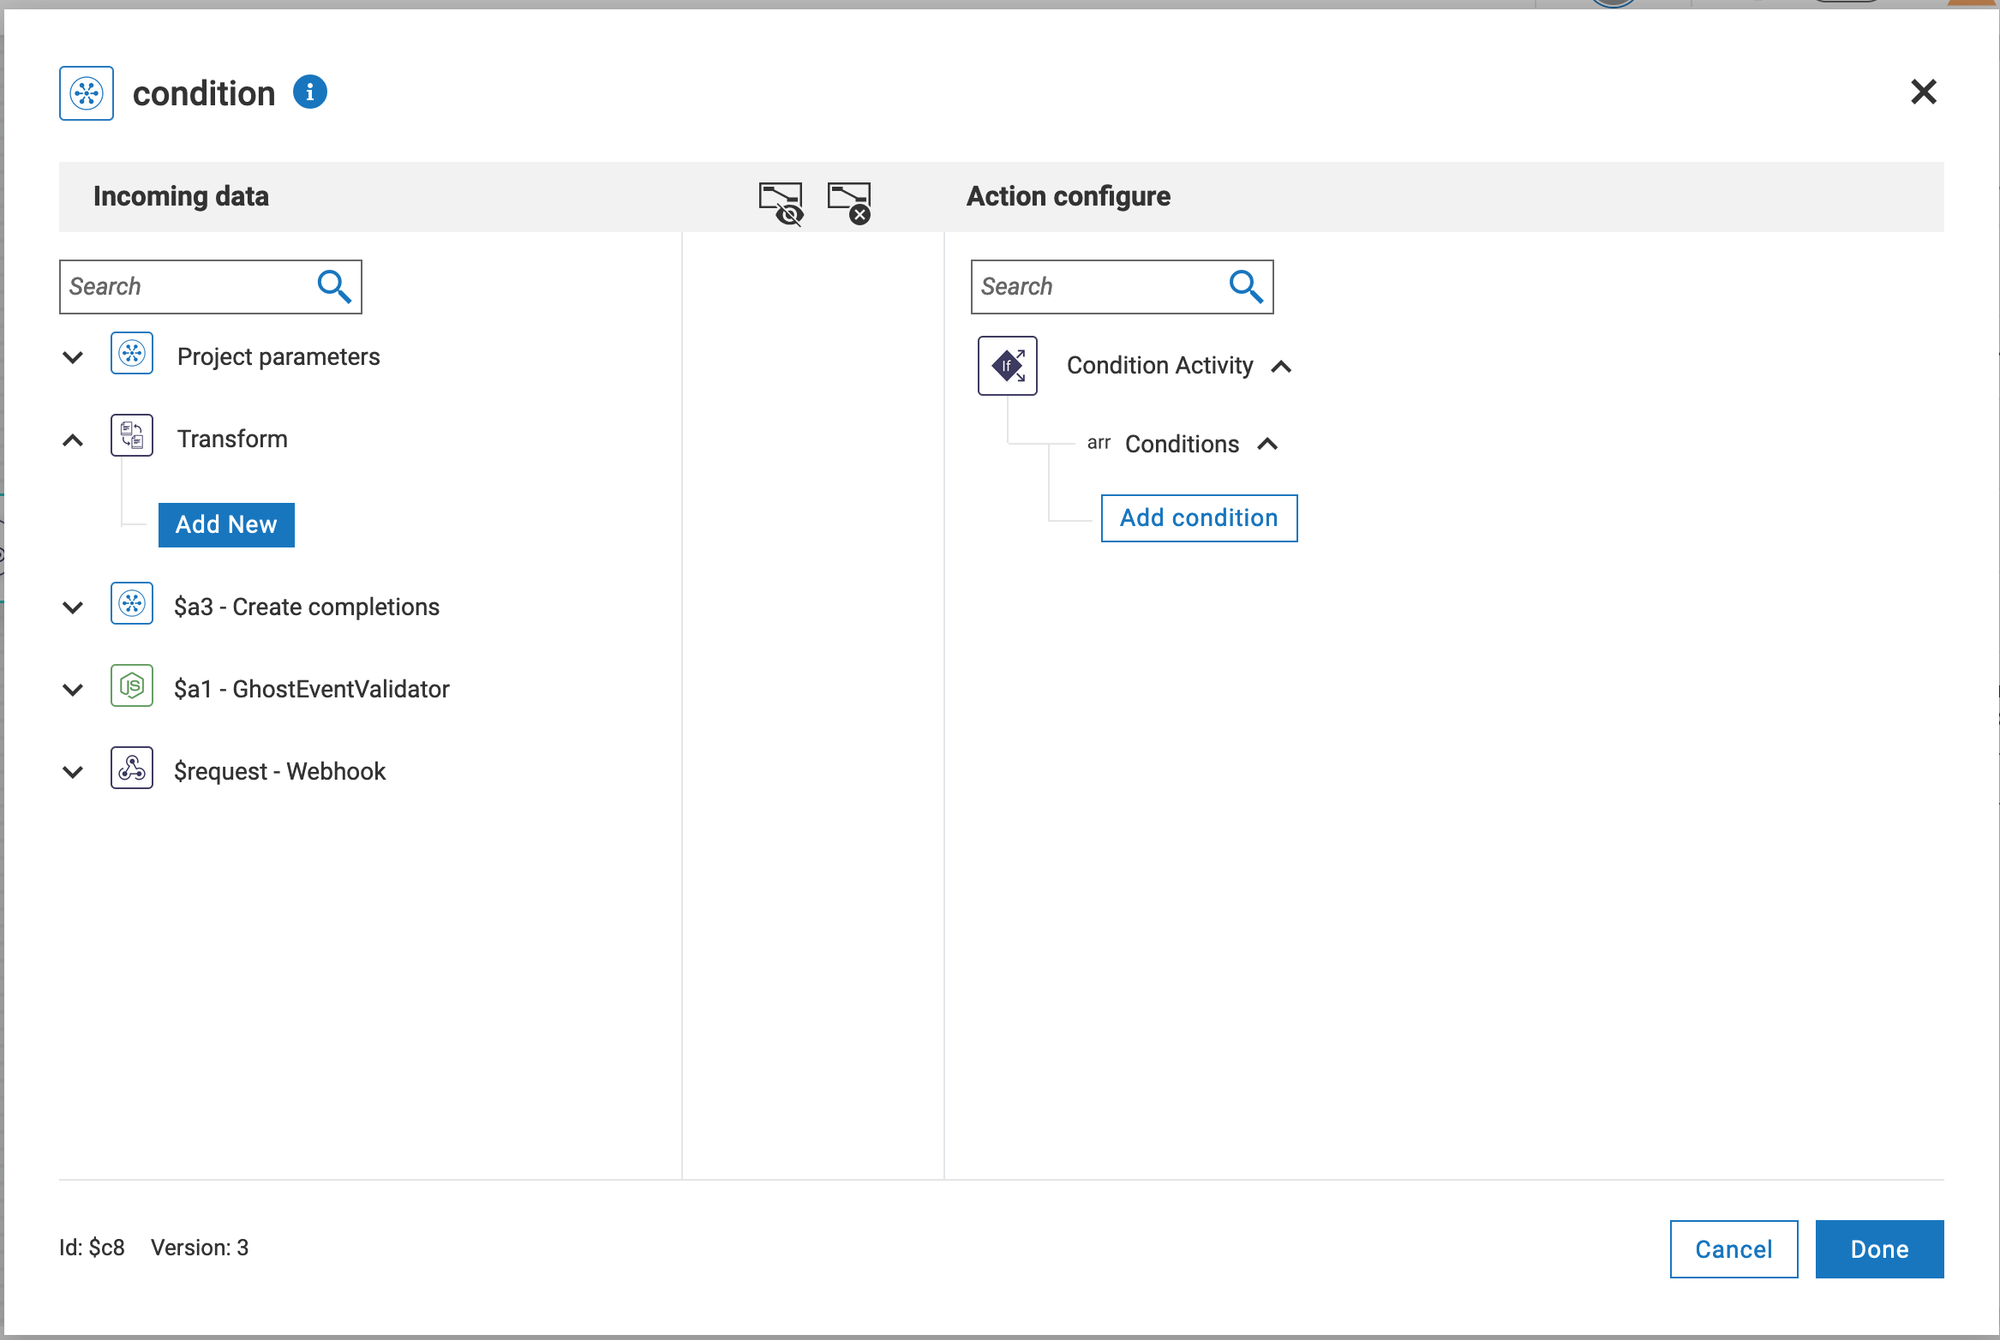
- Expand the Transform branch on the left side and click "Add New" to start the new Transform definition wizard.
- Set the name for the new transformation (in my case, "TrimGPTCompletion") and select the type as "Custom/Node.js."

- Delete str1 and str2 declarations on lines 6- 7 and leave the cursor on the blank space in the code editor area.
- Expand your GPT Chat response. On my screenshots, it has the name "$a3 - Create completions," then drill down to the "choices" list.
- Click on the list name, and the corresponding variable reference will appear in your code.
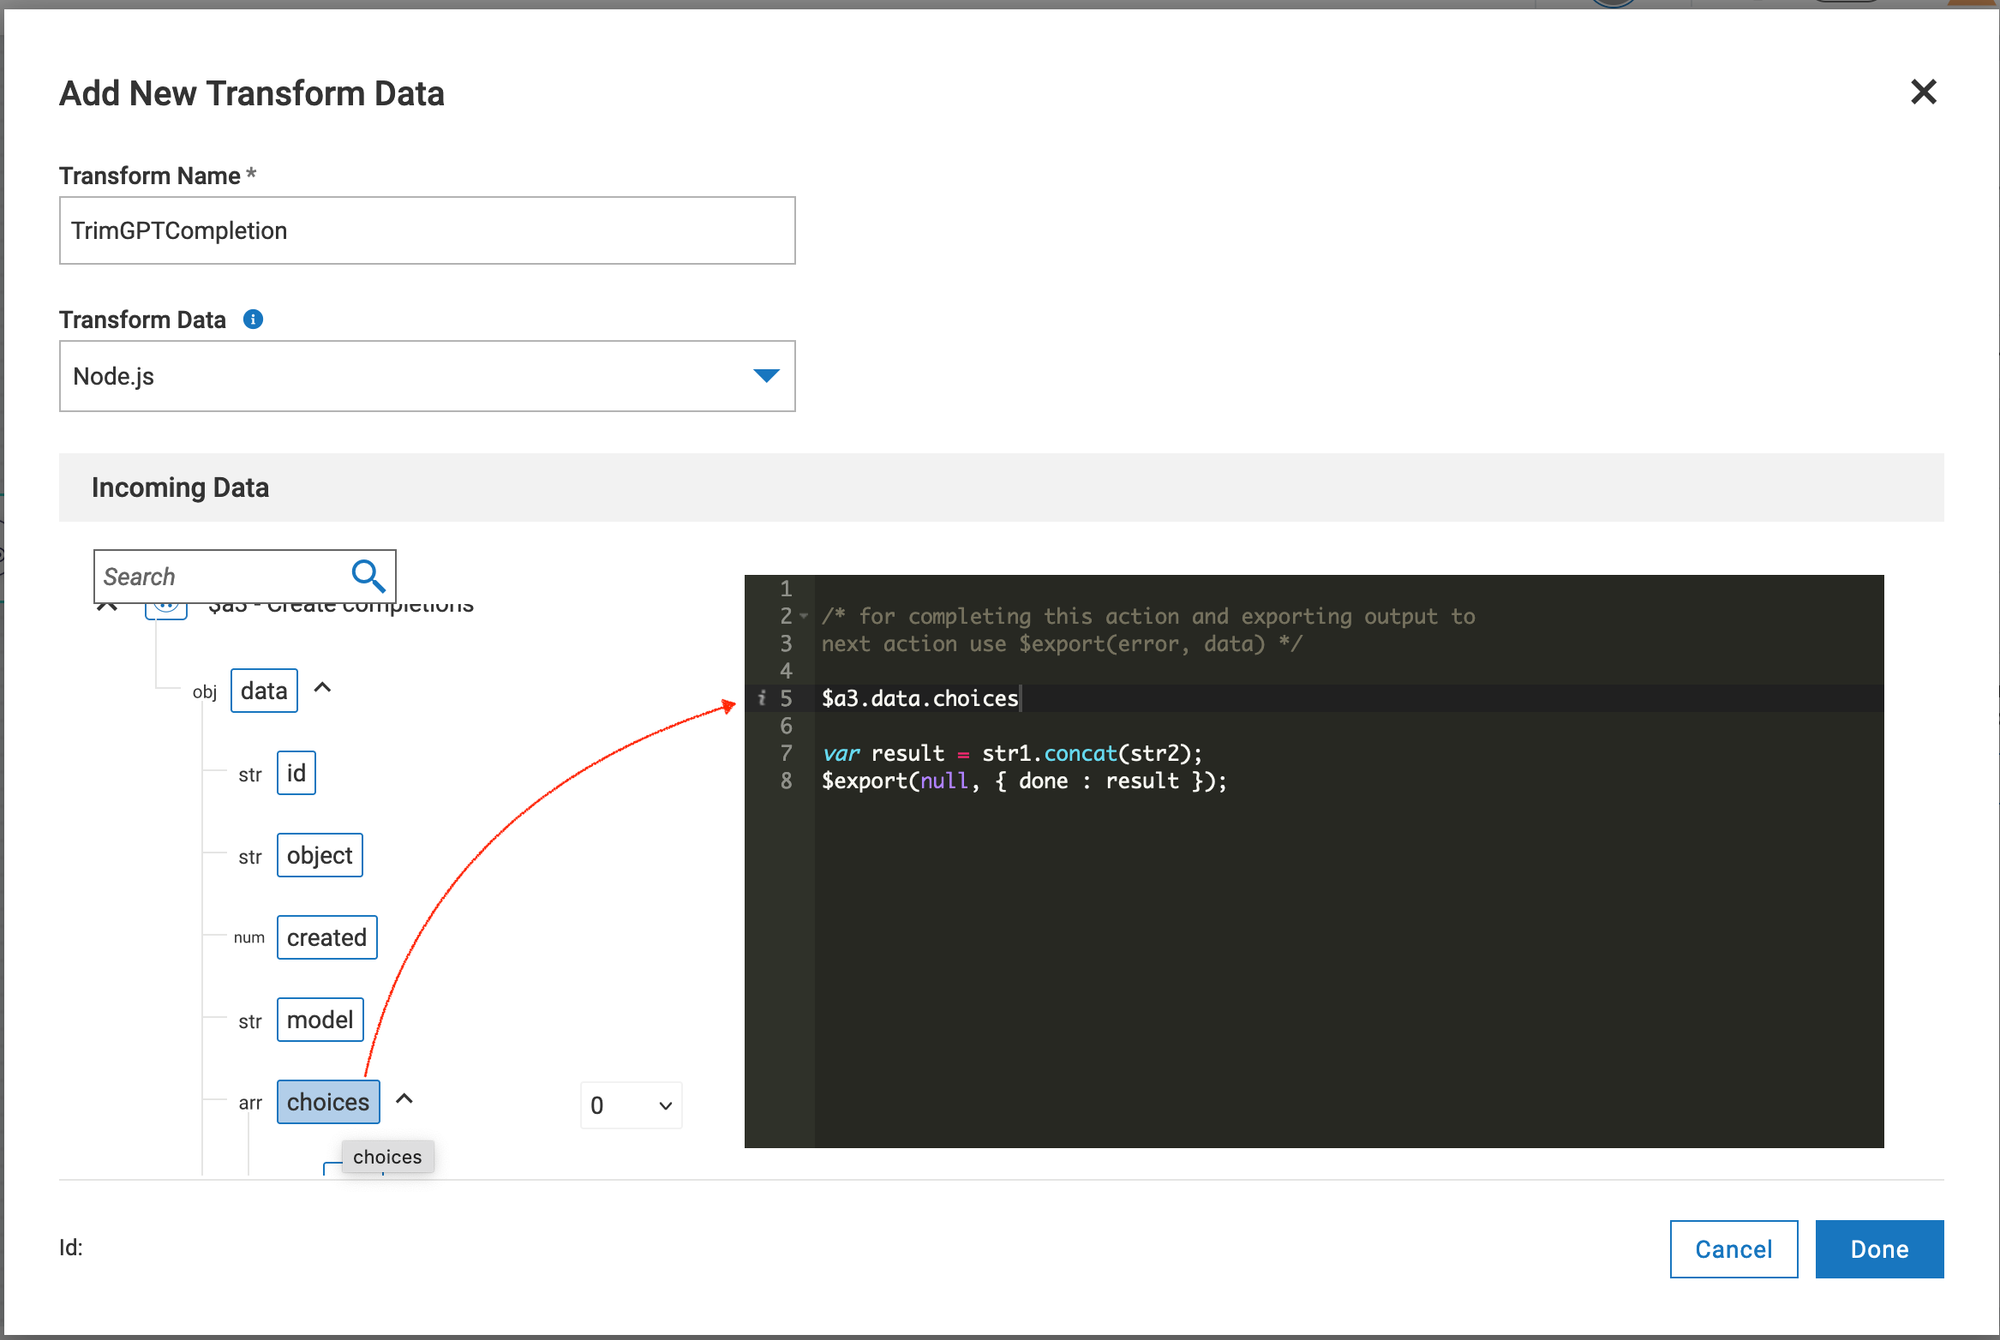
- Now that we know how to refer to the workflow data, let's use the code below. The code loops through the list of choices and returns a list of trimmed strings without extra quotes.
/* for completing this action and exporting output to
next action use $export(error, data) */


var trimmed = [];

$a3.data.choices.forEach(reply=>{
  trimmed.push(reply.text.trim().replace(/^"/g,'') \
               .replace(/"$/g,'').trim());
});

$export(null, { done : trimmed });
- Ensure your code editor does not indicate syntax errors or warnings, and click the "Done" button twice to close the wire configuration screen.
- Use the "Save" button in the top right corner to preserve workflow changes.
The following steps are not well-documented, but I show you how to use custom transform results.
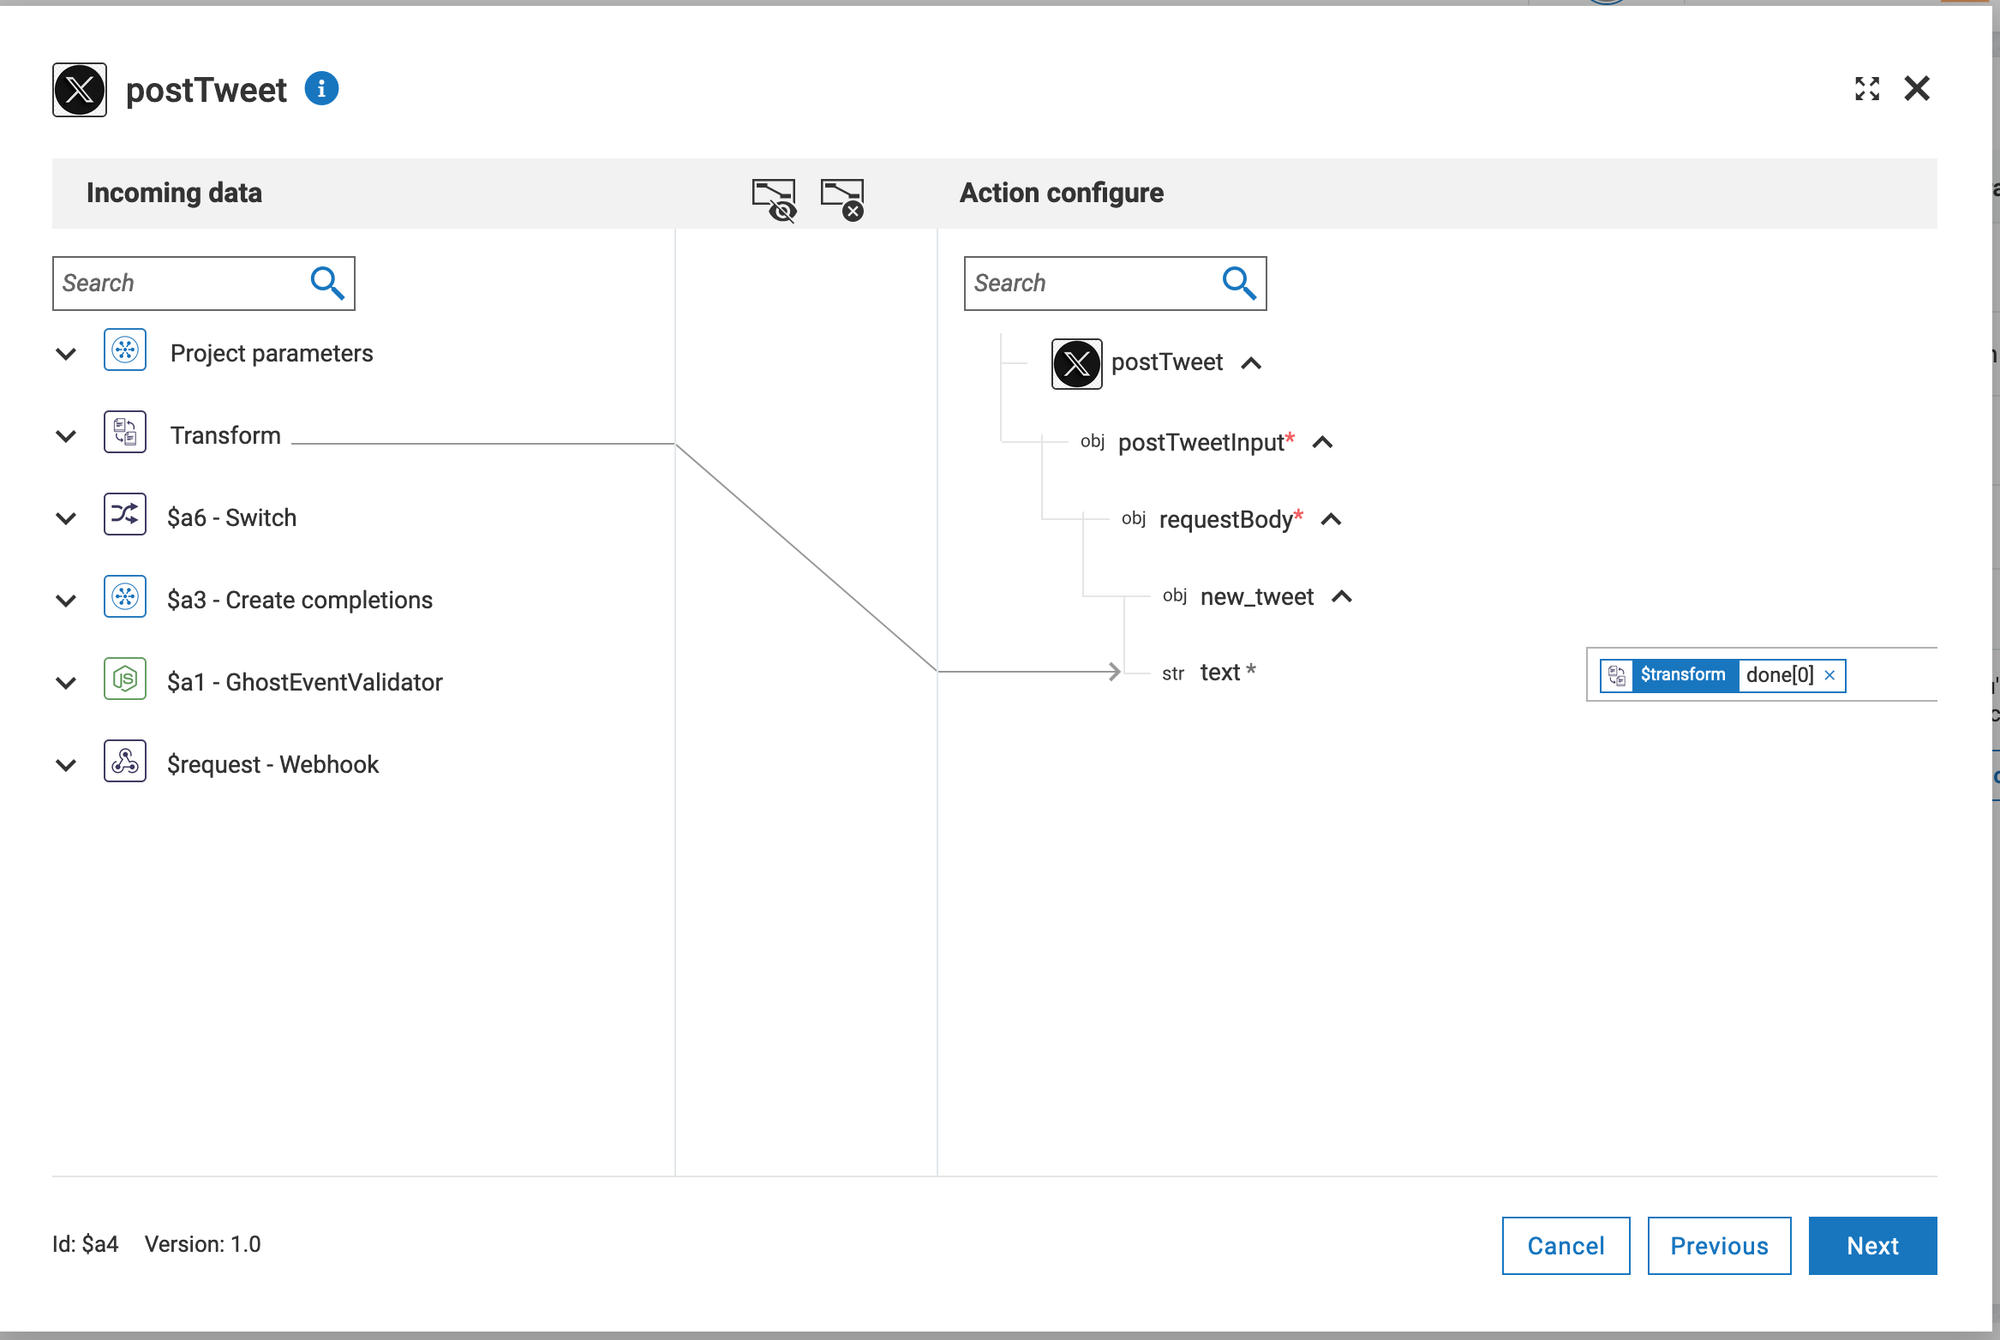
- Select the X connector, then click the ⛭ icon to open the connector configuration screen.
- Expand the Transform section on the right to see the new Transform element. Note that you could use the transformation but can't delete or change the transformation.
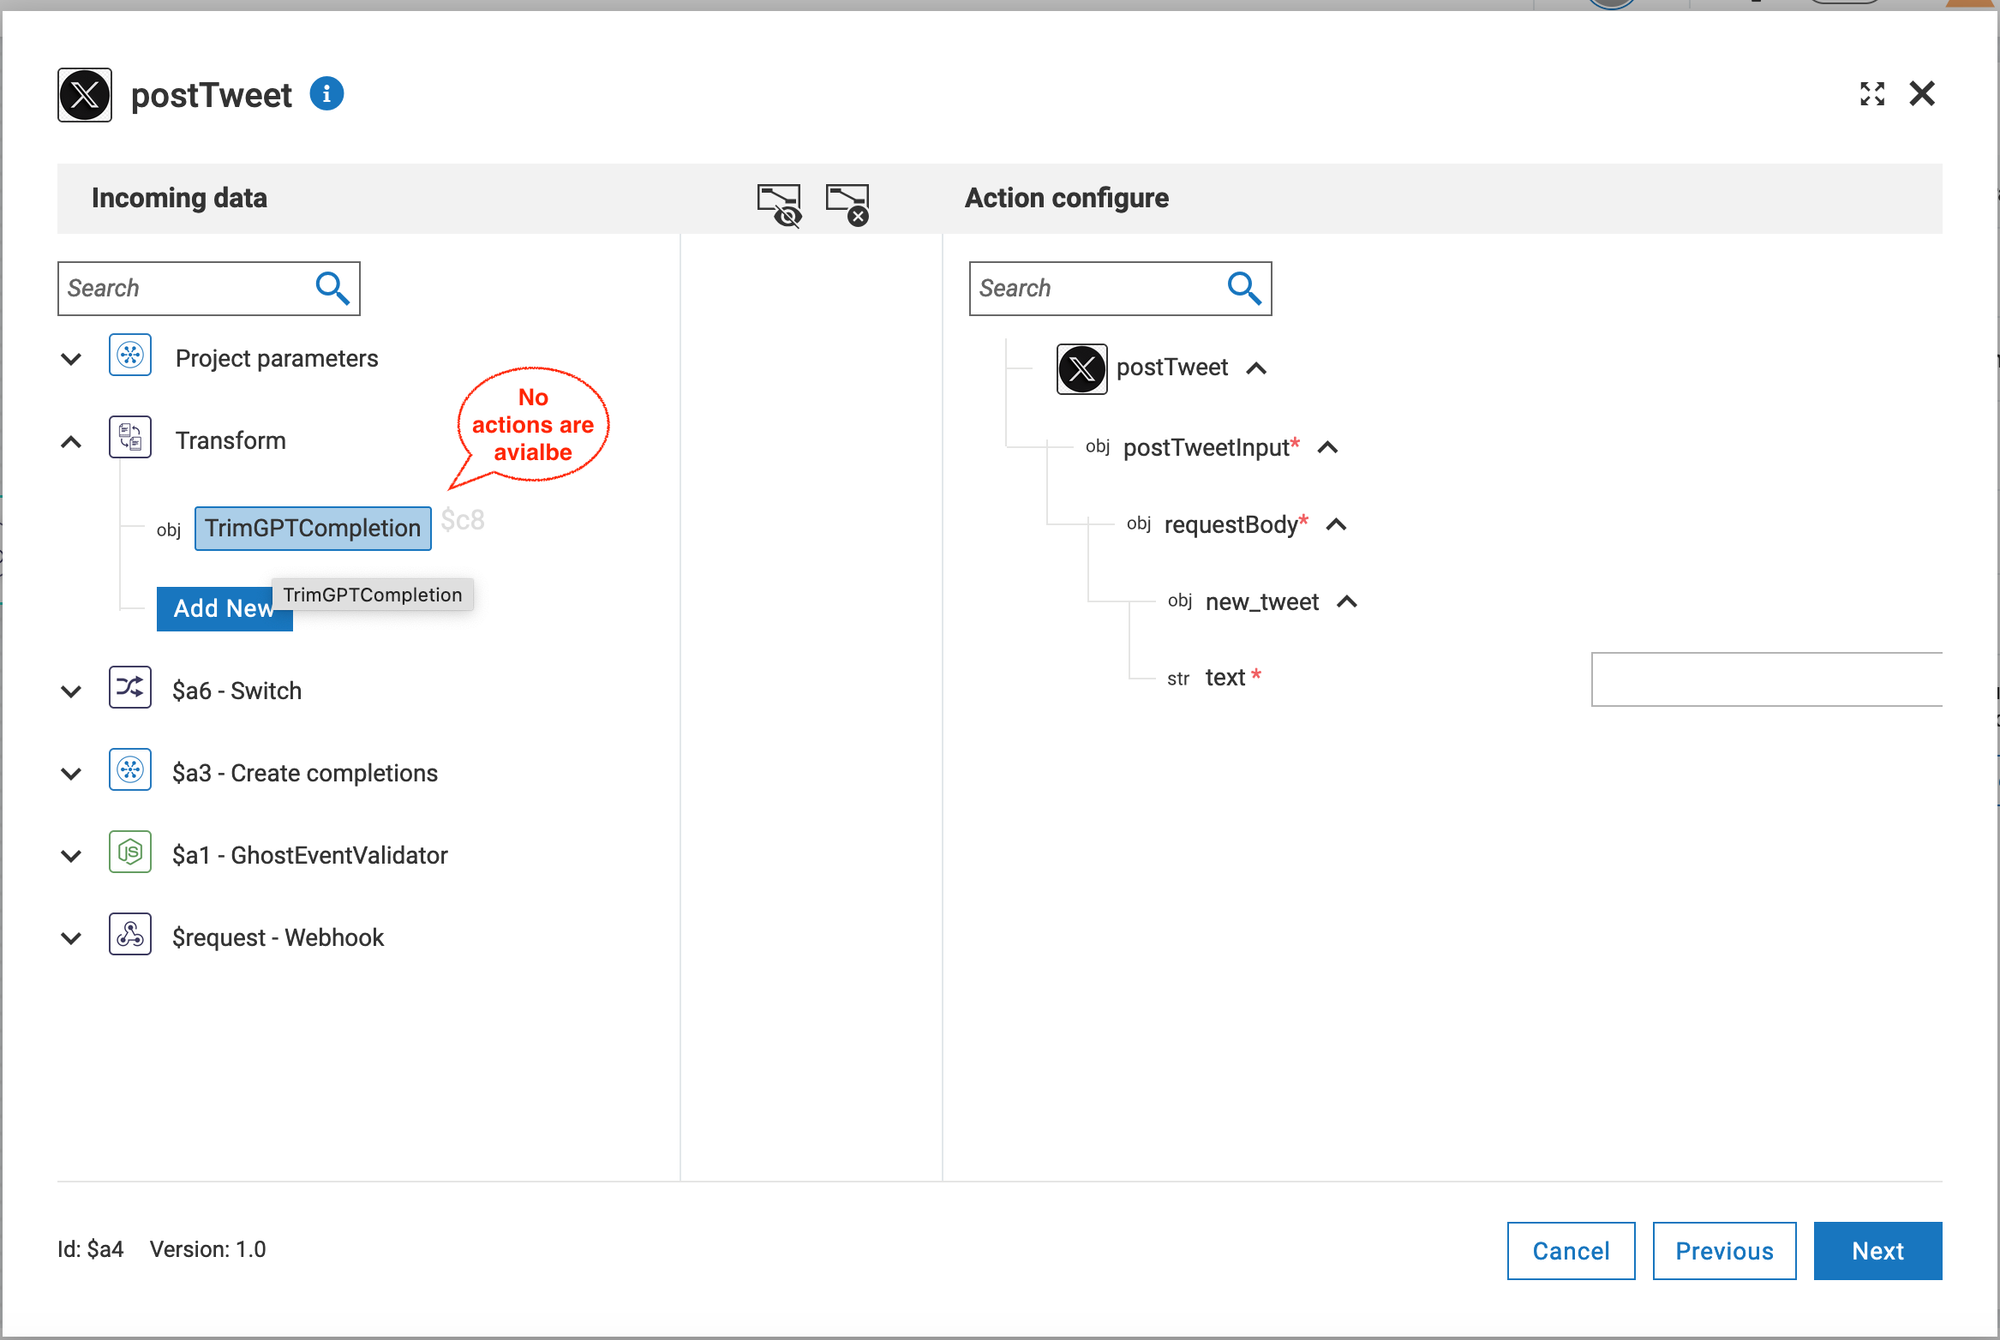
- Drag TrimGPTCompletion to the "text" field of the X connector. The input template should be similar to {{$transform.t1}}.
- Since that variable refers to the whole object, we export from the custom operation. Change the template text to {{$transform.t1.output.done[0]}}. This way, we address the first list item of the output attribute "done."
- Click "Next" and complete the connector configuration, testing the transformation results.
A few takeaways:
- Transformations offer you a rich toolset to manipulate workflow data
- Use custom connectors and transformations only when you have no choice or the "no-code" approach is too "expensive."
In case you missed previous publications: