Ghost: Rebuild Backup Procedure


Ahmed and I run this blog on the standalone Ghost for almost four years. Around the same time, I created a small cron task that backs up the site content, dumps the database, and uploads archives to Google Drive. But now it's time for the change.
Google Drive was a good option in 2019, but product upgrades, site growth, and the fast decaying of the meaning "unlimited" made the current approach obsolete. Plus, I have another purpose for these backup files in mind. So here is the list of the backup requirements that fit my bill:
- Use free or very inexpensive cloud storage;
- Leverage versions and lifecycle policies to keep space usage in check;
- Do not use passwords in the command line;
- Suitable for quick cloning and testing.
Although almost the same could be done with any big cloud player, I decided to see how it works with Google Cloud and how it fits my final goal requirements. But before changing my backup scripts, some preparations are due.
Cloud Storage Preparation
- Create or activate your Google Cloud account. If it's your first account, don't forget to grab your $300 voucher.
- Create a new project to group your cloud artifacts.
- Create a new Cloud Storage bucket.
- Enable Object Versioning
- Create Lifecycle rules regarding how many object versions you want to keep and how long.
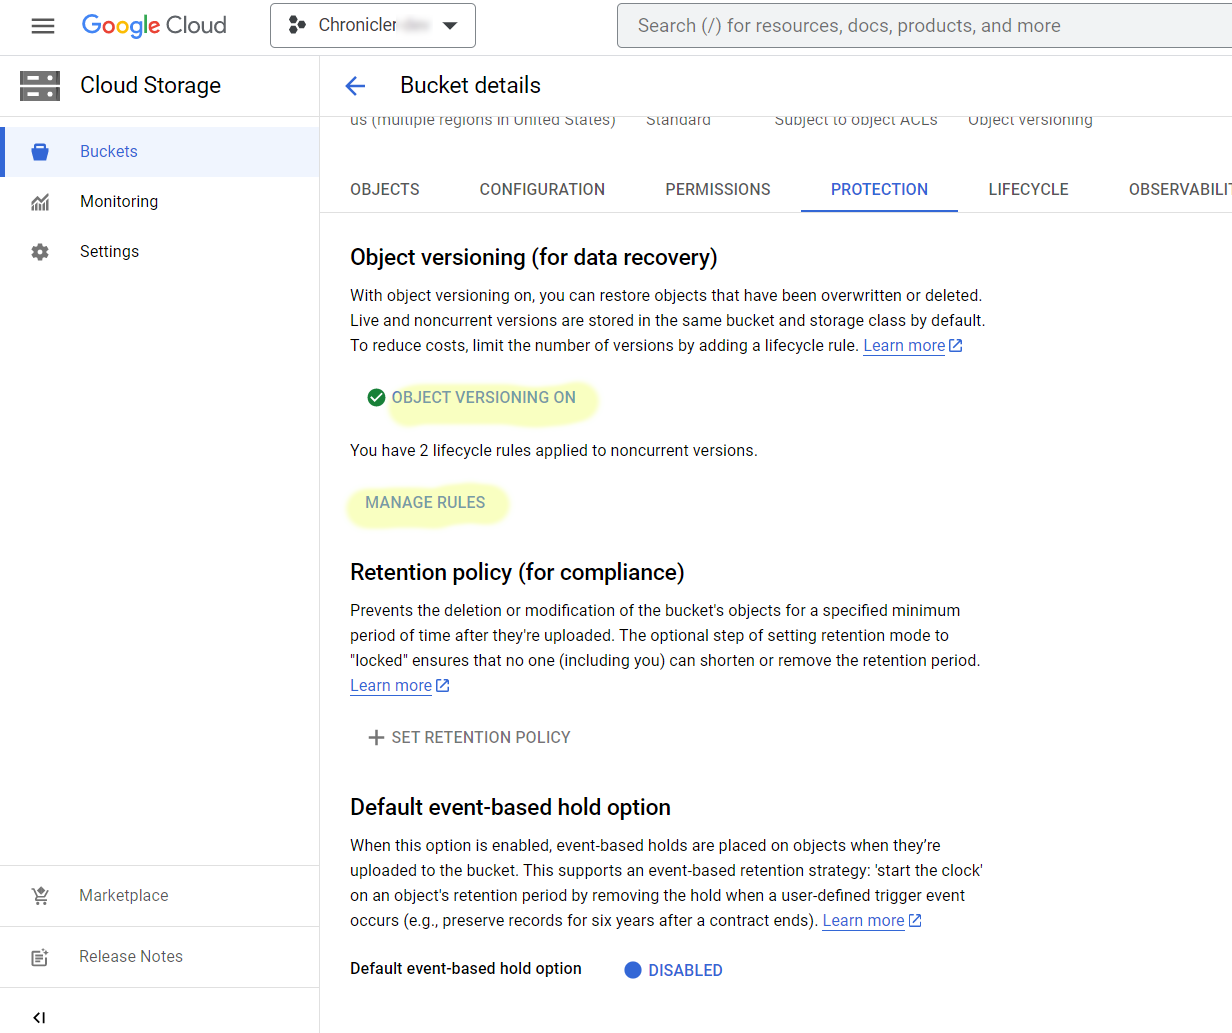
Since we have a few monthly updates, I will keep two previous versions of each file for two weeks. The bi-weekly backup will give the current and two earlier copies of the site at any given moment.
Environment Preparation
Install and configure Google Command Line Interface.
-
Install Google Cloud CLI, following the documentation steps. Instructions are straightforward and shouldn't give you any trouble.
-
During the CLI configuration, be ready to open an URL in the browser and log in with your cloud account credentials. Then, paste a confirmation key back to the terminal upon successful authentication and permission consent.
-
Make sure that your configuration works and you see your target bucket.
gcloud config configurations describe default gcloud storage ls -
Enable parallel file uploads for the best performance and suppress warnings.
gcloud config set storage/parallel_composite_upload_enabled True
Configure your MySQL database and tools.
-
MySQL v8 requires additional global privileges for full database exports.
GRANT PROCESS ON *.* TO ghostuser@localhost; -
The utility mysql_config_editor allows you to encrypt passwords for database tools. Enter the database user password at the prompt.
mysql_config_editor set --login-path=mysqldump --host=localhost --user=ghostuser --password -
Test the full database export; You should not see any prompts or warnings.
mysqldump -u ghostuser --databases ghostdb > /dev/null
Assembly backup script
Essentially we have everything we need to compile a shell script. I stripped down all the bells and whistles from the original, but it will do.
#!/bin/sh

#Backup Site
tmp_f="/tmp/ghost.bkp"
pref="your-site-name"
gs_bucket="gs://put-your-name-here/"
ghost_home=/var/opt/ghost/

# Create temp folder
mkdir -p $tmp_f

# Export Ghost Database
mysqldump --user your_dabase_user --databases your_ghost_db |gzip >"${tmp_f}/${pref}.sql.gz"

# Archive non text content
cd $ghost_home
tar zcf "${tmp_f}/${pref}.content.tgz" content

# Upload to the GC
gcloud -q storage cp $tmp_f/* $gs_bucket
rc=$?

if [ $rc == "0" ]; then
 printf " Done.\n"
 rm $tmp_f/*
fi

# Remove temp folder
rmdir $tmp_f

echo -e "==========================================================================="
echo -e "         Backup completed"
echo -e "==========================================================================="
Save the backup script to your ~/bin/ folder and adjust execution permissions.
Now, use crontab to schedule your backups and watch for cloud storage content. By the way, I always struggle with the cron schedule syntax, but https://crontab.guru is very helpful.