ChatGPT-4: Webnmethods.io Connector
Earlier in the series, we defined a custom connector for the new X API and established that a predefined connector does not work with the latest OpenAI models. Let's create a custom REST connector for the latest GPT models.


Earlier in the series, we defined a custom connector for the new X API and established that a predefined connector does not work with the latest OpenAI models. Let's create a custom REST connector for the latest GPT models.
The most logical way to define a custom connector would be to create a custom REST connector, as we've done for X API version 2. The primary difference in the configuration process is the authentication and authorization methods. But let's get started.
- Log in to your Webmethods.io environment and select the "Connectors" tab. On the left navigation pane, choose "REST" connectors.
- Start the new connector Wizard with the "Add Connector" button next to the search field.
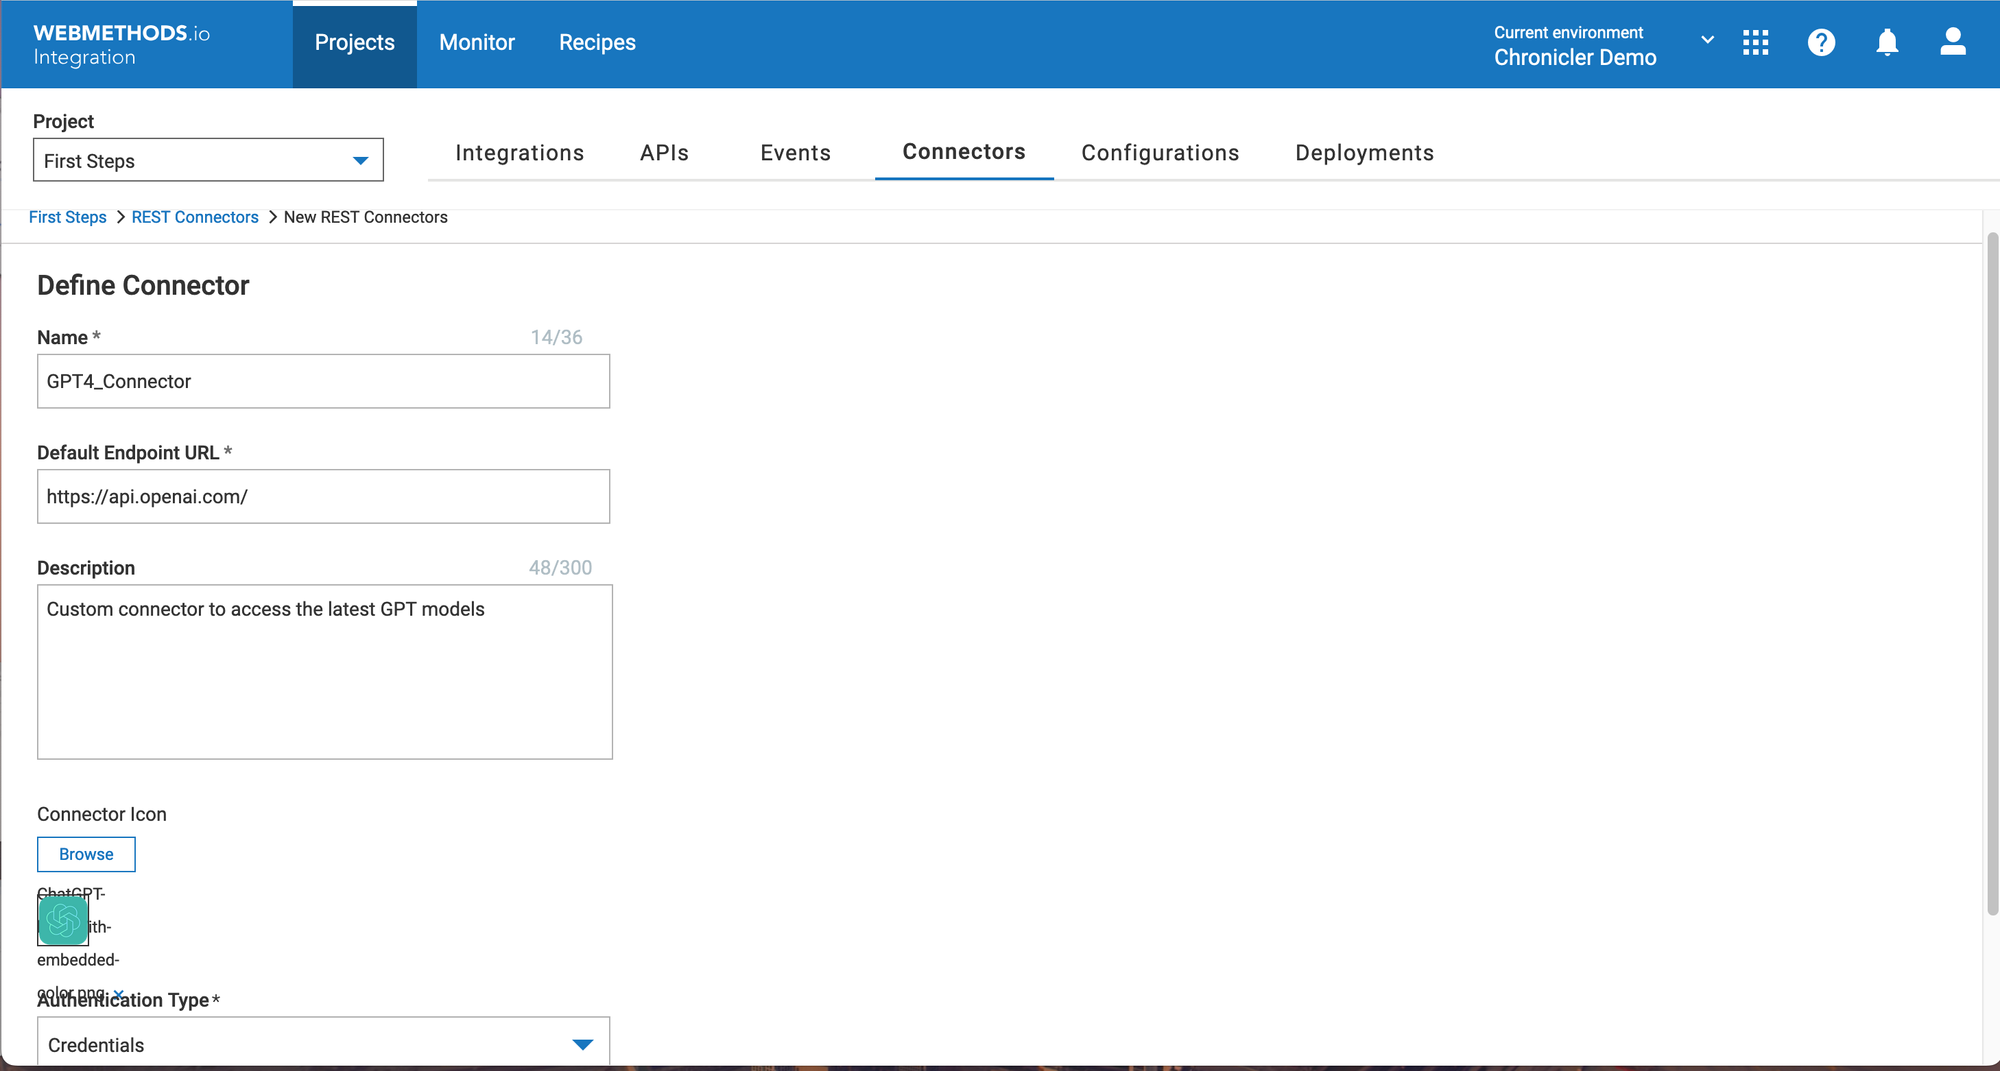
- Fill out the form with the parameters below:
- Name: GPT4_Connector
- Default Endpoint URL: https://api.openai.com/
- Description: Custom Connector to access the latest OpenAI models.
- Connector Icon: Keep it as is or upload a custom image
- Authentication Type: Credentials
- Click the Next button to continue.
- Click the lonely "Add resource" button in the right corner to define services.
- Describe a completions resource with the parameters below:
- Name: ChatCompletions
- Path: /v1/chat/completions
- Description: Put some meaningful description
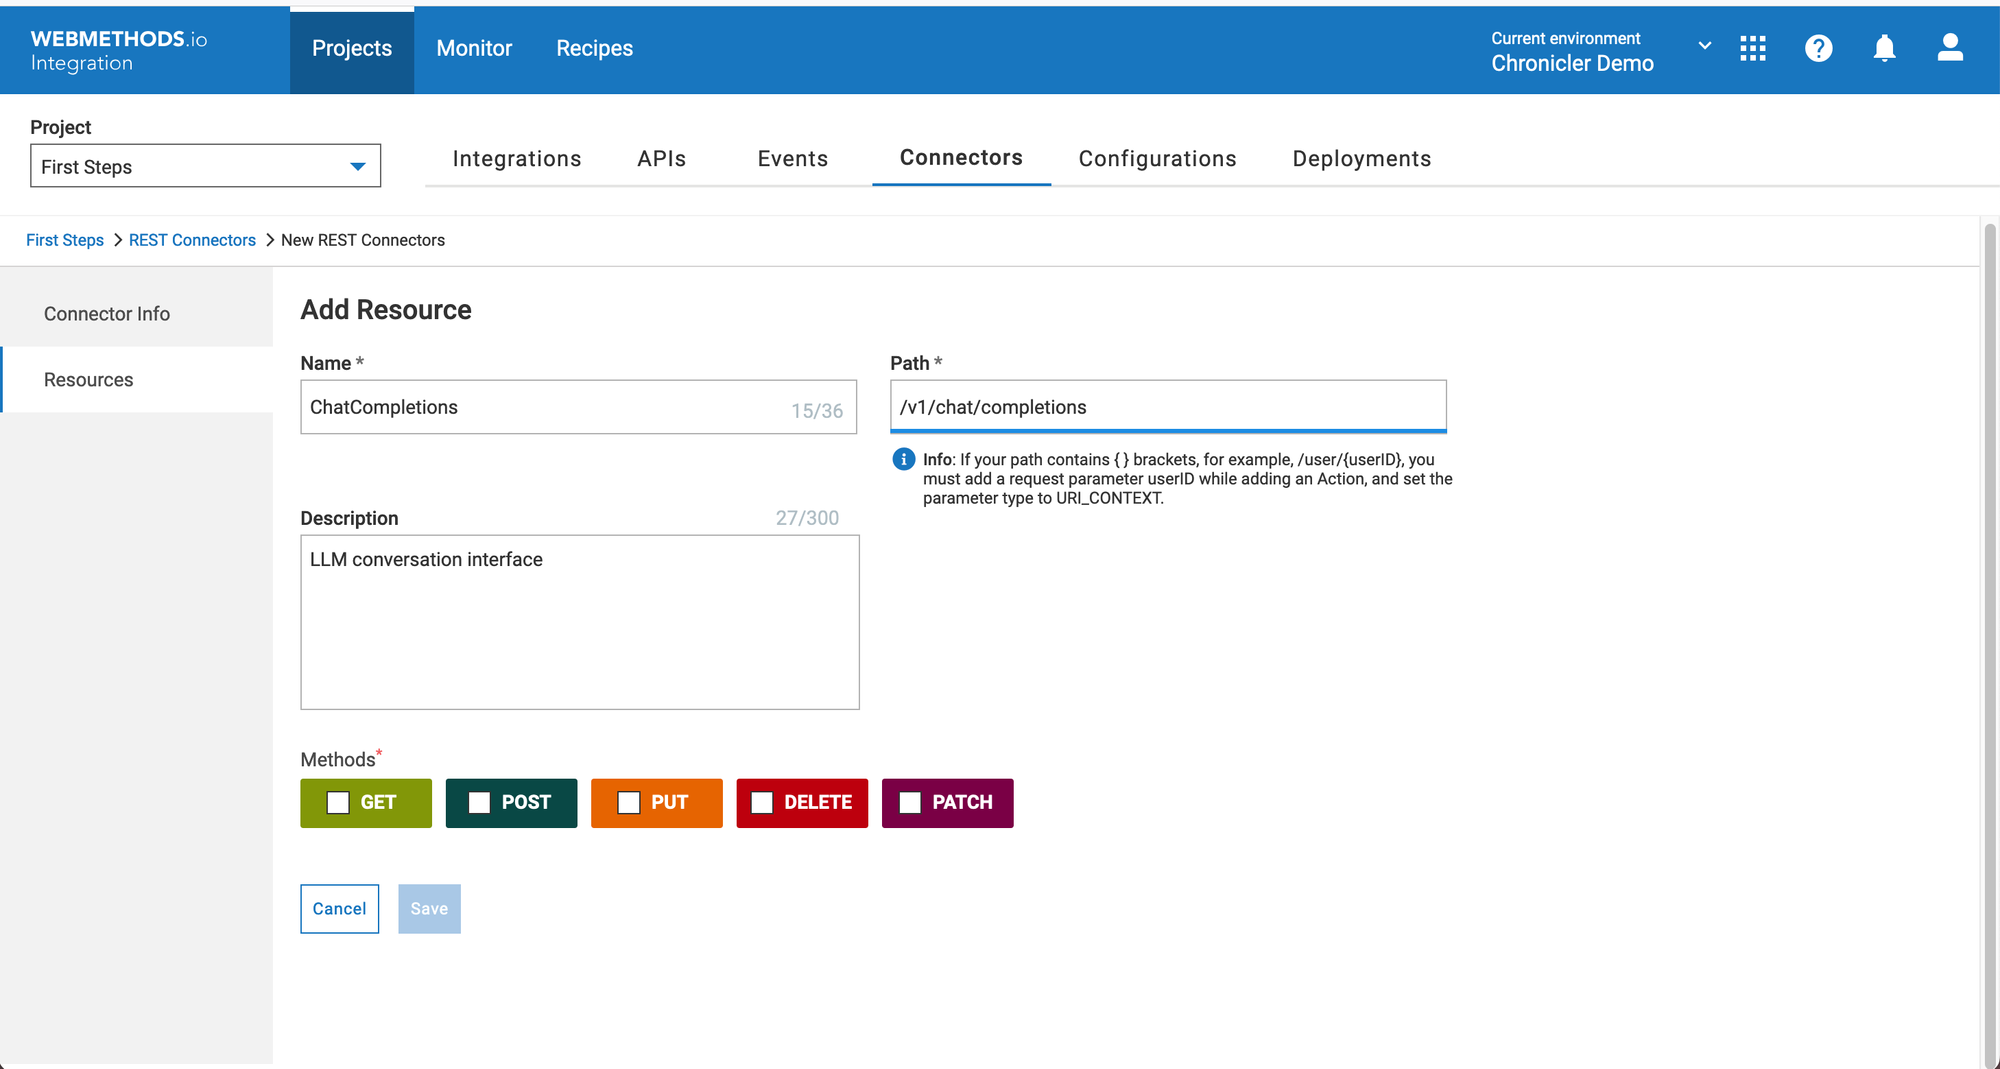
- Click on the POST check to unlock the method definition form.
- Under the Request tab, locate the "Document Type" drop-down and click the + icon.
- You could define the document structure manually, but the easiest way is to Load an existing JSON document and adjust it to your satisfaction. Click the "Load JSON" button on the "Data Fields" toolbar.
- Copy and paste the sample document below, adding or removing optional parameters. When ready, click the "Load JSON" button.
{
  "model": "gpt-4o-mini",
  "temperature": 0.7,
  "max_completion_tokens": 250,
  "stream": false,
  "messages": [
    {
      "role": "user",
      "content": "Say this is a test!"
    }
  ]
}
Load JSON Template Document
- Adjust data fields and make all but model and messages optional.
- Set the document type name, i.e., "GPT4_Request_Doc," and save the new document type.
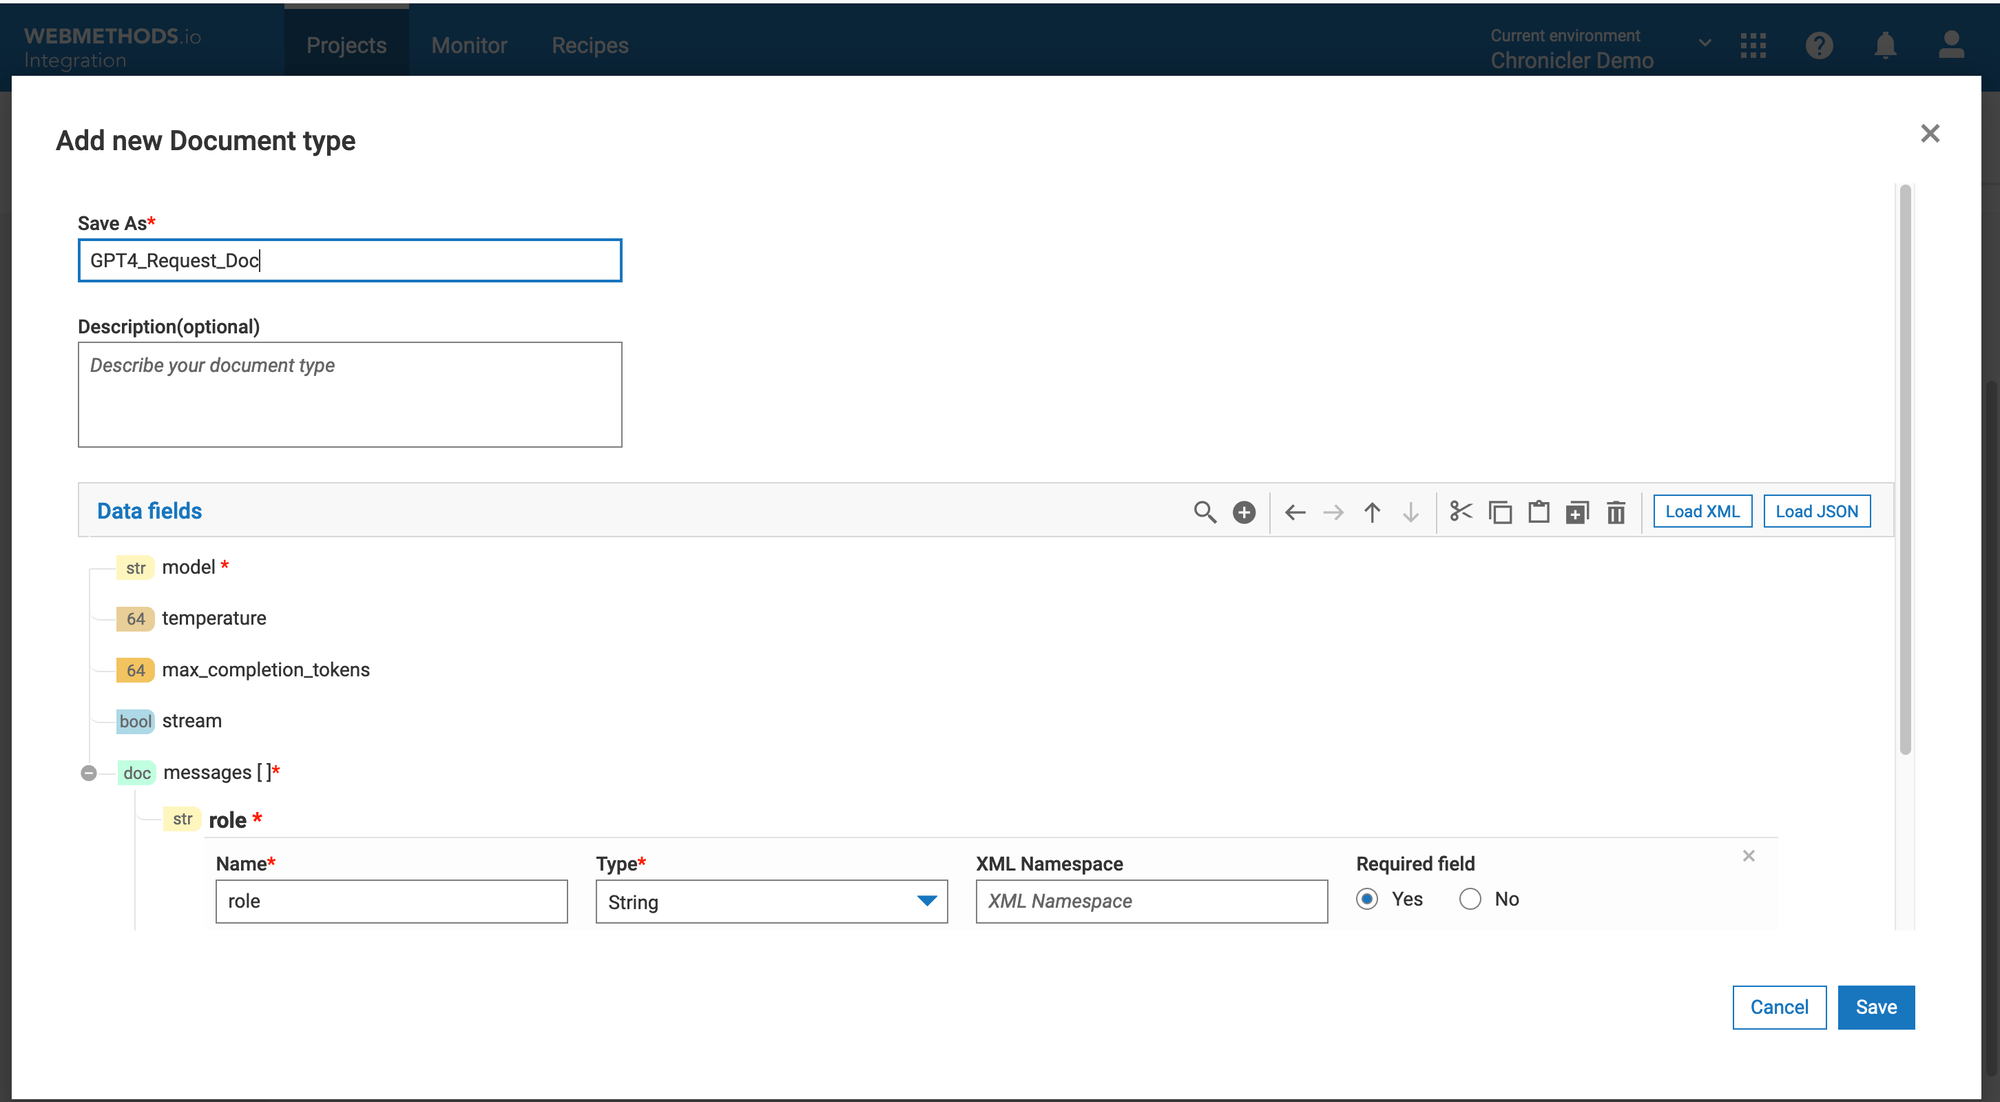
- Click the "Save" button.
- Use the drop-down control to set the "Document Type" field to the GPT_Request_Doc.
- Click "Next" to describe the resource response.
- Set "HTTP Code" to the 200.
- Click on the + icon to define the resource response data structure. Use "Load JSON" to load the sample method reply from the OpenAI API documentation.
{
  "id": "chatcmpl-123",
  "object": "chat.completion",
  "created": 1677652288,
  "model": "gpt-4o-mini",
  "system_fingerprint": "fp_44709d6fcb",
  "choices": [{
    "index": 0,
    "message": {
      "role": "assistant",
      "content": "\n\nHello there, how may I assist you today?"
    },
    "logprobs": null,
    "finish_reason": "stop"
  }],
  "usage": {
    "prompt_tokens": 9,
    "completion_tokens": 12,
    "total_tokens": 21,
    "completion_tokens_details": {
      "reasoning_tokens": 0
    }
  }
}
Sample Chat Completion Response
- Name the new document type "GPT_Response_Doc," and save the reply structure.
- Click the "Next" button to finish the resource description.

- Click "Save" to store the custom connector changes.
Click on the "REST Connectors" breadcrumb to see our new connector line. Let's define a new authentication method and operation.
- Click on the ⋁ icon next to the "GPT4_Connector" and then the "New Account" button on the right.
- Ensure that "Authorization Type" is set to "none" and click the "Add" button.
- Click on the "Operations" button on the right.
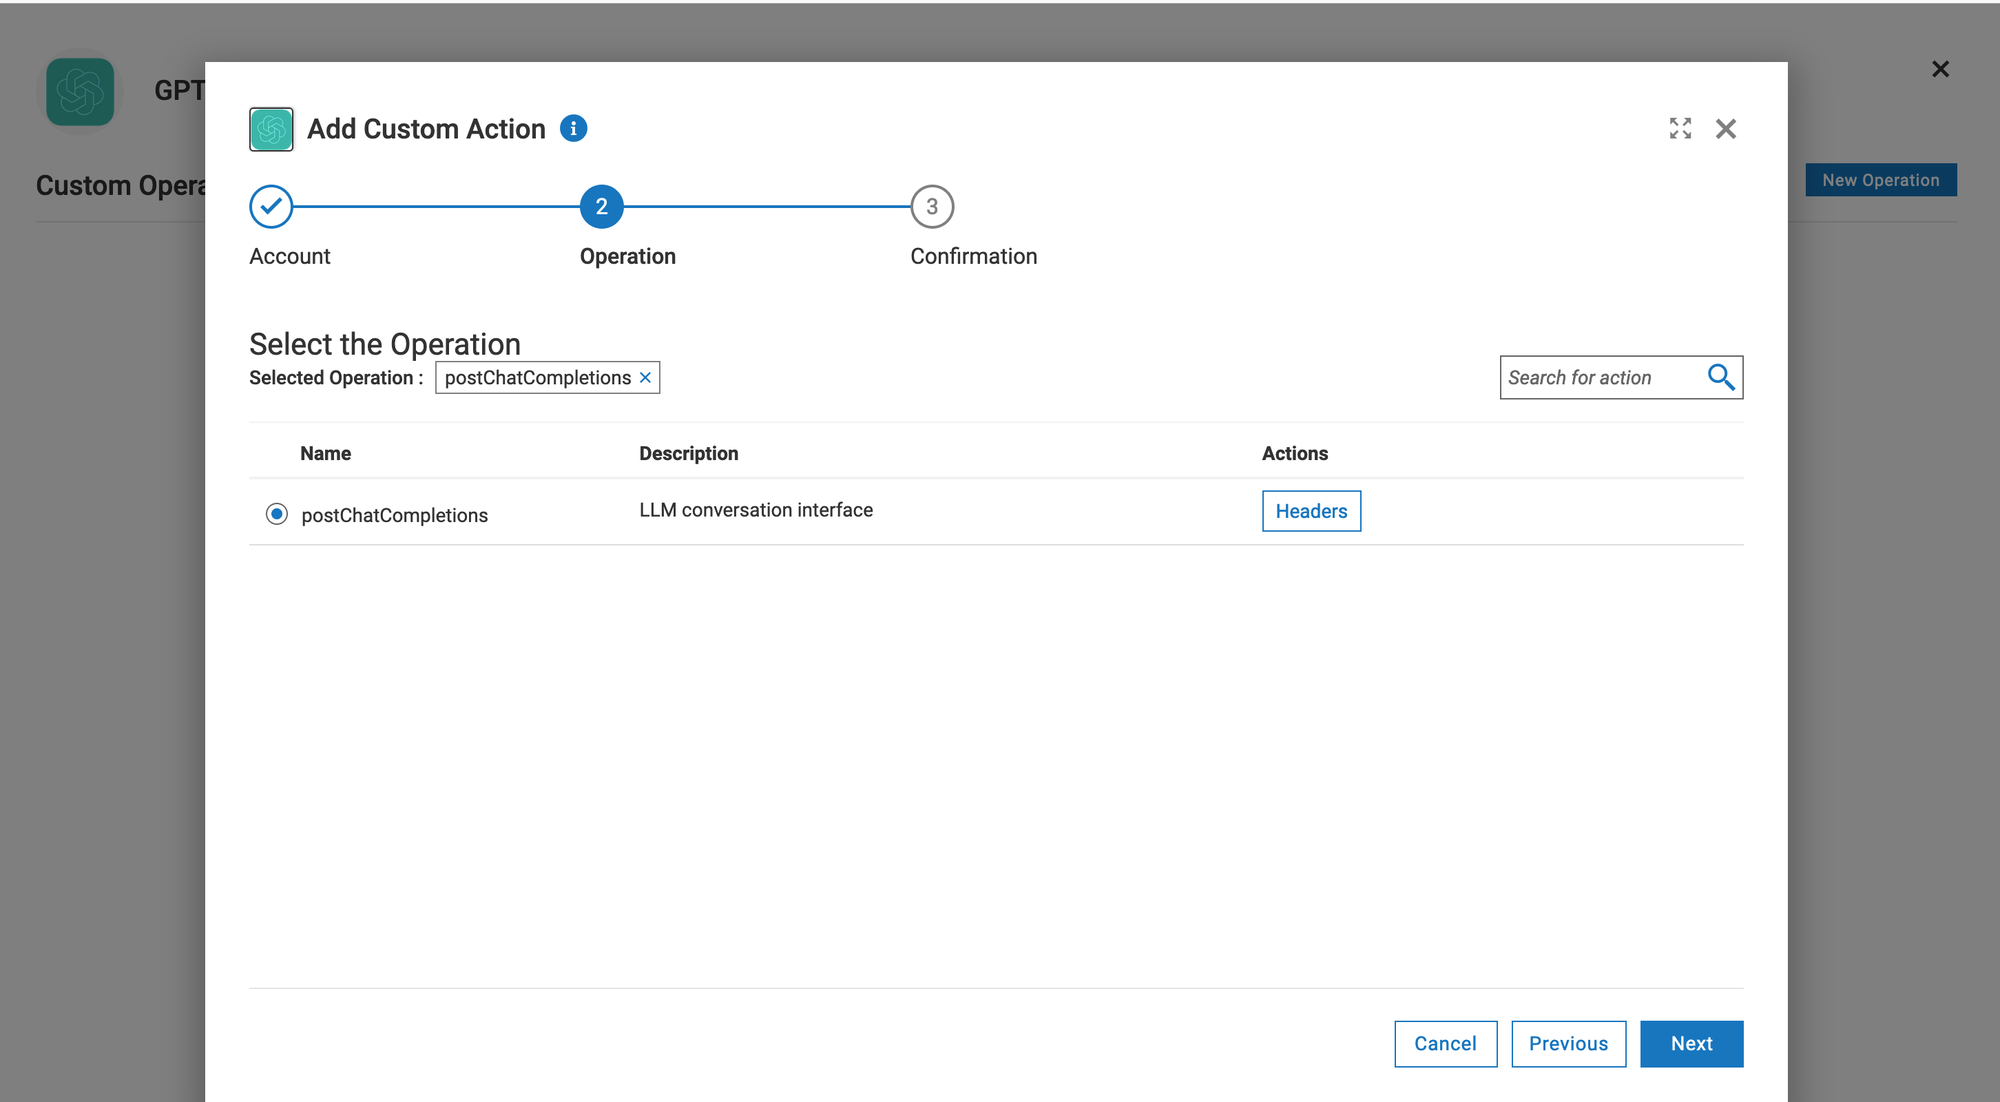
- Click the "New Operation" button to start the new operation detention.
- Select our authentication account "GPT4_Connector_1."
- Set the operation name, i.e, "askGPT", and click the "Next" button.
- Activate the radio button against the "postChatCompletions" and click on the "Headers" button.
- Add Headers as below and make sure they are active:
- Content-Type: application/json
- Authorization:
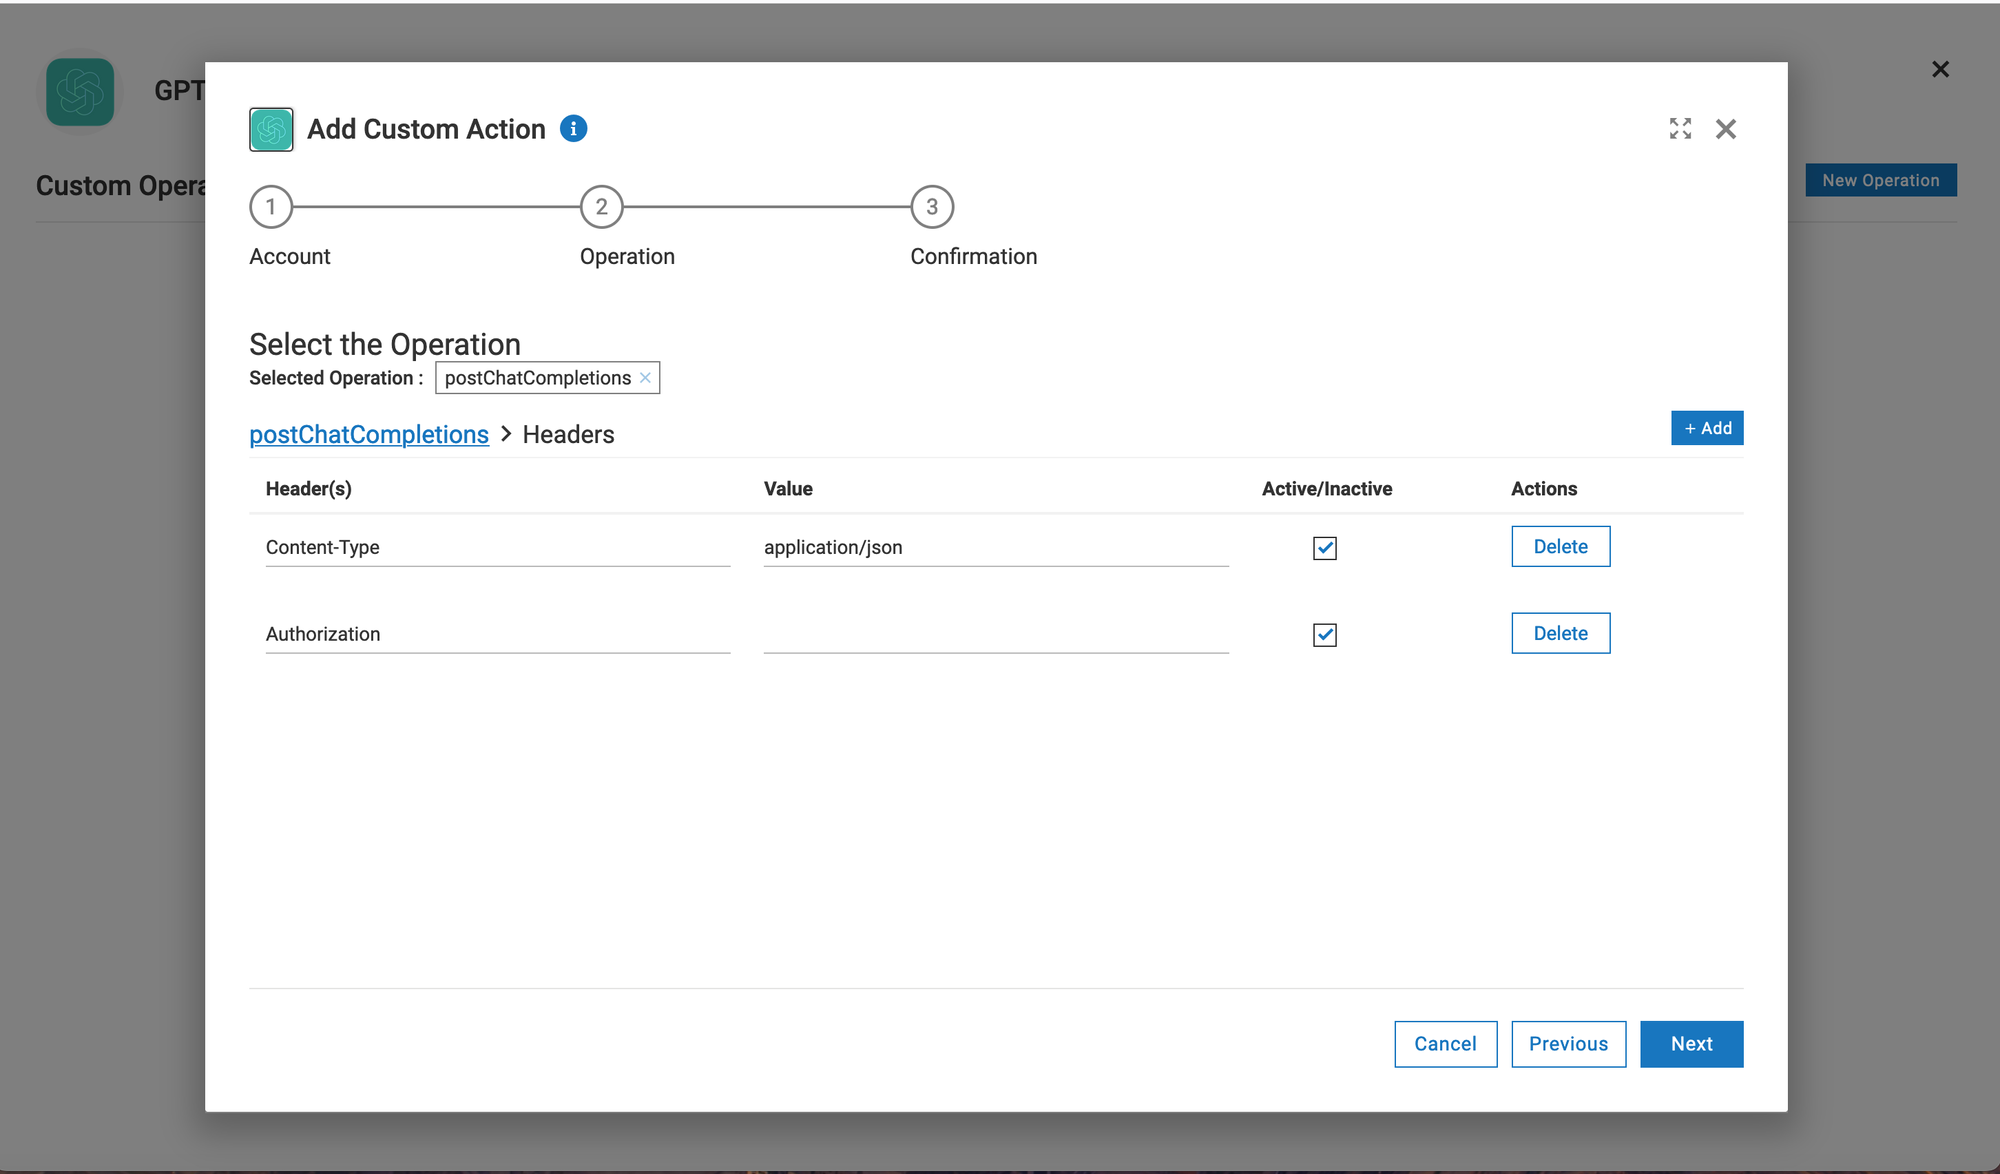
- Click the "Next" button twice to advance to the confirmation screen.
- Click the "Done" button to save the definition.
You could test the new operation if you have your OpenAI API key handy.
- In the list of operations, click on the play icon ▶️ for the "askGPT" operation.
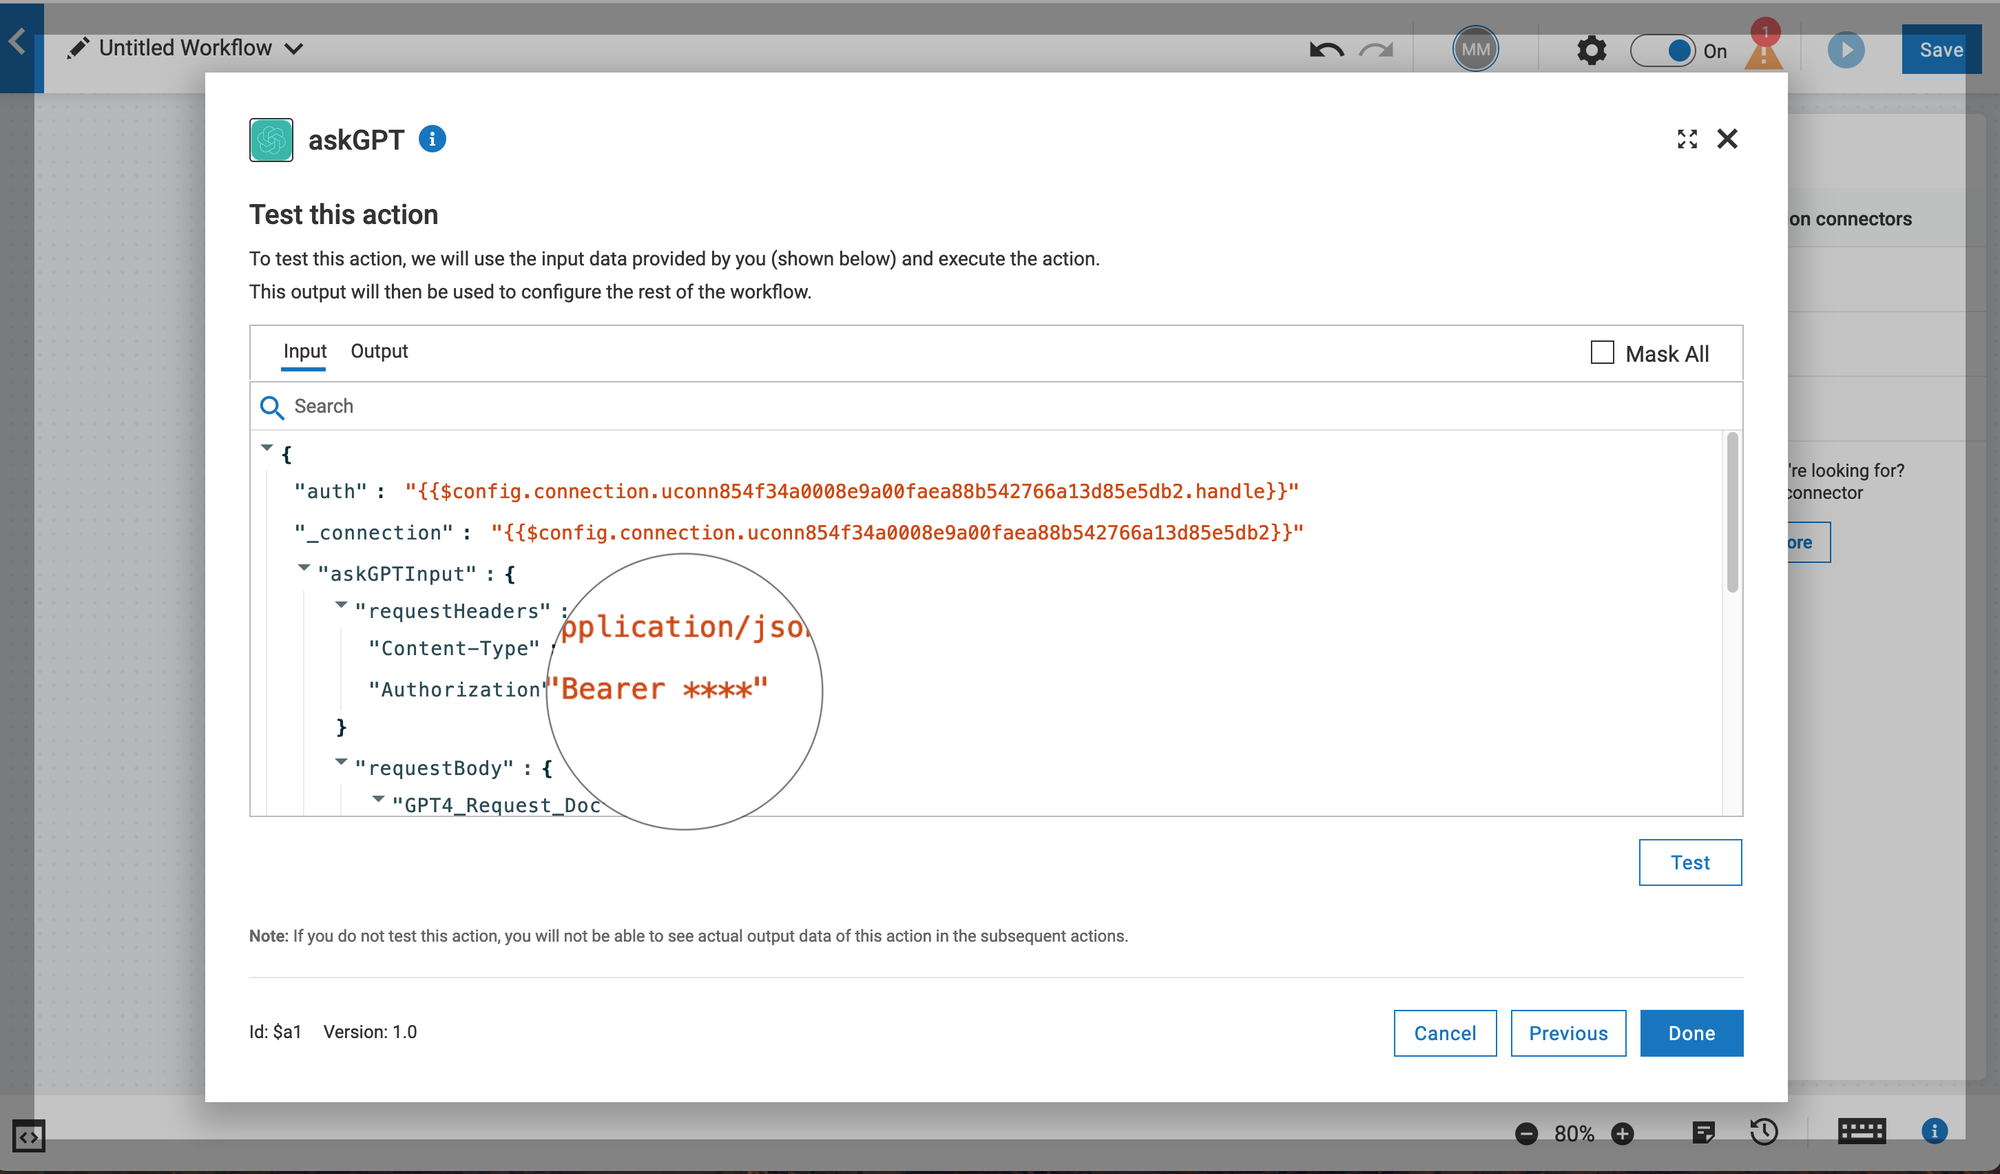
- Select the connection account and fill out the input fields. It's important to set the Authorization header value to "Bearer ${Your API Key}".
- Put the model name into the "model" field.
- Add an entry to the "messages" list and set the "role" to "user" and your question or task for the model into content.
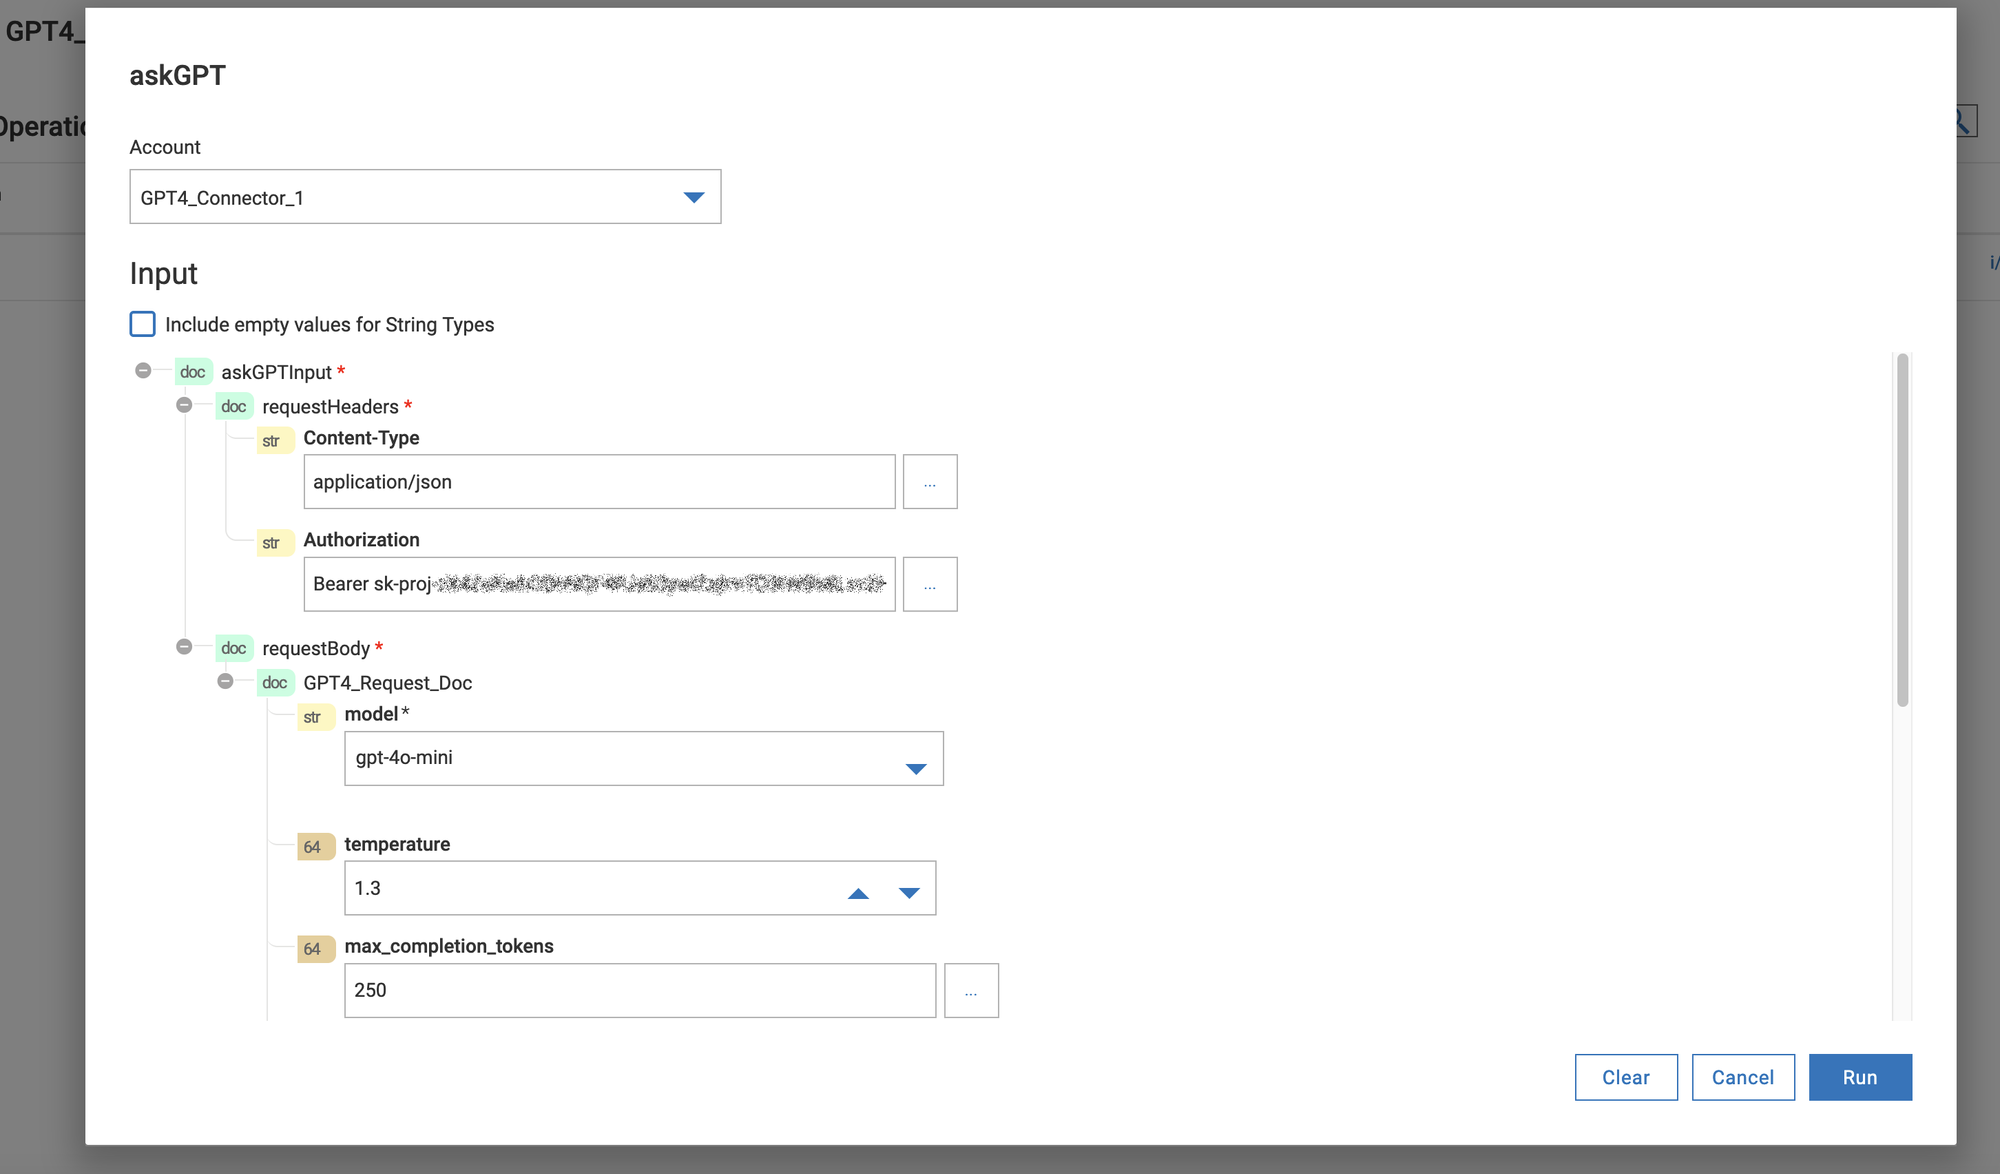
- Click the "Run" button to execute an operation. If you completed all operations correctly you should have reply similar to the screenshot below
You may notice that copying and pasting your API key is not a secure approach, and you are absolutely correct.
That's why I keep my API key as Project parameter, defined as a password field. This approach allows you disassociate your workflows and connectors from credentials and accounts.
- Drop your new GPT4 connector to the workflow, select account and advance to the action configuration.
- Copy API Key from the project parameters to the Authorization header.
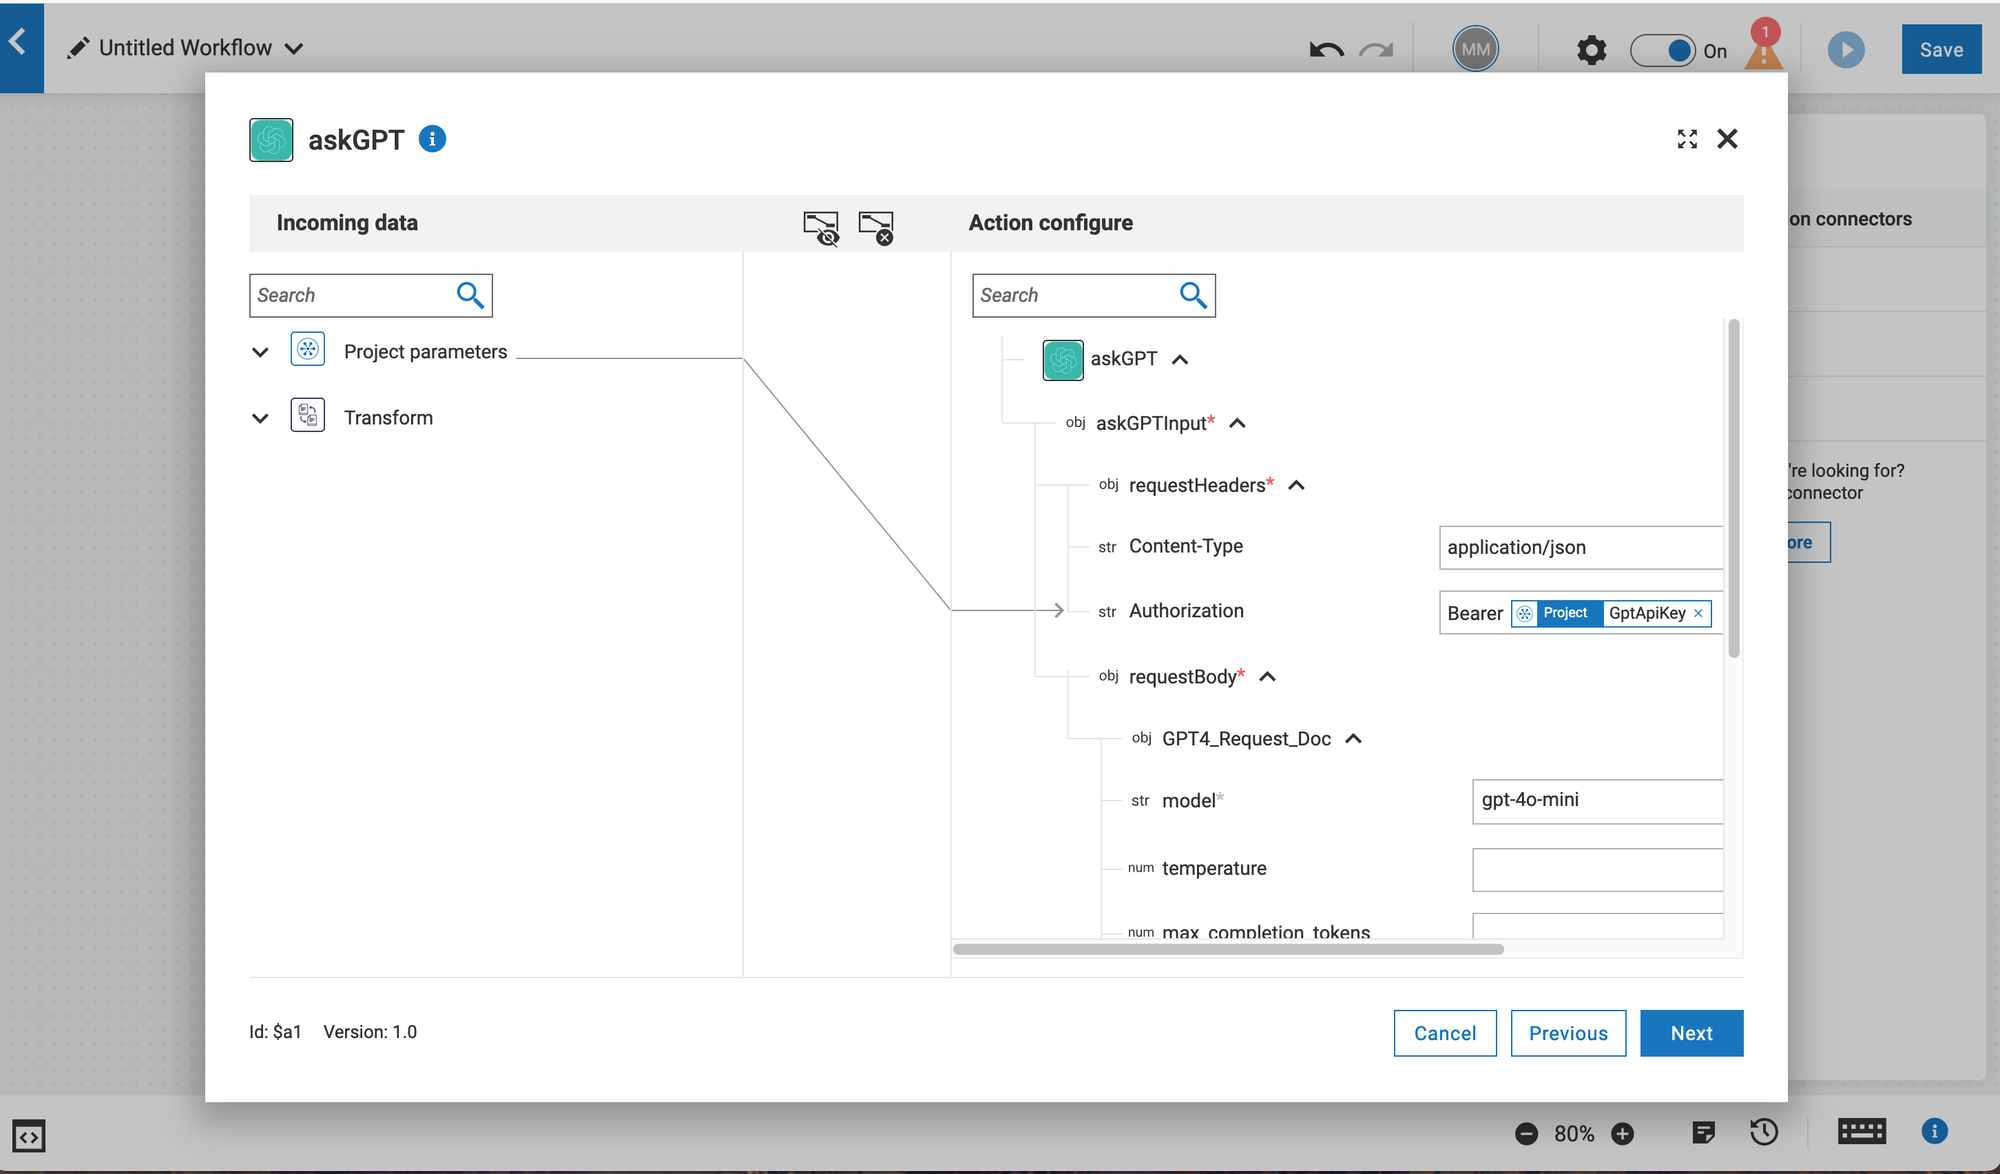
- Set the operation input parameters, dynamic or otherwise.
- Click the "Next" button and test the connector.
As you may see Webmethods.io masking the API key value from all logs and user screens.
This small exercise proves that even you do not have a predefined connector, you can always create a custom one and use it for your integration projects.