Autonomously create a multi-tiered web application using VS Code + Cline + Claude Sonnet (round 2)

In this rather lengthy post, I'll describe how I went about using agentic AI code generation to autonomously create, build, and deploy a custom web application from scratch.
I submitted 1 prompt that initially described the application I wanted, followed by 12 more follow-up prompts throughout the duration of the session for a total of 13 prompts. The session lasted an estimated 6-7 hours and the total cost was $28.9049 utilizing Anthropic Claude Sonnet 4.6 as the LLM (this model was released on February 17, 2026).
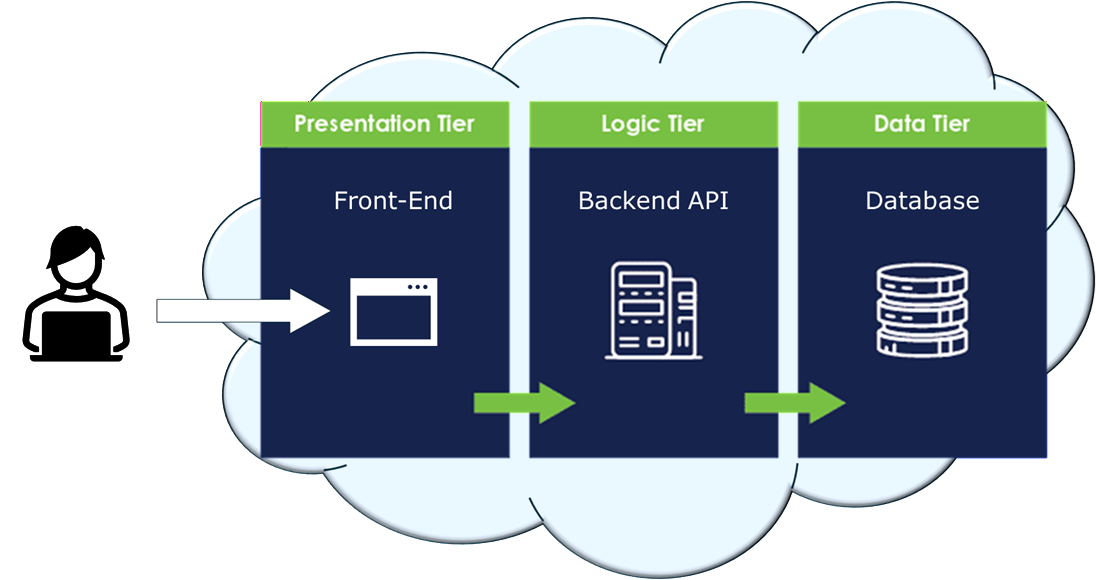
What I want to see is if modern day AI agents can design, develop, and deploy a 3-tier application to the cloud autonomously with little to no human intervention (hint: it can):
The current state of autonomous AI coding agents is honestly impressive. If you look at the software development lifecycle diagram below, the large majority of the steps were actually successfully performed by the AI agent.
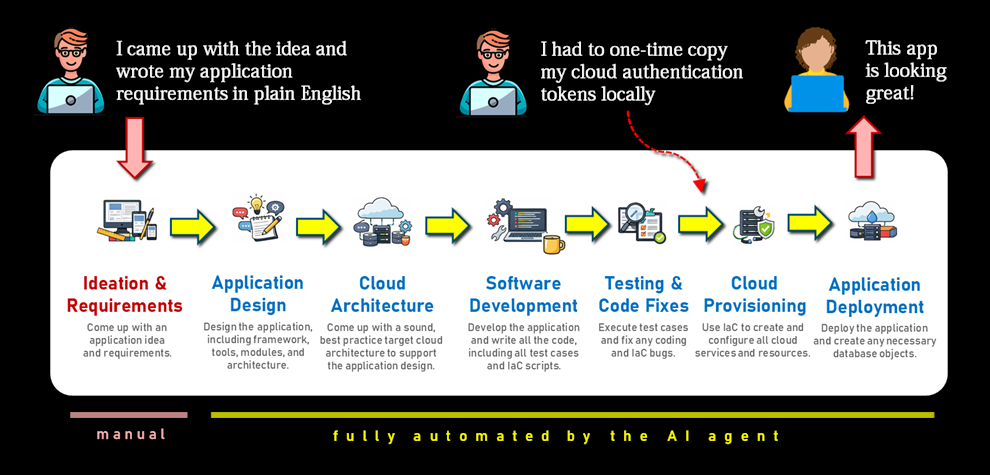
So are we able to go from "idea" to "production" in a matter of hours? Yes, it's getting there.
A little of the prerequisite content below is reused from this blog post of mine which was an earlier attempt from a few days ago, but this post is a different example and a slightly better documented effort.
(Note: I use "Cline" and "AI agent" interchangeably in this post.)
What is Autonomous Code Generation?
Let's get a few concepts clarified first.
AI code generation is generally meant to refer to a developer's use of AI to assist in code generation through human prompting. The human (i.e., developer) types what he'd like to see, and the AI somehow automagically creates the code.
I use the term autonomous code generation where through the use of human prompts, an AI agent independently performs multiple steps of the software development lifecycle, including coding the application, building it (i.e., packaging it), and deploying it. The level of autonomy can become a topic of debate, which I'll shed some light on.
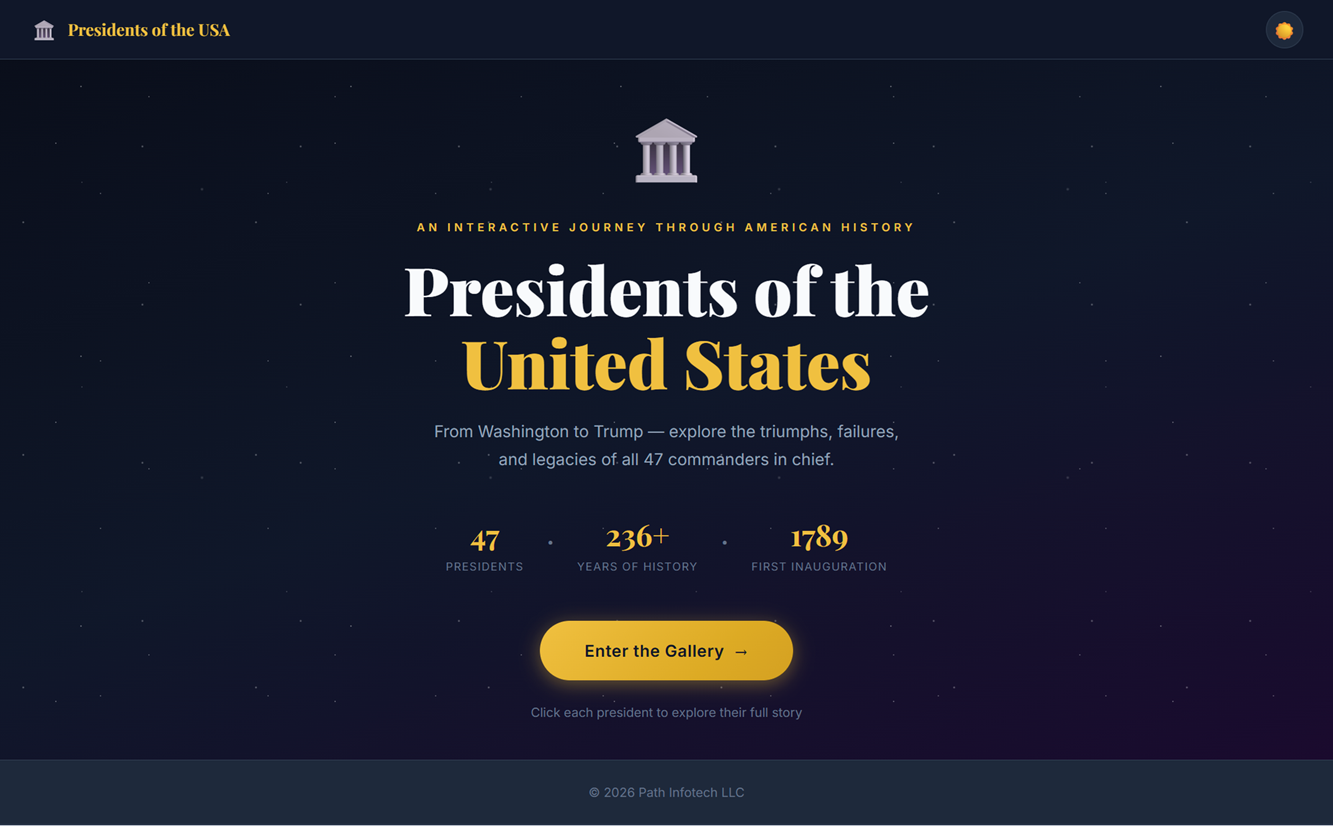
The following screenshot is one of the pages of the completed application. I deem the exercise a success. I could have continued engaging the AI agent to refine the application, enhance the look-and-feel even further, add more functionality, enable security, create separate non-production and production environments in the cloud, and so on. It would just take longer and cost more money.
What was I aiming for?
I remember coming across this table from Stride Conductor a couple of years ago that laid out the different levels of AI code automation. It's hard to believe that just two years ago we were floating around Level-2 Semi-Autonomous, and here we are today almost nearly reaching Level 5 Full Automation.
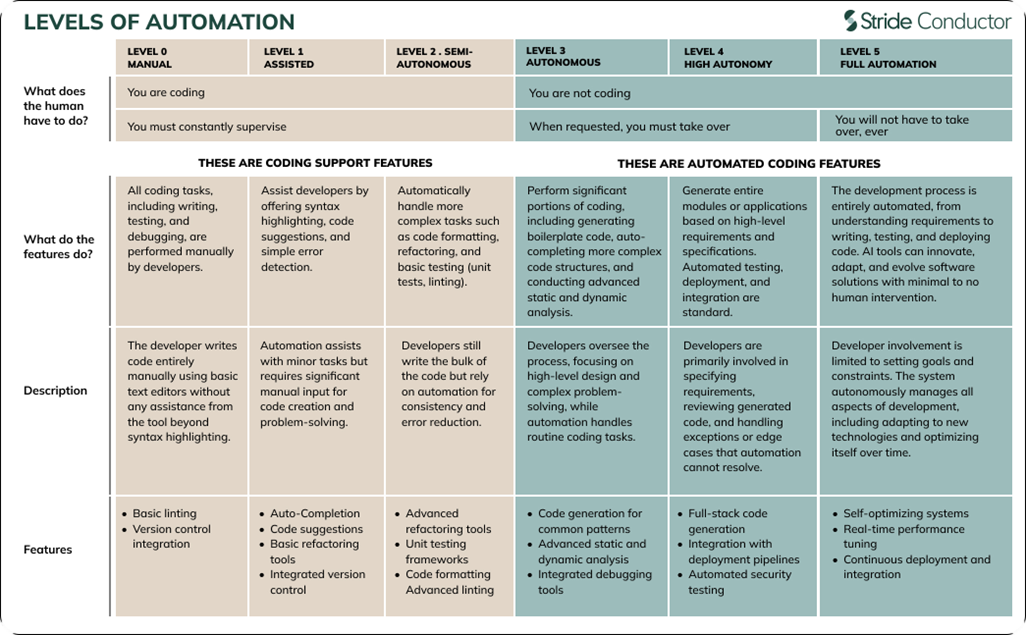
The purpose of this exercise is to see if we're able to reach automation Level 4 or even a Level 5 (note: it was a Level 4).
The entire development process was 100% autonomous, the build phase was 100% autonomous, and the deployment steps were 95% autonomous. Deployment included provisioning all Oracle Cloud Infrastructure (OCI) services and resources, creating sample data, inserting seed data into the database, downloading free-to-use images, installing an nginx reverse proxy and Gunicorn server, as well as deploying/configuring the Python application in a compute instance.
I provided minimal guidance to the AI agent on the design of the target cloud architecture. The only mandate was to store all data in an Oracle Autonomous AI Database and to try to use as many free tier services within OCI as possible.
Lots of bugs in the code and errors during deployment were encountered, but the AI agent worked through all of it on its own.
There were a couple of areas of confusion/conflict between me and the AI agent. For example, I had updated all the API token values in the terraform.tfvars early on in the process (this was practically the only manual step needed), but it was overwritten later when the AI agent started creating all the Terraform files. Also, I manually added a second approved sender in the Email Delivery service on the OCI console (to send out emails), and I'm guessing it would not have worked if I let the AI agent do it since there was a permission exception on the console and I had to use elevated access to perform this particular step.
But aside from these two manual interventions, the rest of the process was entirely autonomous.
Software Tools Used
In this exercise, I attempted to leverage certain tools to perform autonomous code generation. These multiple tools and services included:
- Visual Studio Code (aka VS Code) - A lightweight, extensible source code editor (i.e., IDE) from Microsoft with a large ecosystem of extensions for many programming languages.
- Cline - An open-source AI coding assistant that integrates with development environments such as VS Code to autonomously plan, write, modify, and run code using large language models such as Claude Sonnet.
- Claude Sonnet - Anthropic’s best performance-value large language model (LLM) designed for reasoning, coding, and problem-solving tasks.
- Oracle Cloud Infrastructure (aka OCI) - Oracle’s enterprise cloud platform that provides compute, storage, networking, databases, and AI services for building and running scalable applications.
Essentially the only software you need to download is VS Code to get started. Later on during development, other tools such as Terraform and various Python packages will be downloaded automatically by the AI agent.
Summary of Steps
This is a list of all activities performed, and each one is detailed below.
- Create an API key to access the Claude models
- Download and install VS Code
- Install the Cline extension in VS Code
- Set up your API provider and model in Cline
- Create an empty project
- Add a Cline rules files (optional)
- Decide on auto-approve for the AI agent
- Write an initial prompt to design your application
- Ask the AI Agent (Cline) to create a "Plan"
- Switch to "Act" mode for the AI agent to generate the code
- Get the required API tokens from the OCI Console (manual step)
- Let Cline provision the cloud resources autonomously
- Manually verify the database objects (optional)
- Test the application
- Generate SMTP credentials (manual)
- Create a cloud architecture diagram (optional)
- Generate documentation summary (optional)
- Shutdown the cloud servers to save money (optional)
1. Create an API key to access the Claude models
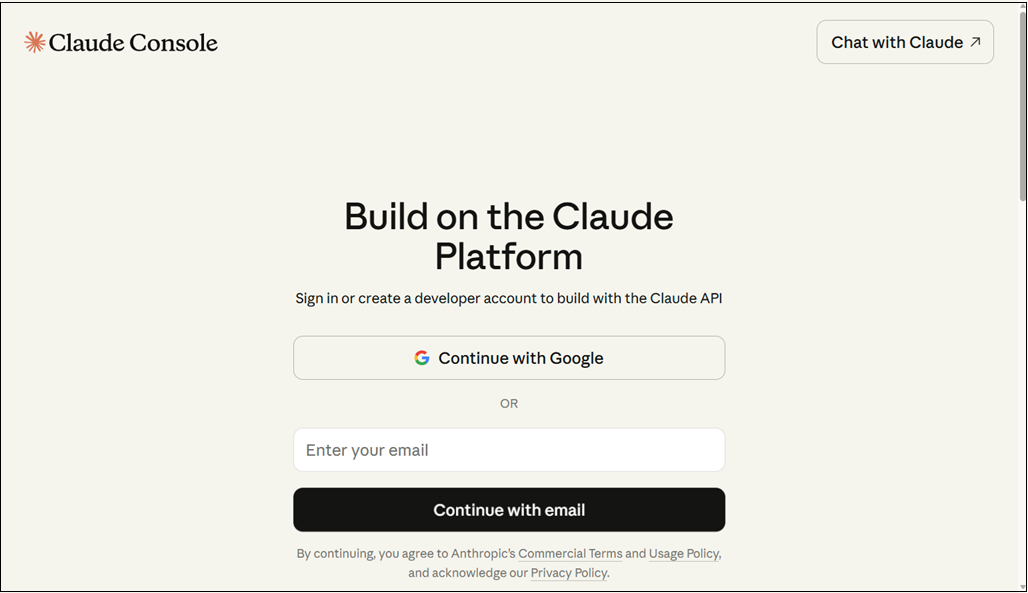
You will need to create an account on the Claude platform, create an API key, and purchase some credits. This API key will be con
- Navigate to platform.claude.com and create a free account.
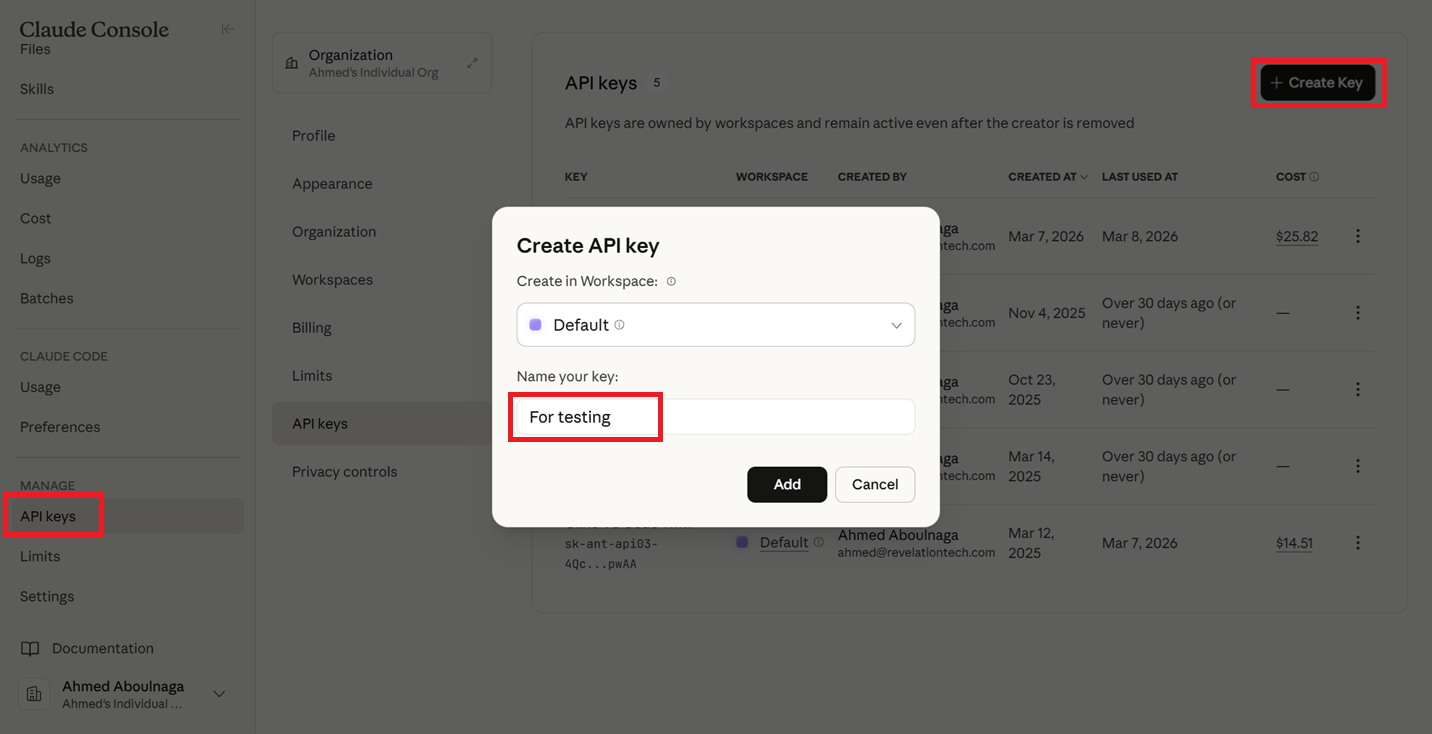
- After logging in, click on "API Keys --> Create Key", give your key any name, click "Add", and copy the value of the API and store it somewhere (it will never be displayed again, so save it someplace safe!).
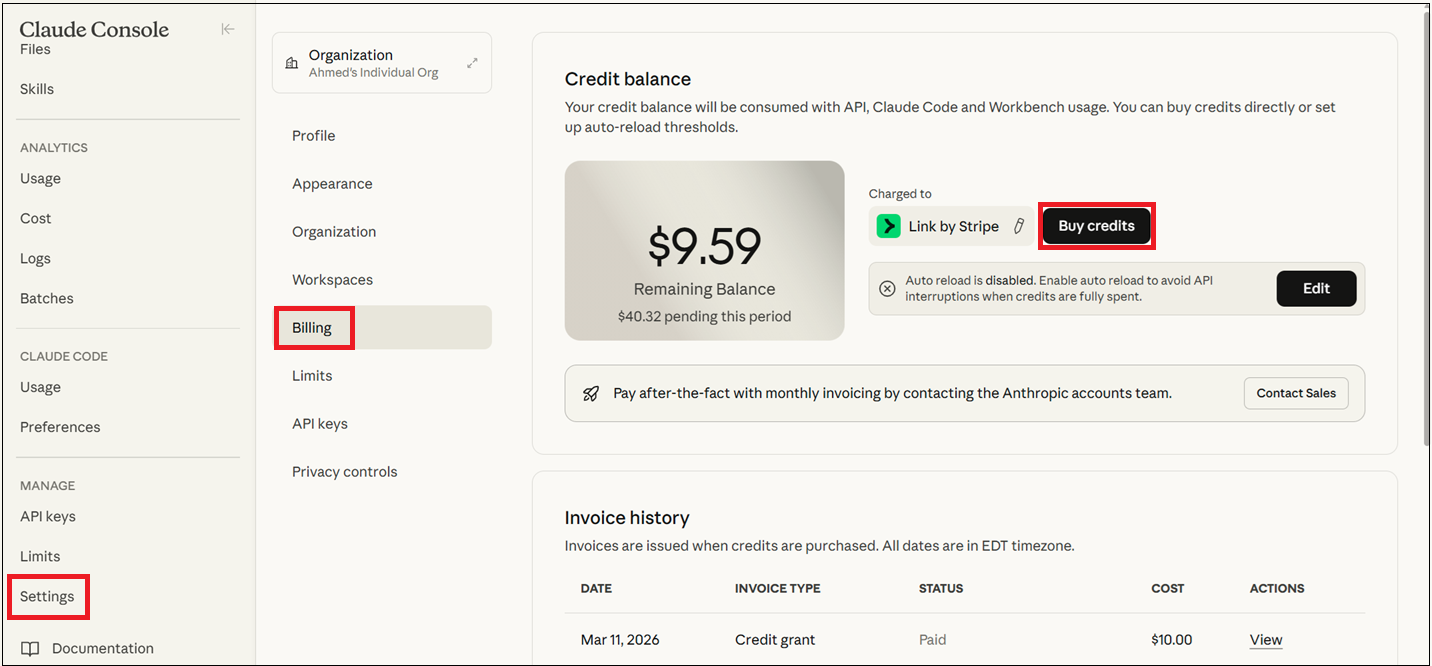
- Click on "Settings --> Billing --> Buy credits" and purchase any amount of credits to start with (e.g., $10).
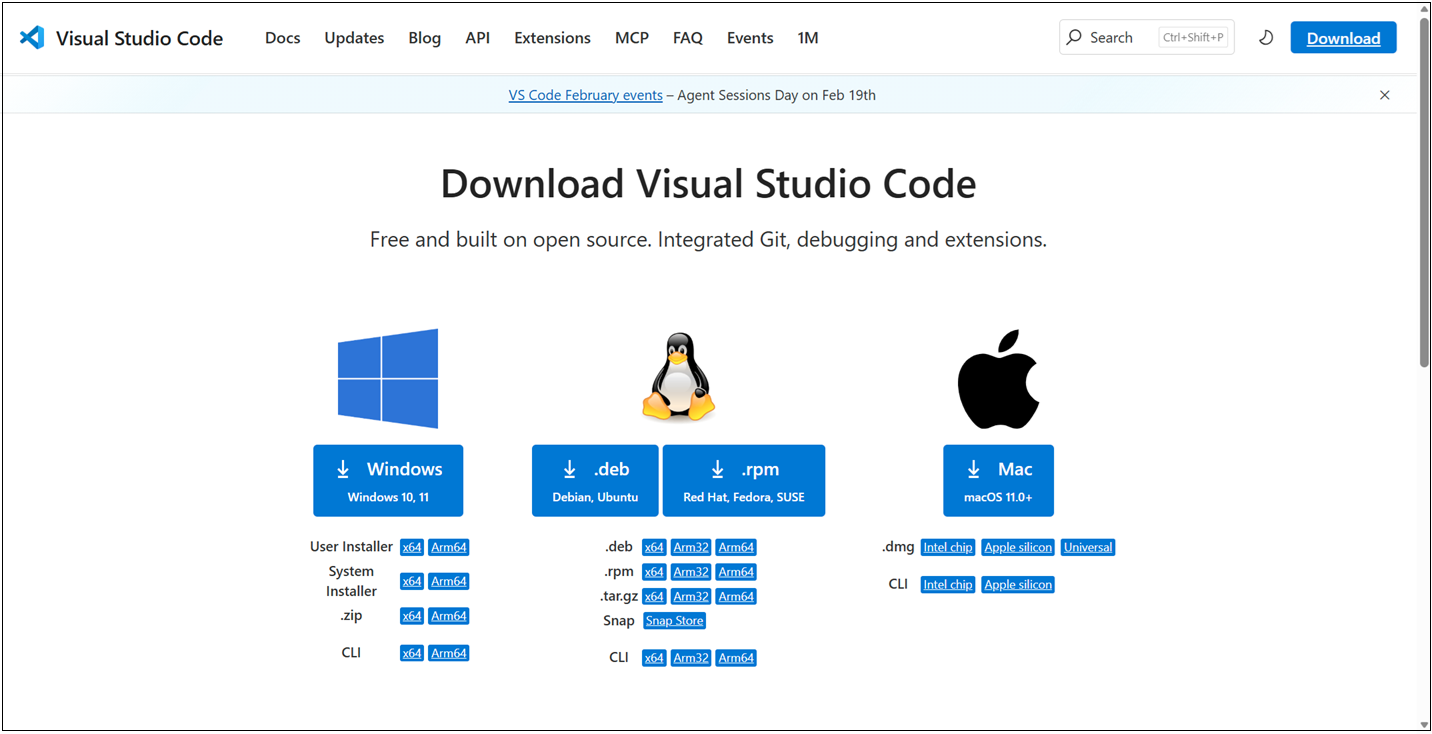
2. Download and install VS Code
Download and install the VS Code IDE. This is a straightforward process.
- Navigate to code.visualstudio.com/download, then download and install the software.
3. Install the Cline extension in VS Code
Cline is an autonomous coding agent that is used inside VS Code and is available via an extension. Alternatives include Claude Code and Oracle Code Assist.
- Open VS Code.
- Click on the "Extensions" button on the left.
- Search for "cline".
- Click on "Install".
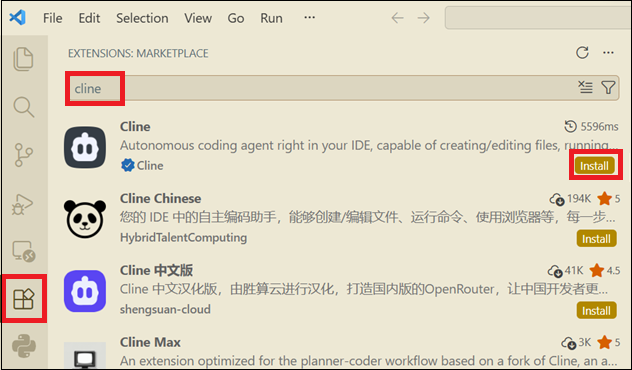
Cline is now ready for use.
4. Set up your API provider and model in Cline
Now that Cline is installed, it's not still ready for use. Cline relies on a 3rd party LLM model of your choice. Now that we've created an API key within Claude from earlier, we will use those values here.
- If the Cline sidebar is not showing in VS Code, click on the Toggle Secondary Side Bar button on the top right or click CTRL+ALT+B.
- Click on the Settings icon.
- Select "Anthropic" as the API Provider.
- Enter the API key that you created in the Claude platform console.
- Select a model such as "claude-sonnet-4.6".
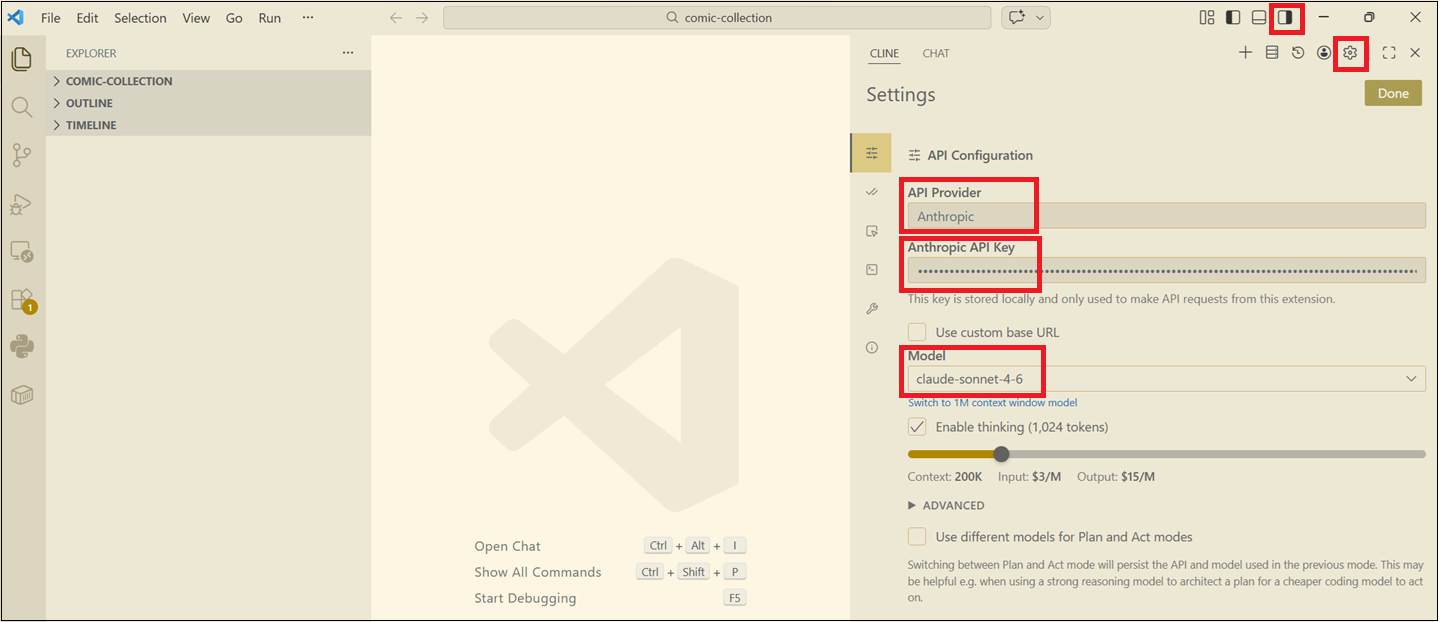
Now Cline, your AI chatbot and agent, is ready for use!
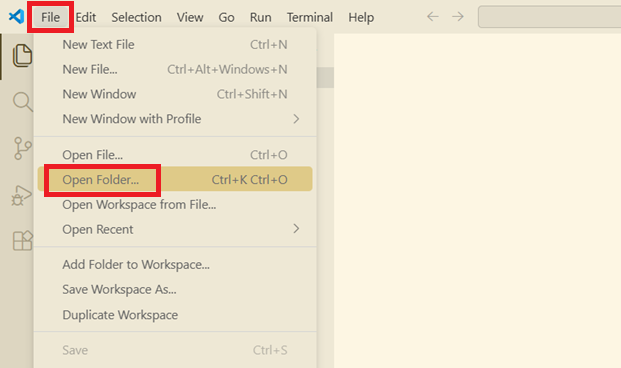
5. Create an empty project
Start with an empty project.
- Click on "File".
- Click on "Open Folder" and select an empty folder on your local file system.
6. Add a Cline rules files (optional)
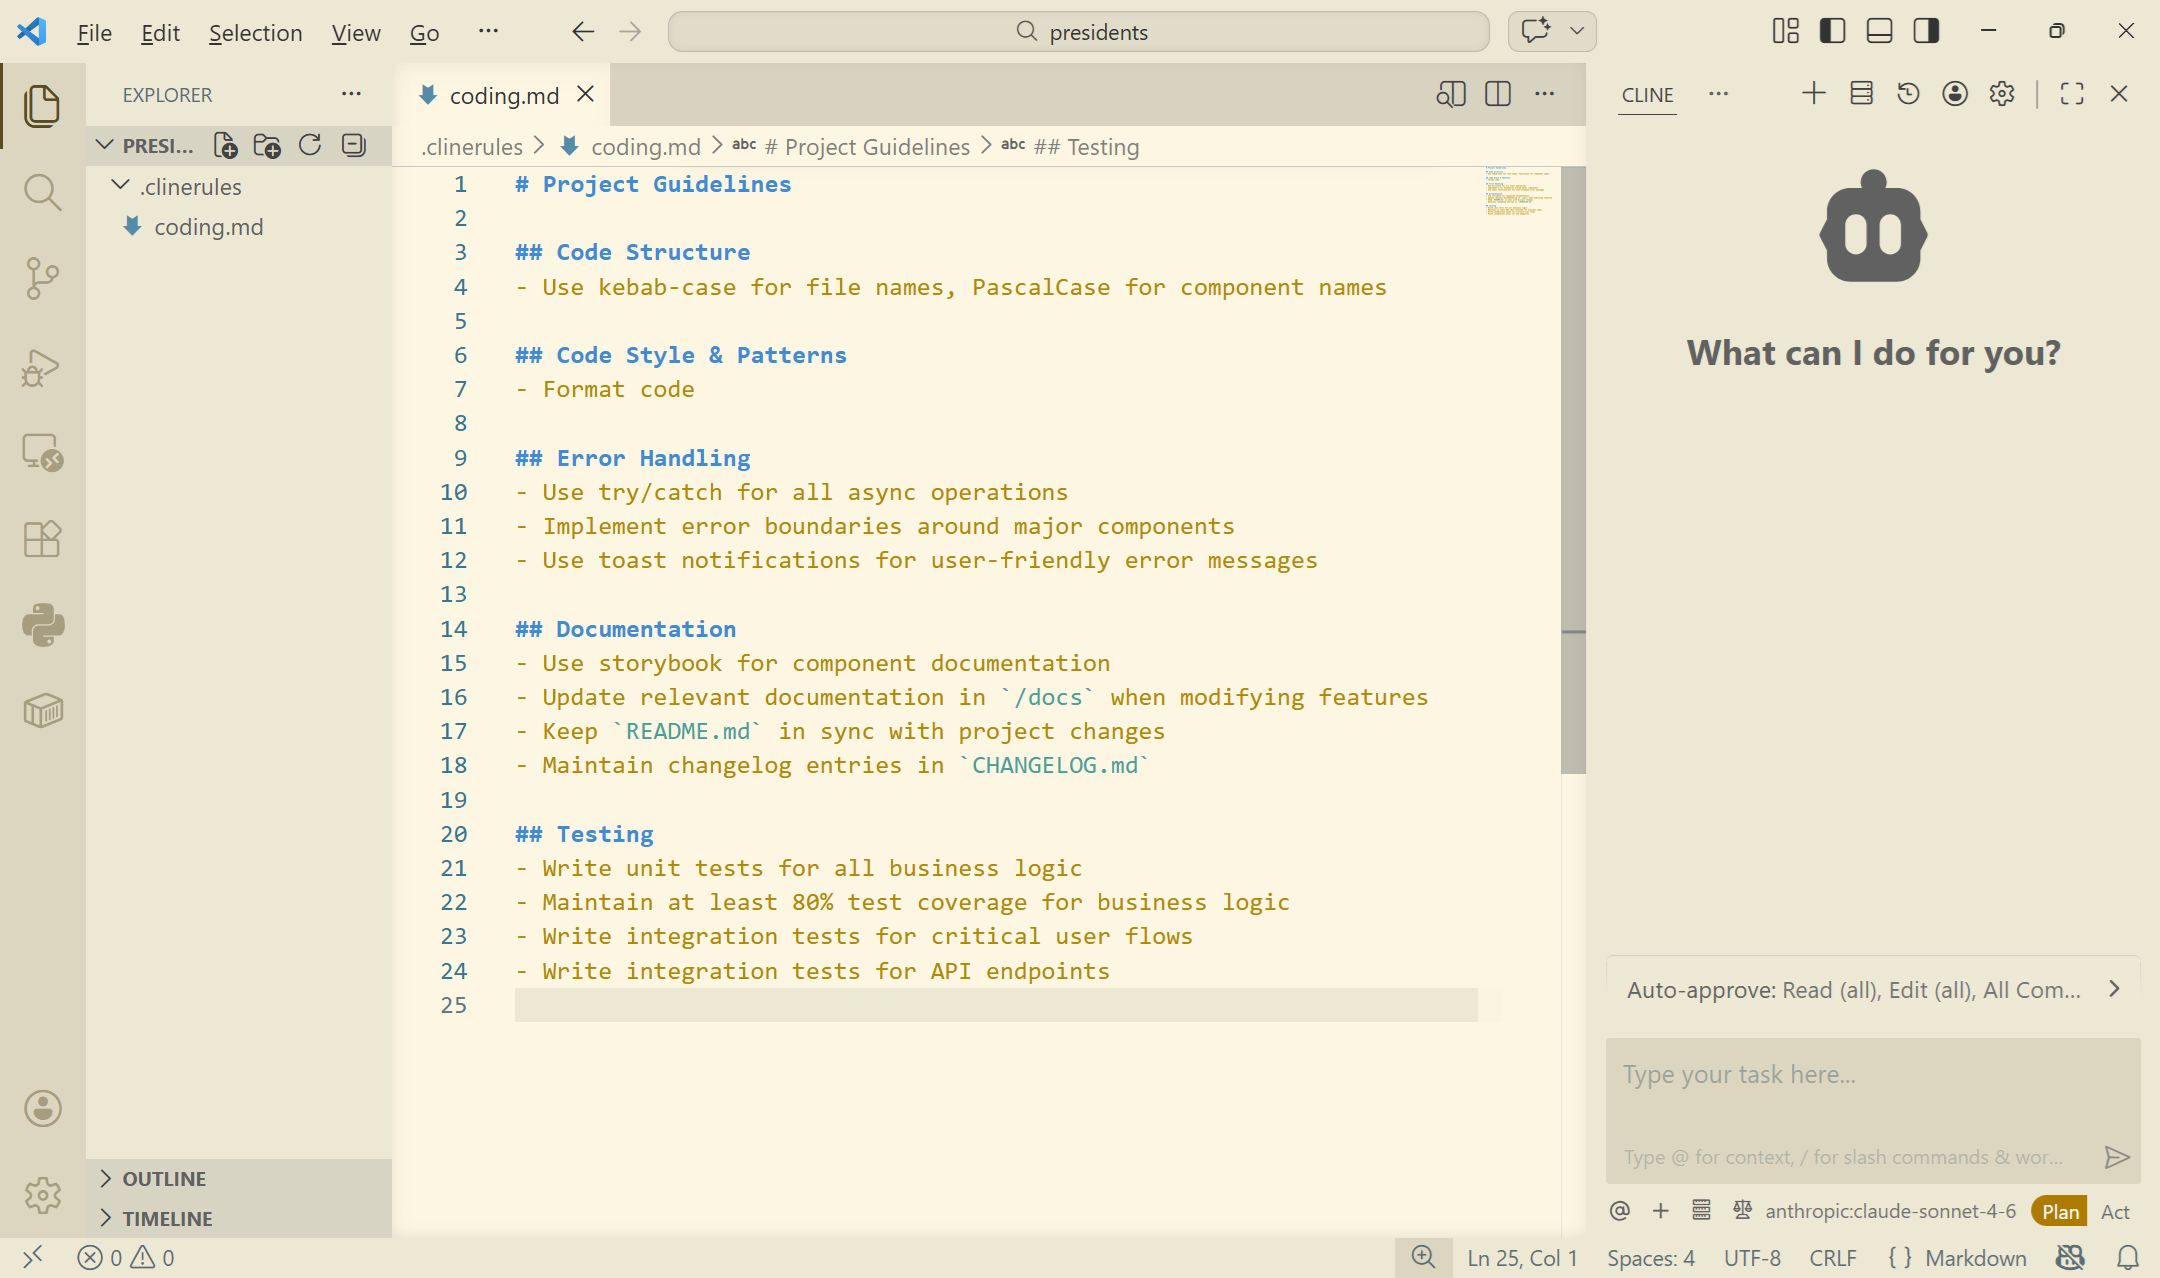
Cline rules files are markdown documents (.md files) that define persistent instructions and coding standards for Cline, stored in the /.clinerules directory to maintain consistent behavior across sessions.
Cline rules serve as a persistent memory for Cline, which otherwise resets completely between sessions, ensuring consistent behavior and adherence to project-specific standards.
- Create a subfolder in your project called
.clinerules. - Create one or more filenames (e.g.,
coding.md,testing.md) and in plain English describe the rules for your standards.
Below is a single rules files that I created with some basic rules. If you are using a specific programming language, you can be more specific in your rules and coding standards.
7. Decide on auto-approve for the AI agent
Before you start engaging with Cline (by pressing the play button, highlighted in red), note the sections highlighted in blue first.
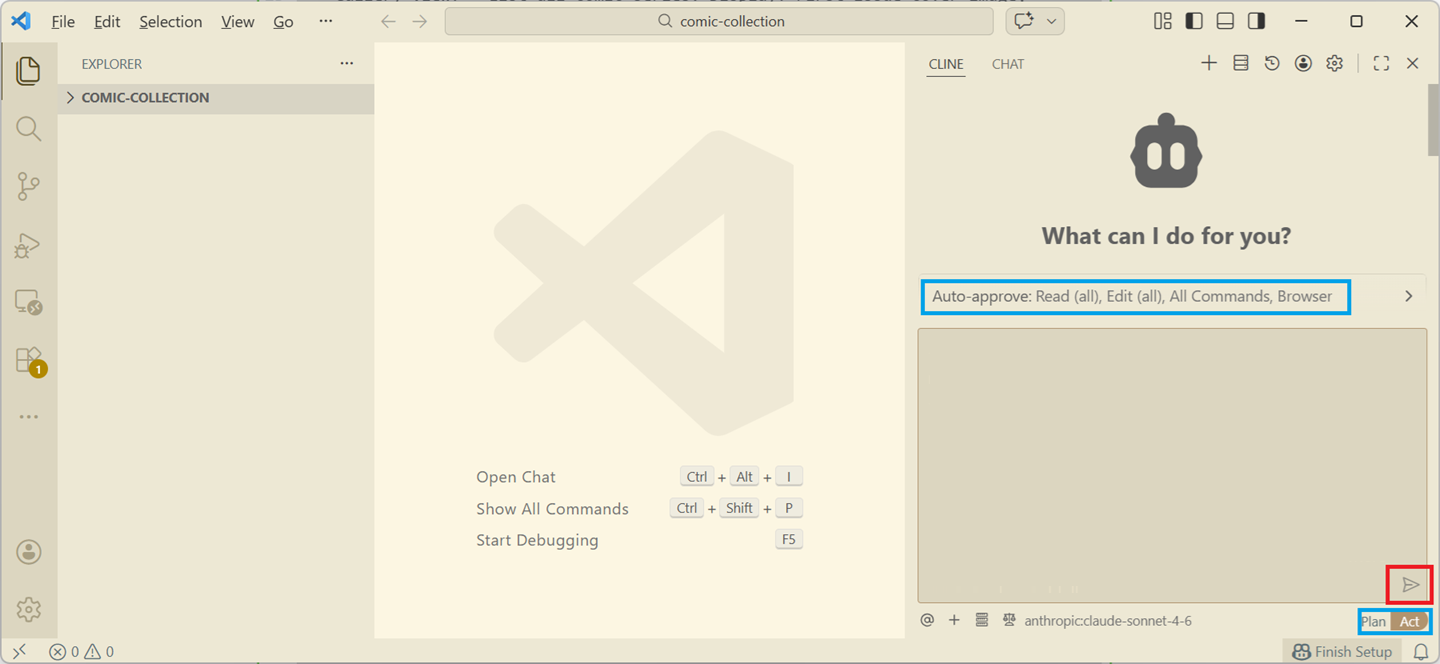
It's important to understand a few things.
Plan or Act?
Typically, you want to select "Plan" first. Cline here generates a step-by-step strategy and it doesn't actually do anything. It will not create any code. It will not perform any actions. It will simply present you with a proposed plan of what it intends on doing. This allows you to refine your design before asking the AI agent to implement it.
With Plan:
- No changes are made.
- No files are edited.
- No commands are executed.
Agentic AI systems can be dangerous if they act immediately. Plan gives you a preview of the AI's reasoning and intended actions.
In Act mode, Cline executes the plan.
It will read and edit files, run terminal commands, download and install dependencies, run builds, create and update code, and so on.
Auto-approve or not?
Auto-approve controls whether the developer must approve each operation during Act mode.
If auto-approve is on, as shown in the last figure above, Cline will automatically perform certain actions without asking. It is not unusual to be asked for hundreds of approvals in a single session, so setting auto-approve may seem tempting, but it obviously comes with its risks.

In this exercise, I had set auto-approve on every action; reading files, editing files, and executing commands.
8. Write an initial prompt to design your application
In a text editor, start by creating a prompt of the application. Here is the prompt I spent time writing for my "Presidents of the United States" application.
1. PROJECT NAME: "Presidents of the United States"
Act as an expert Full-Stack Cloud Architect and Python Developer. Your goal is to build a modern, serverless web application deployed on Oracle Cloud Infrastructure (OCI) using Python.
2 GOAL:
- Create a simple, modern, visually impressive web application that provides basic information of all presidents of the United States of America.
3. FUNCTIONAL REQUIREMENTS:
- The web application will be called "Presidents of the United States".
- The web application should use a modern, responsive UI.
- The web application should default to a dark mode style, but provide the ability to switch to a light style.
- The welcome page of the application should be a simple welcome page, where the user clicks on "Enter" or something like that to enter the application.
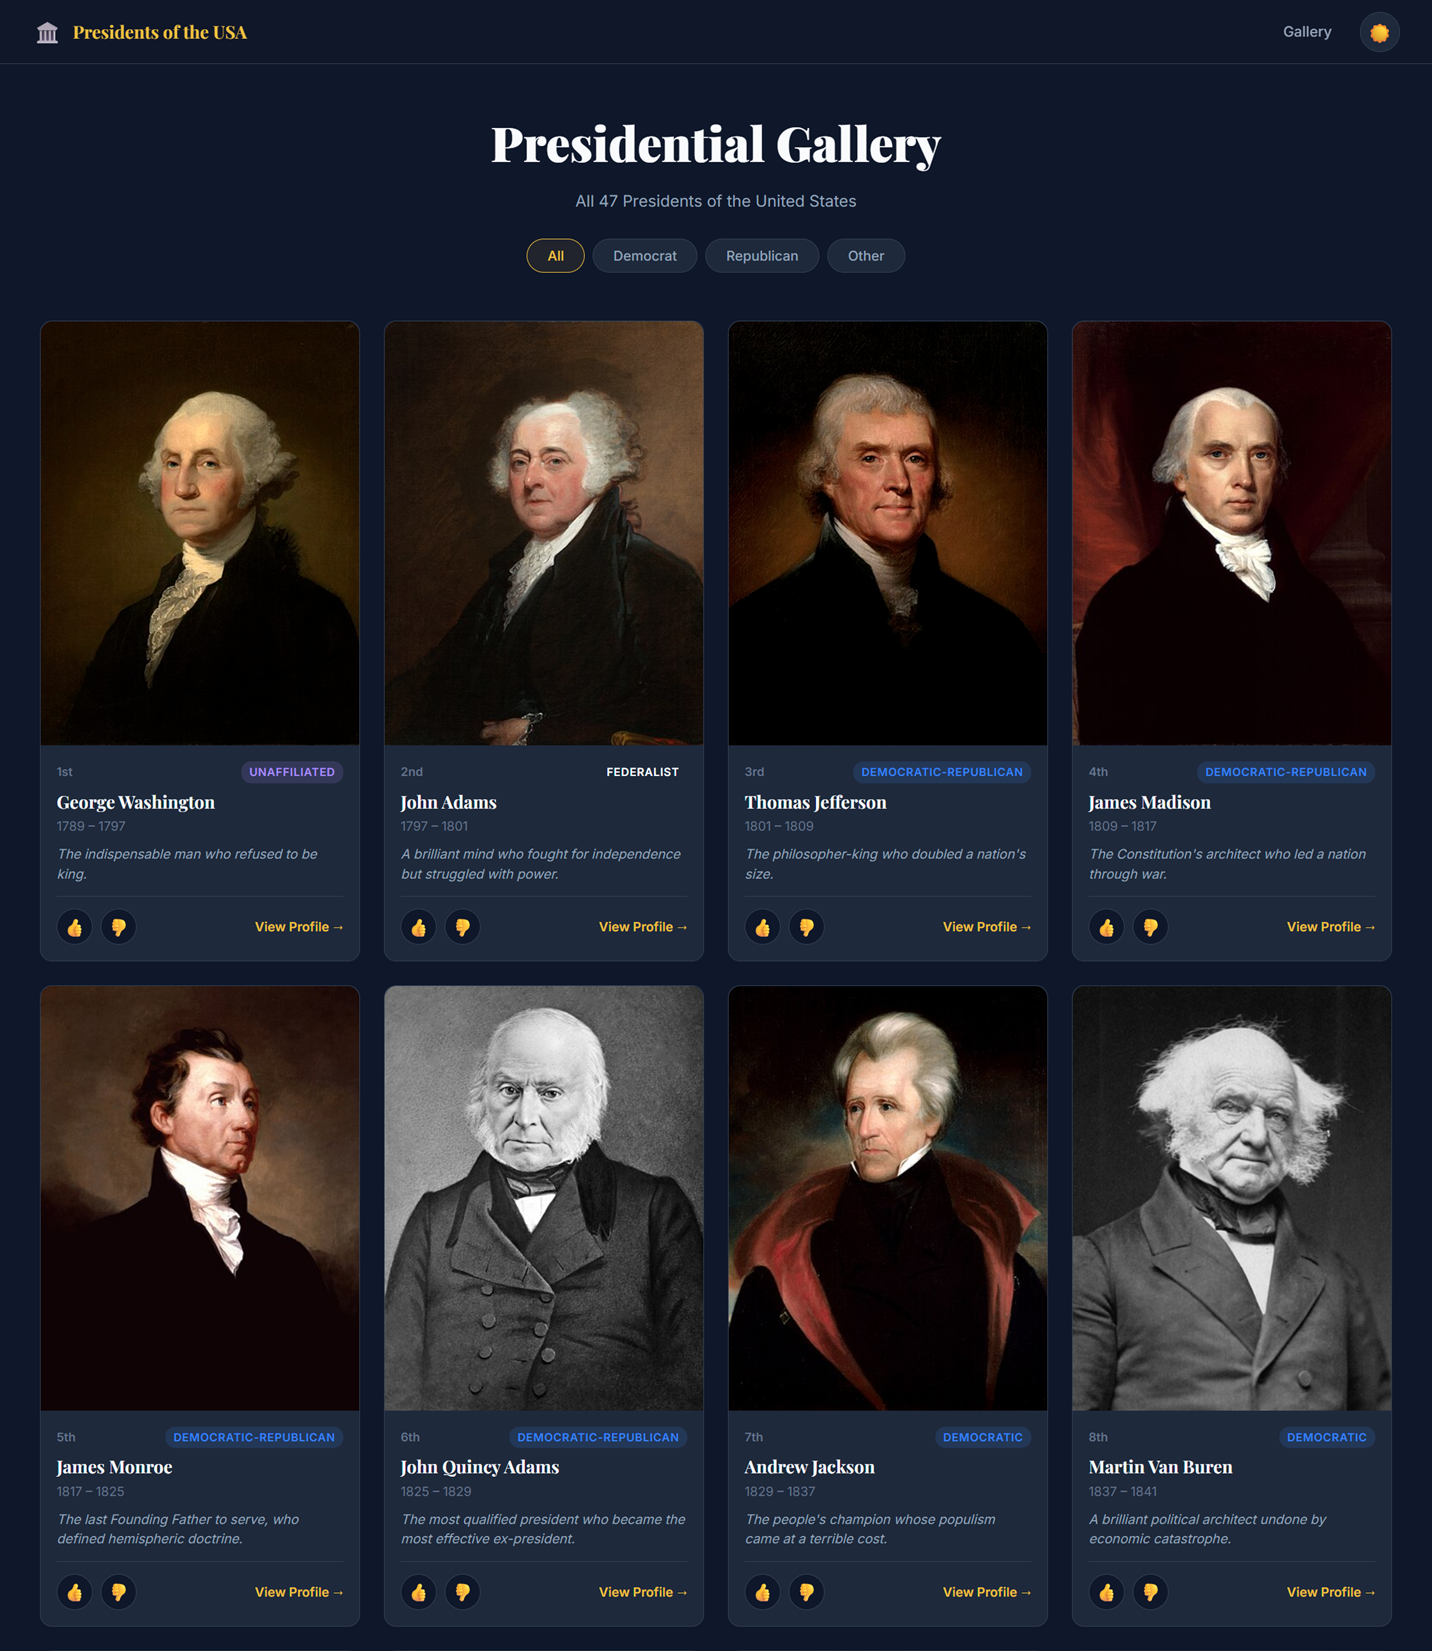
- The second page should be a gallery of every single president. Every president should have a professional looking, flattering photo.
- Each president will have a tag line under it, giving an impression of that president.
- There should be a thumbs up and a thumbs down icon. Clicking on the thumbs up icon will show a popup with text that describes a notable or impressive feat this president has done. Clicking on the thumbs down icon will show a popup with text that describes a major failing or shameful act that this present has done.
- There should be an option to click on the president to take it to a detailed page of the president.
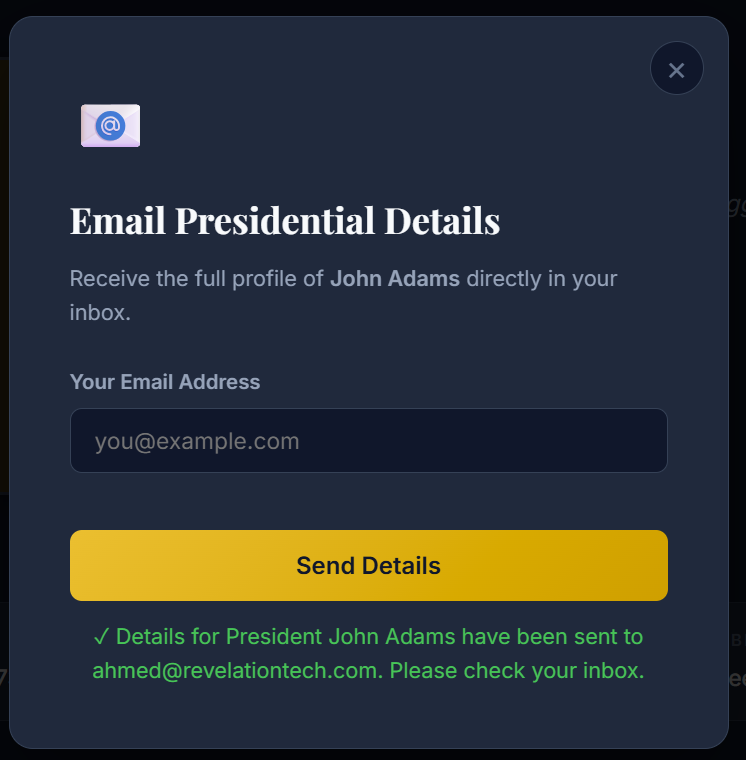
- The detailed page should provide at least a page of details of each president. On this page, there should be a mail icon, where clicking it will popup a field that requests an email address, and the details of the president will be emailed to that email address.
4. NON-FUNCTIONAL REQUIREMENTS
- The web application should use a modern and stylistic CSS template.
- None of the pages requires authentication, so all pages are publicly accessible.
- The web application will be deployed to Oracle Cloud Infrastructure (OCI).
- Emails should be sent in HTML format using the OCI Email Delivery service.
- On the bottom of each page will be a footer that states "© 2026 Path Infotech LLC".
- Include Terraform scripts to automatically provision all required infrastructure.
- Any combination of services is acceptable, but the simpler the architecture, the better.
- The web application should be developed in Python.
- Provide test cases and instructions on how to run the test cases.
- The code should include comments describing some information throughout the code.
- Detailed instructions to create the infrastructure within OCI should be provided.
- Detailed instructions to deploy the web application to OCI should be provided.
- Include anything relevant you think should be added.
- The web application should be publicly accessible.
- The database should be Oracle Autonomous Database in OCI that stores the details of each president.
- Use a serverless architecture as much as possible.
- All OCI services provisioned should include a tag with a tag name of "webapp" and value "uspresidents".
- Use free tier services within OCI whenever possible.
- Provide instructions on how to install, setup, and execute the Infrastructure-as-Code scripts.
- Provide instructions to setting up the public/private RSA key pair on the client host where Terraform will be executed.
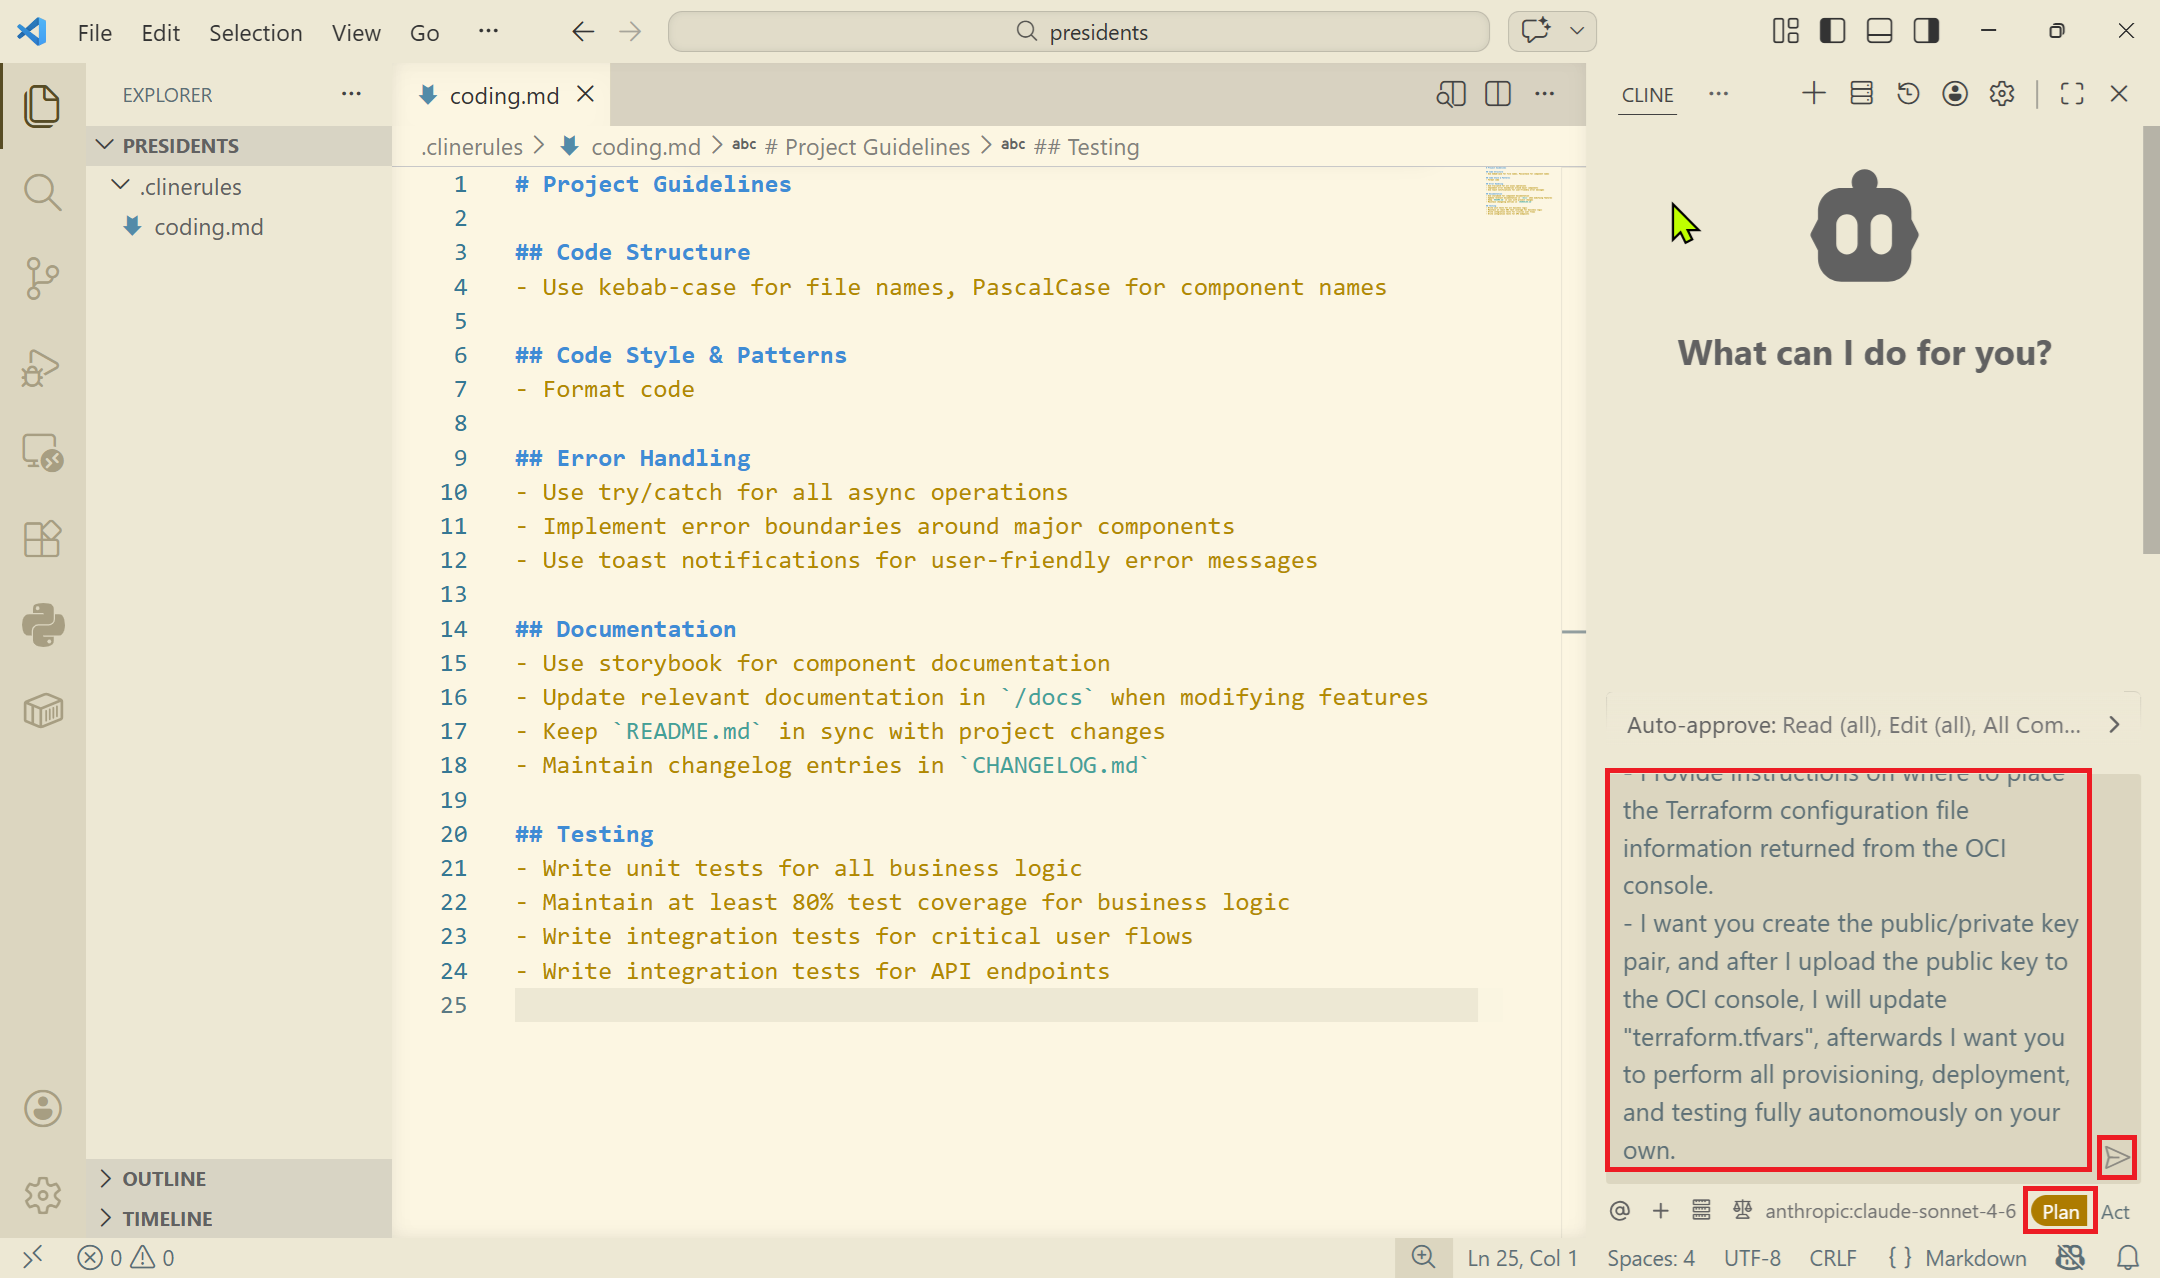
- Provide instructions on where to place the Terraform configuration file information returned from the OCI console.
- I want you create the public/private key pair, and after I upload the public key to the OCI console, I will update "terraform.tfvars", afterwards I want you to perform all provisioning, deployment, and testing fully autonomously on your own.In an ideal scenario, I would be much more specific in my functional requirements, dictating navigation paths, grid layout, text I wanted to see, and so on. I would also add more technical requirements, detailing the language, services, and frameworks I want to use, add any restrictions and constraints, and so on.
Some people like starting with a light prompt as you see above, and continue engaging the AI agent to continue refining it, while others (such as myself) prefer spending the effort up front to be as specific as possible.
5. Ask the AI agent (Cline) to create a "Plan"
Now that the prompt is created, it's time to submit it to Cline.
- Paste the entire prompt in the box.
- Click on "Plan".
- Click on the play button.
Cline will take several minutes and start spitting out output. Up until this point, the cost was $0.0801.
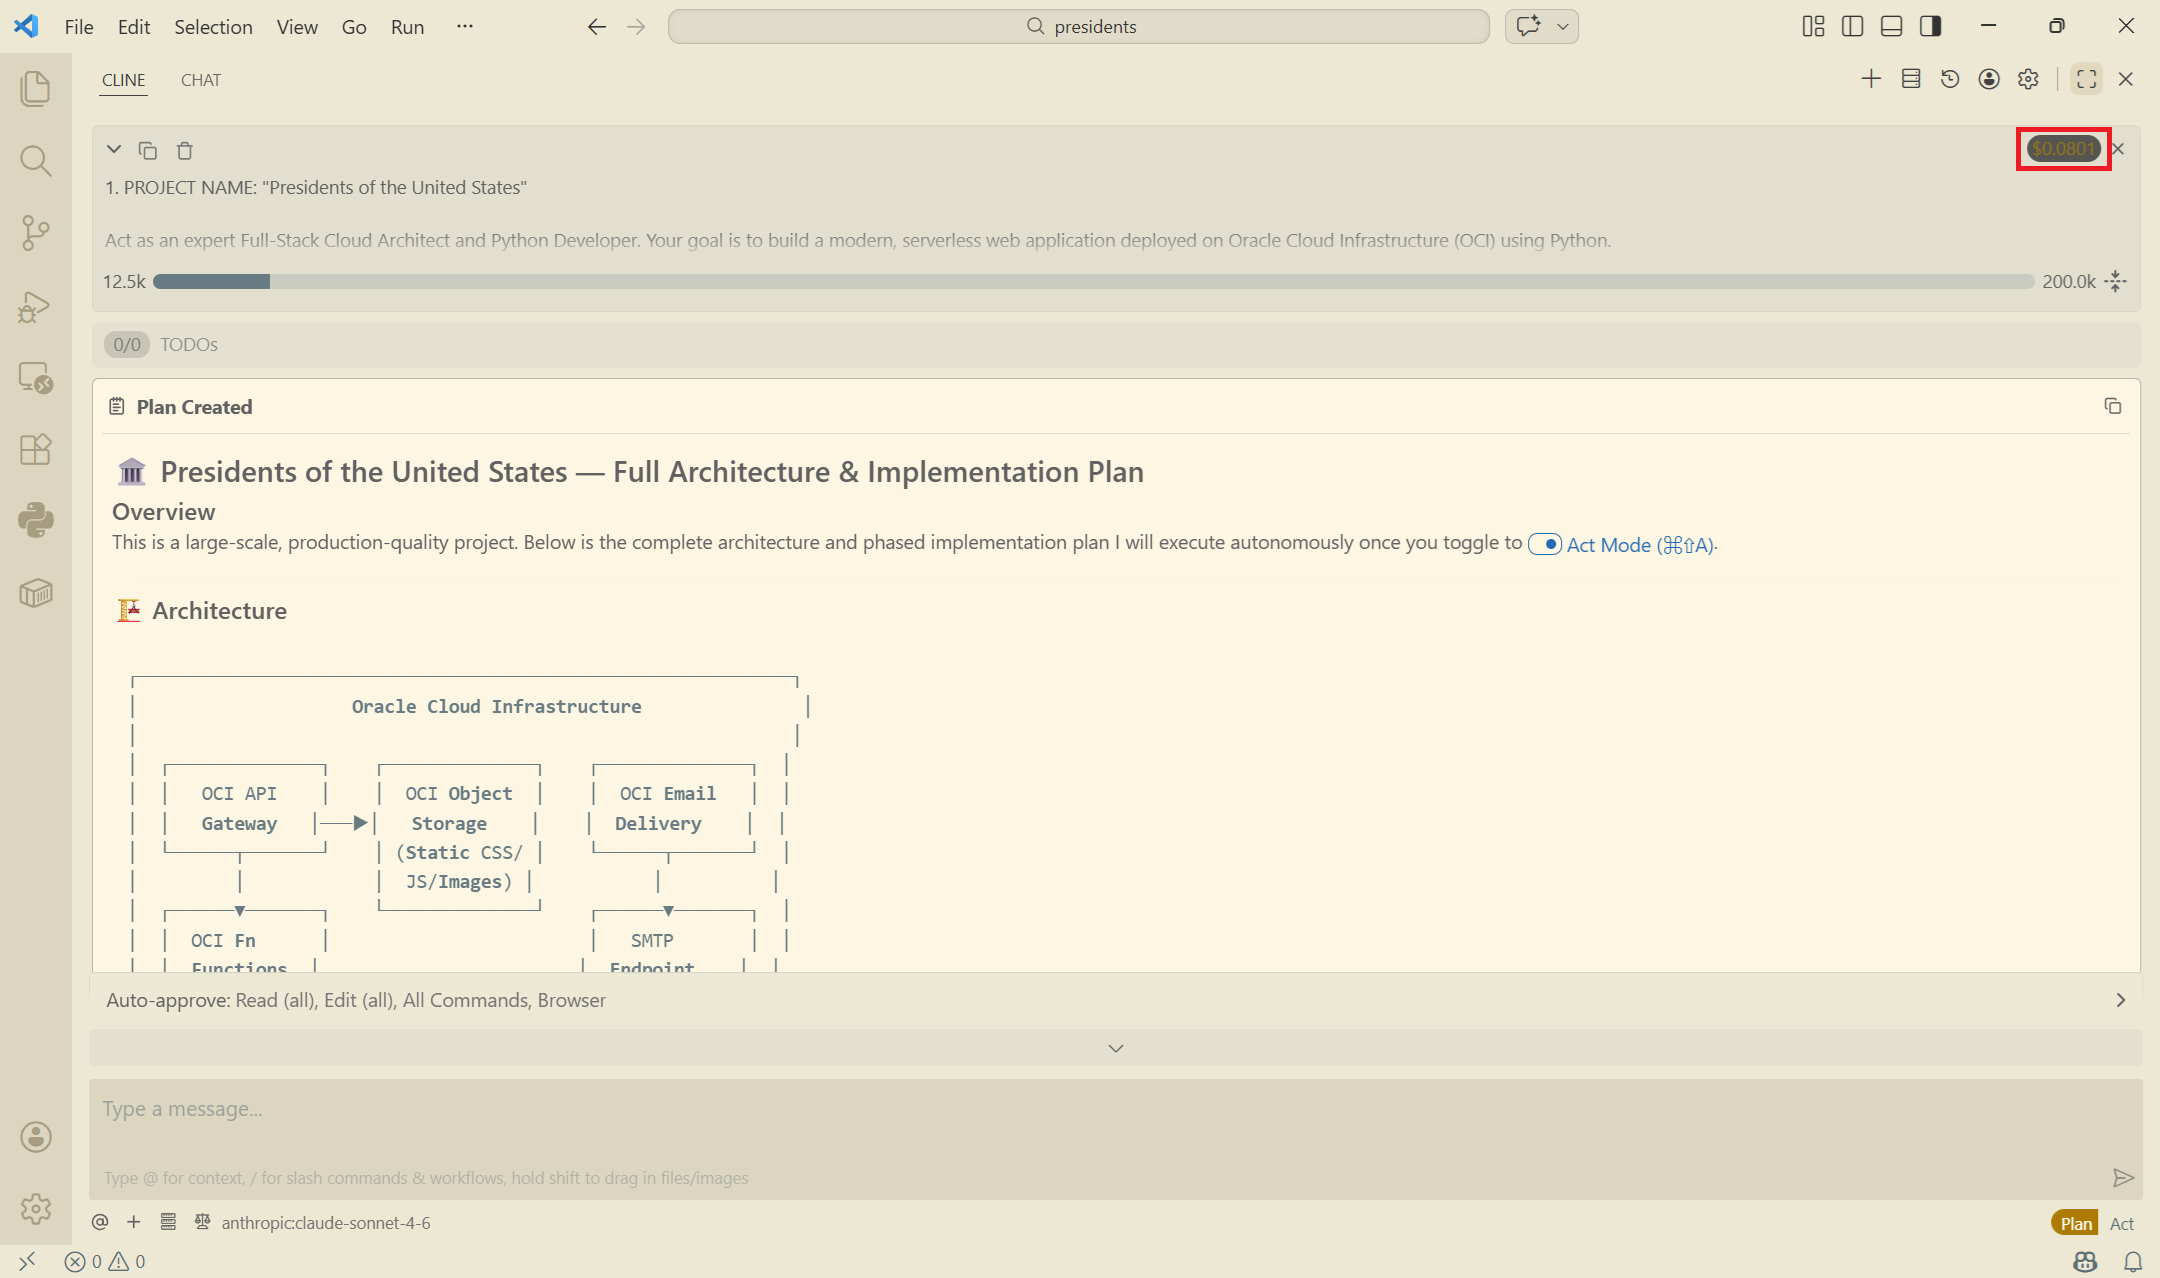
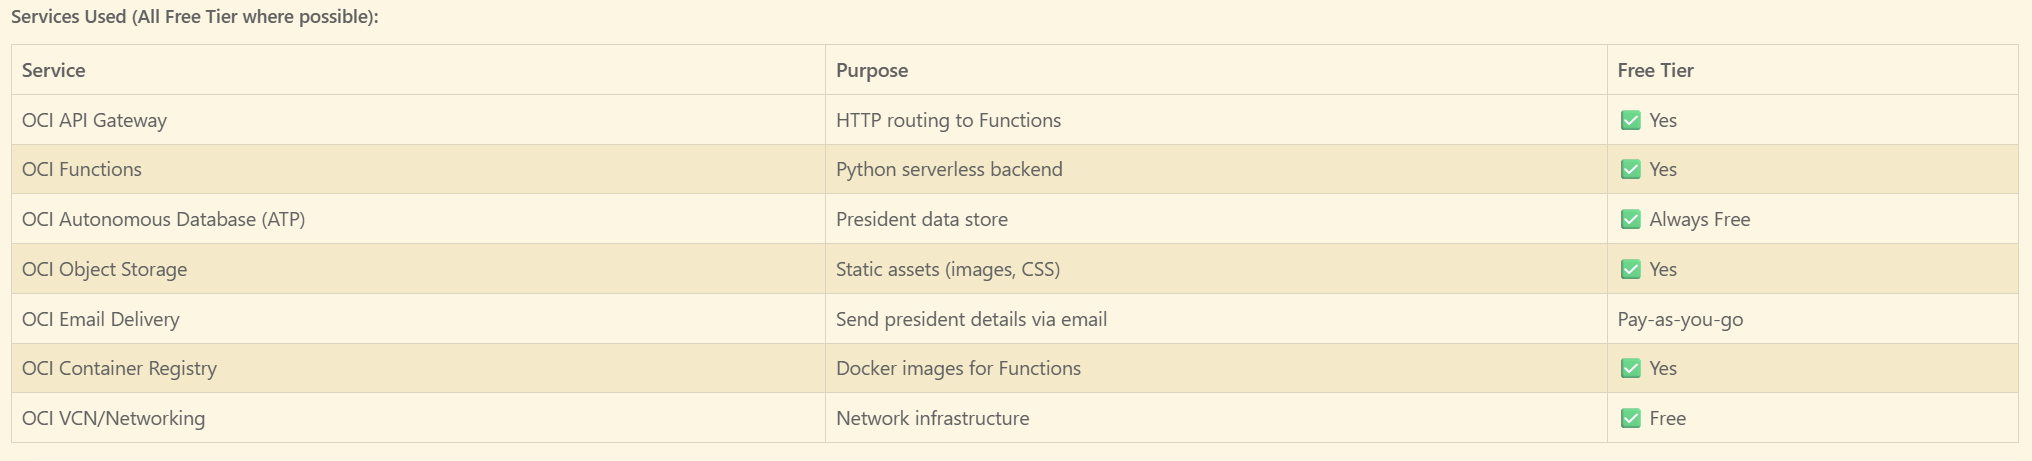
Scrolling down through the output, I can see all the services that Cline intends on using.
WARNING: The brief text architecture in the last image was not the final architecture that Cline actually used. At some point it decided to go a different route when it ran started running into deployment errors during execution.
Cline stated that it would use the API Gateway, Functions, Object Storage, and Container Registry. None of these were used in the end.
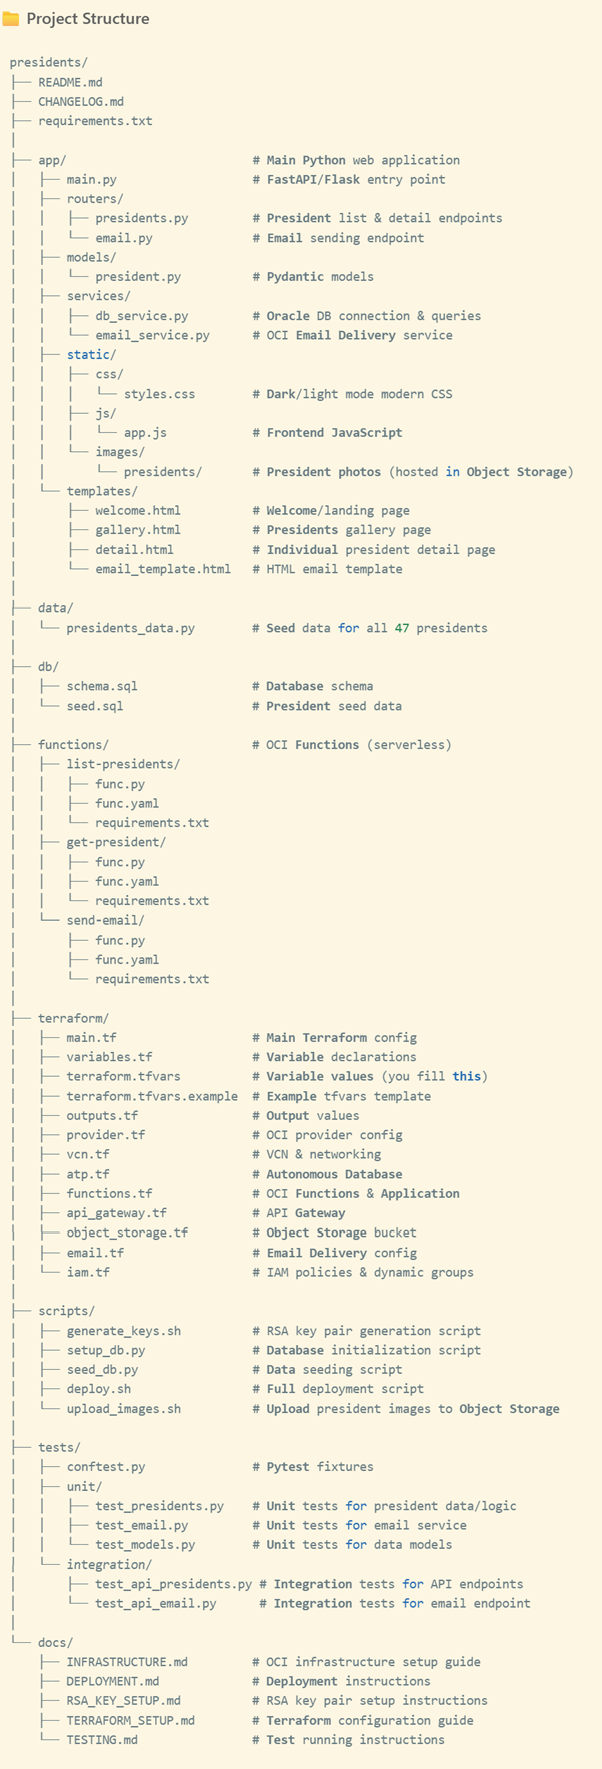
Cline laid out the entire project structure. Remember, none of this has been created yet.
At the end of the output, Cline wanted me to confirm a few things:

I responded with the following:
1. OCI Region: us-ashburn-1
2. I already have an OCI tenancy/account already set up.
3. Email address should be "noreply@revelationtech.com". Please provide instructions on how to verify the domain in OCI Email Delivery, or if you can automate it with Terraform that would be better.
4. I prefer Flask.
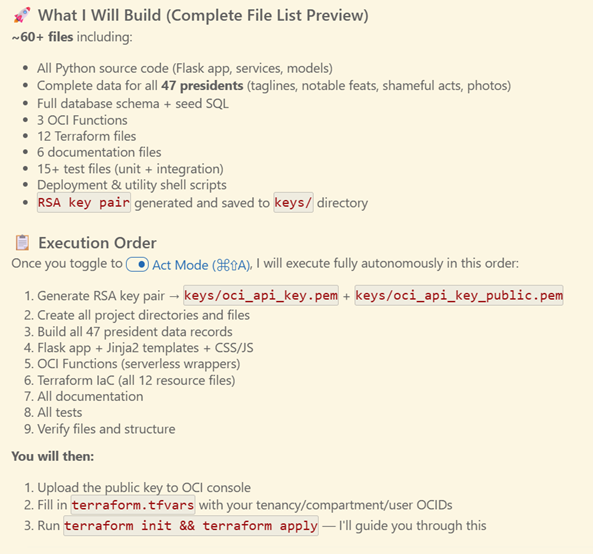
Now that Cline had its answers, it summarized the execution plan. Very few of the steps needed to be done manually as I had requested:
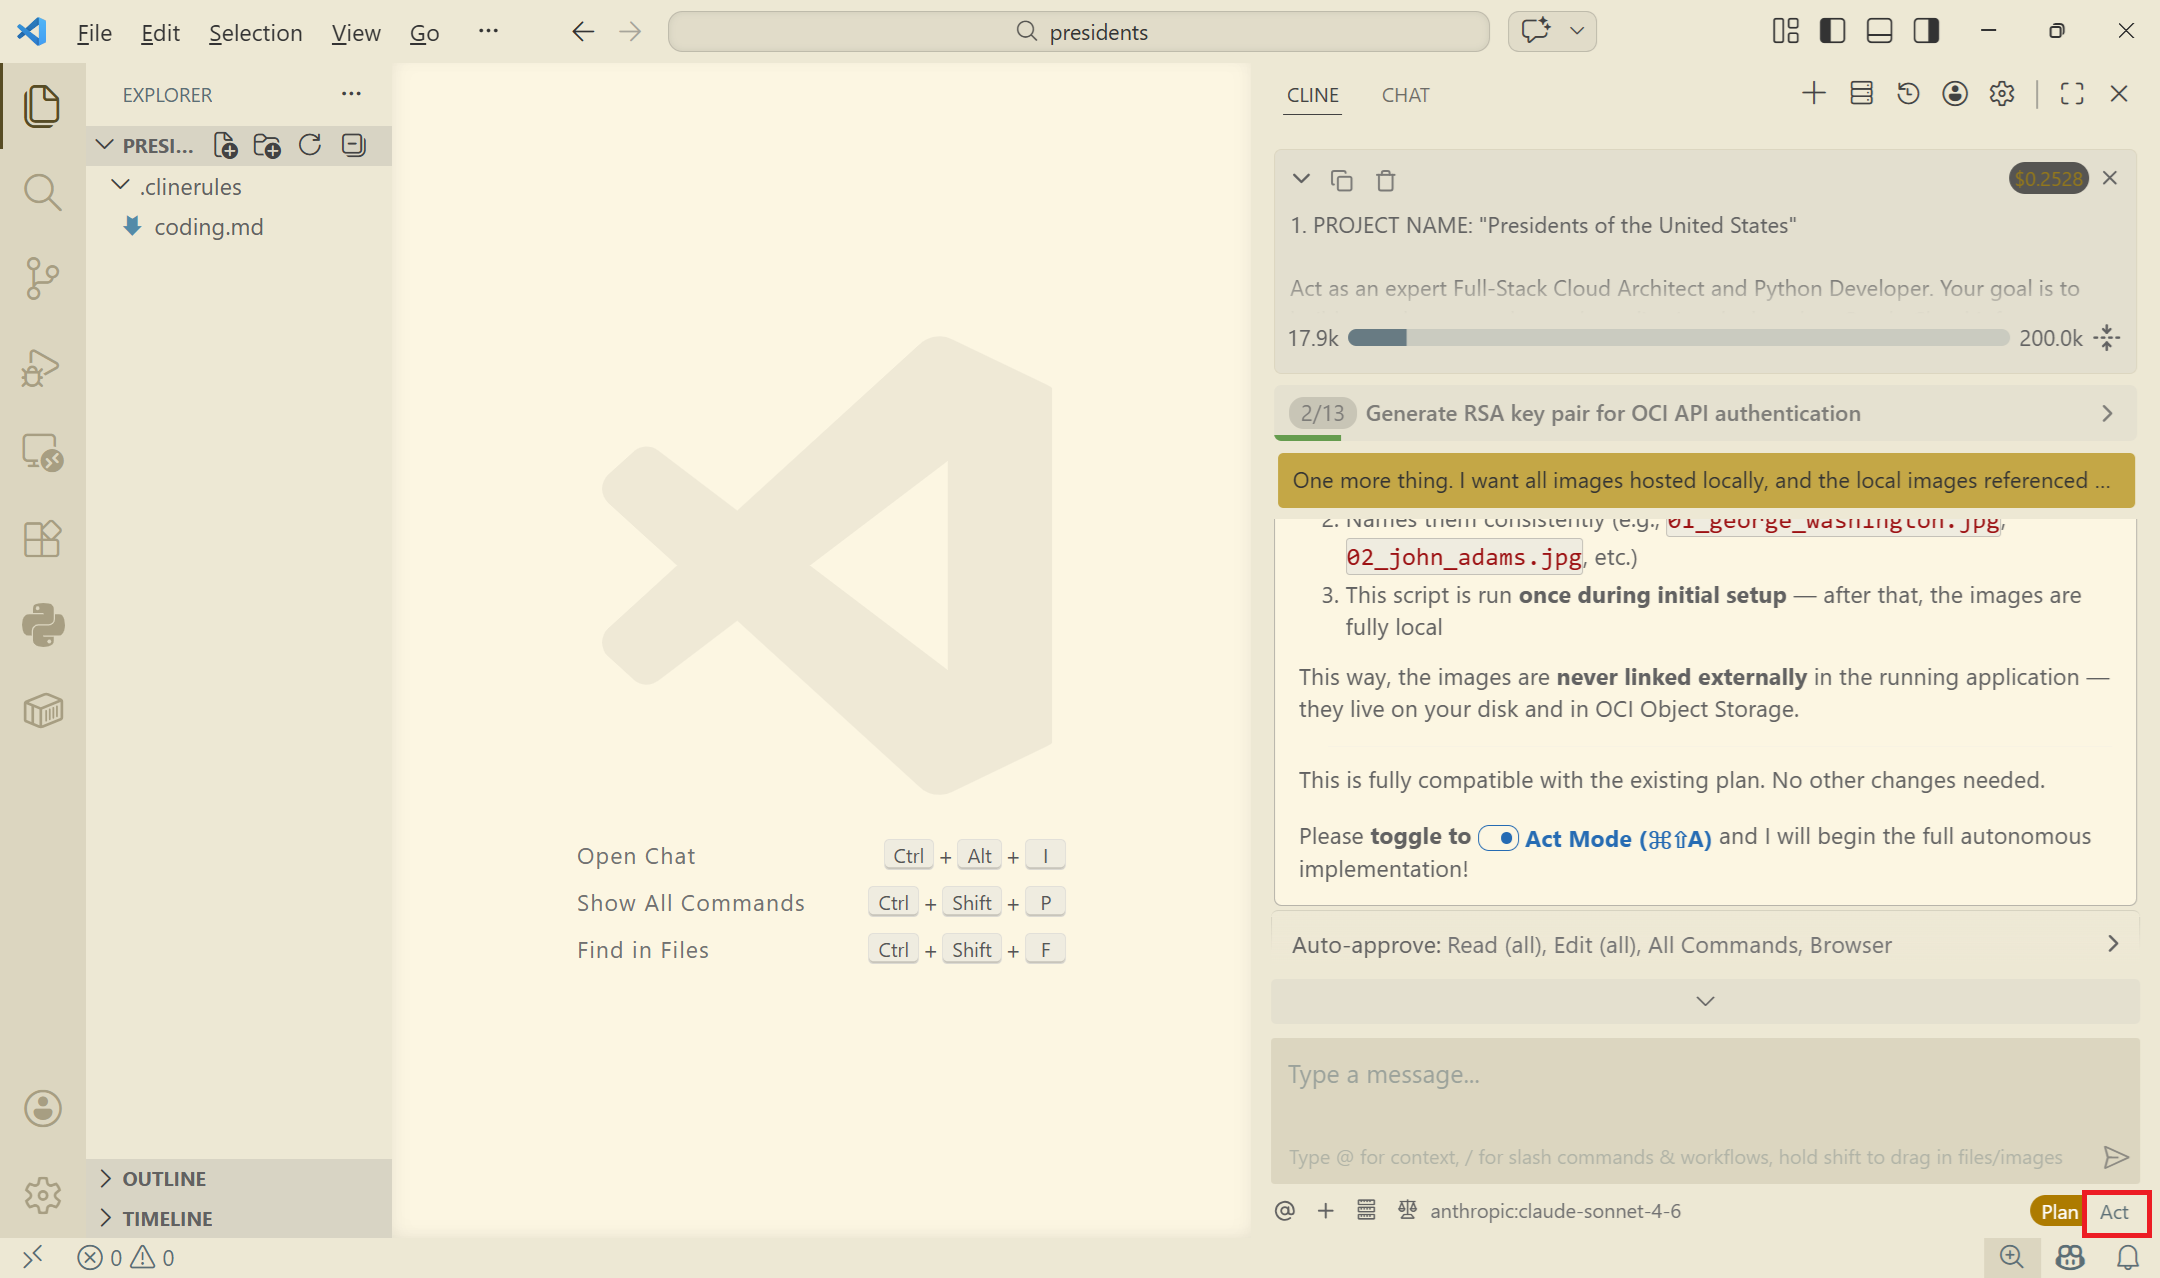
But I then noticed that Cline suggested doing a remote HTTP reference to the images. Basically, it wanted to hyperlink the images to Wikemedia directly, and I didn't want that. So I asked it the following:
One more thing. I want all images hosted locally, and the local images referenced by URL in the database. I do not want to link to the publicly available Wikimedia Commons URLs.
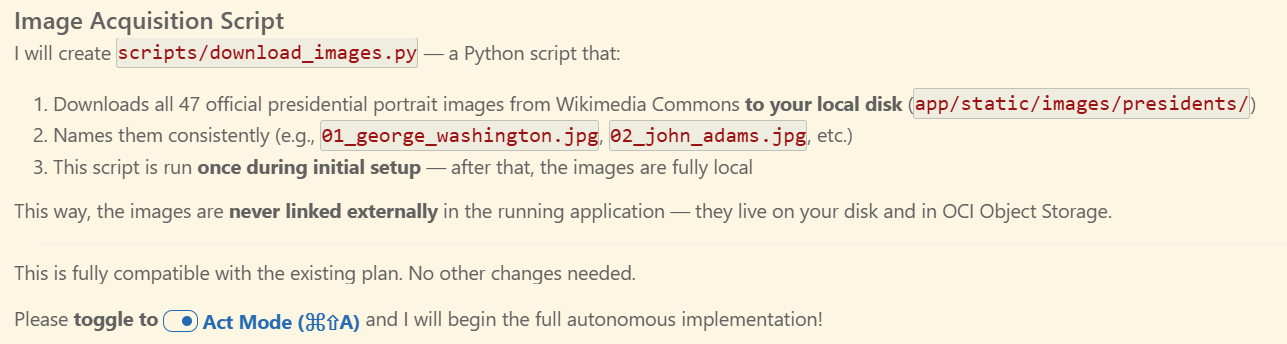
After which Cline said that it would create a download script in Python to eventually do just that:
The total final cost of the Plan phase was $0.1783 using Claude Sonnet 4.6 and took 16 minutes and 47 seconds. This included the time it took for me to respond with my follow-up prompts.
Remember, none of the above had been created up until this point.
10. Switch to "Act" mode for the AI agent to generate the code
Now that I've reviewed the plan, it's time to "Act", or execute the plan.
- Click on the "Act" button.
- If nothing happens, type a message like "Act" and click on the play button.
For the next several hours, or however long it takes, Cline will start creating all files. I asked it to create the public/private key pair for me, which it did. I needed this in order to get the API tokens from the OCI console. These tokens will later be added to the Terraform configuration files so that it can provision the cloud services.
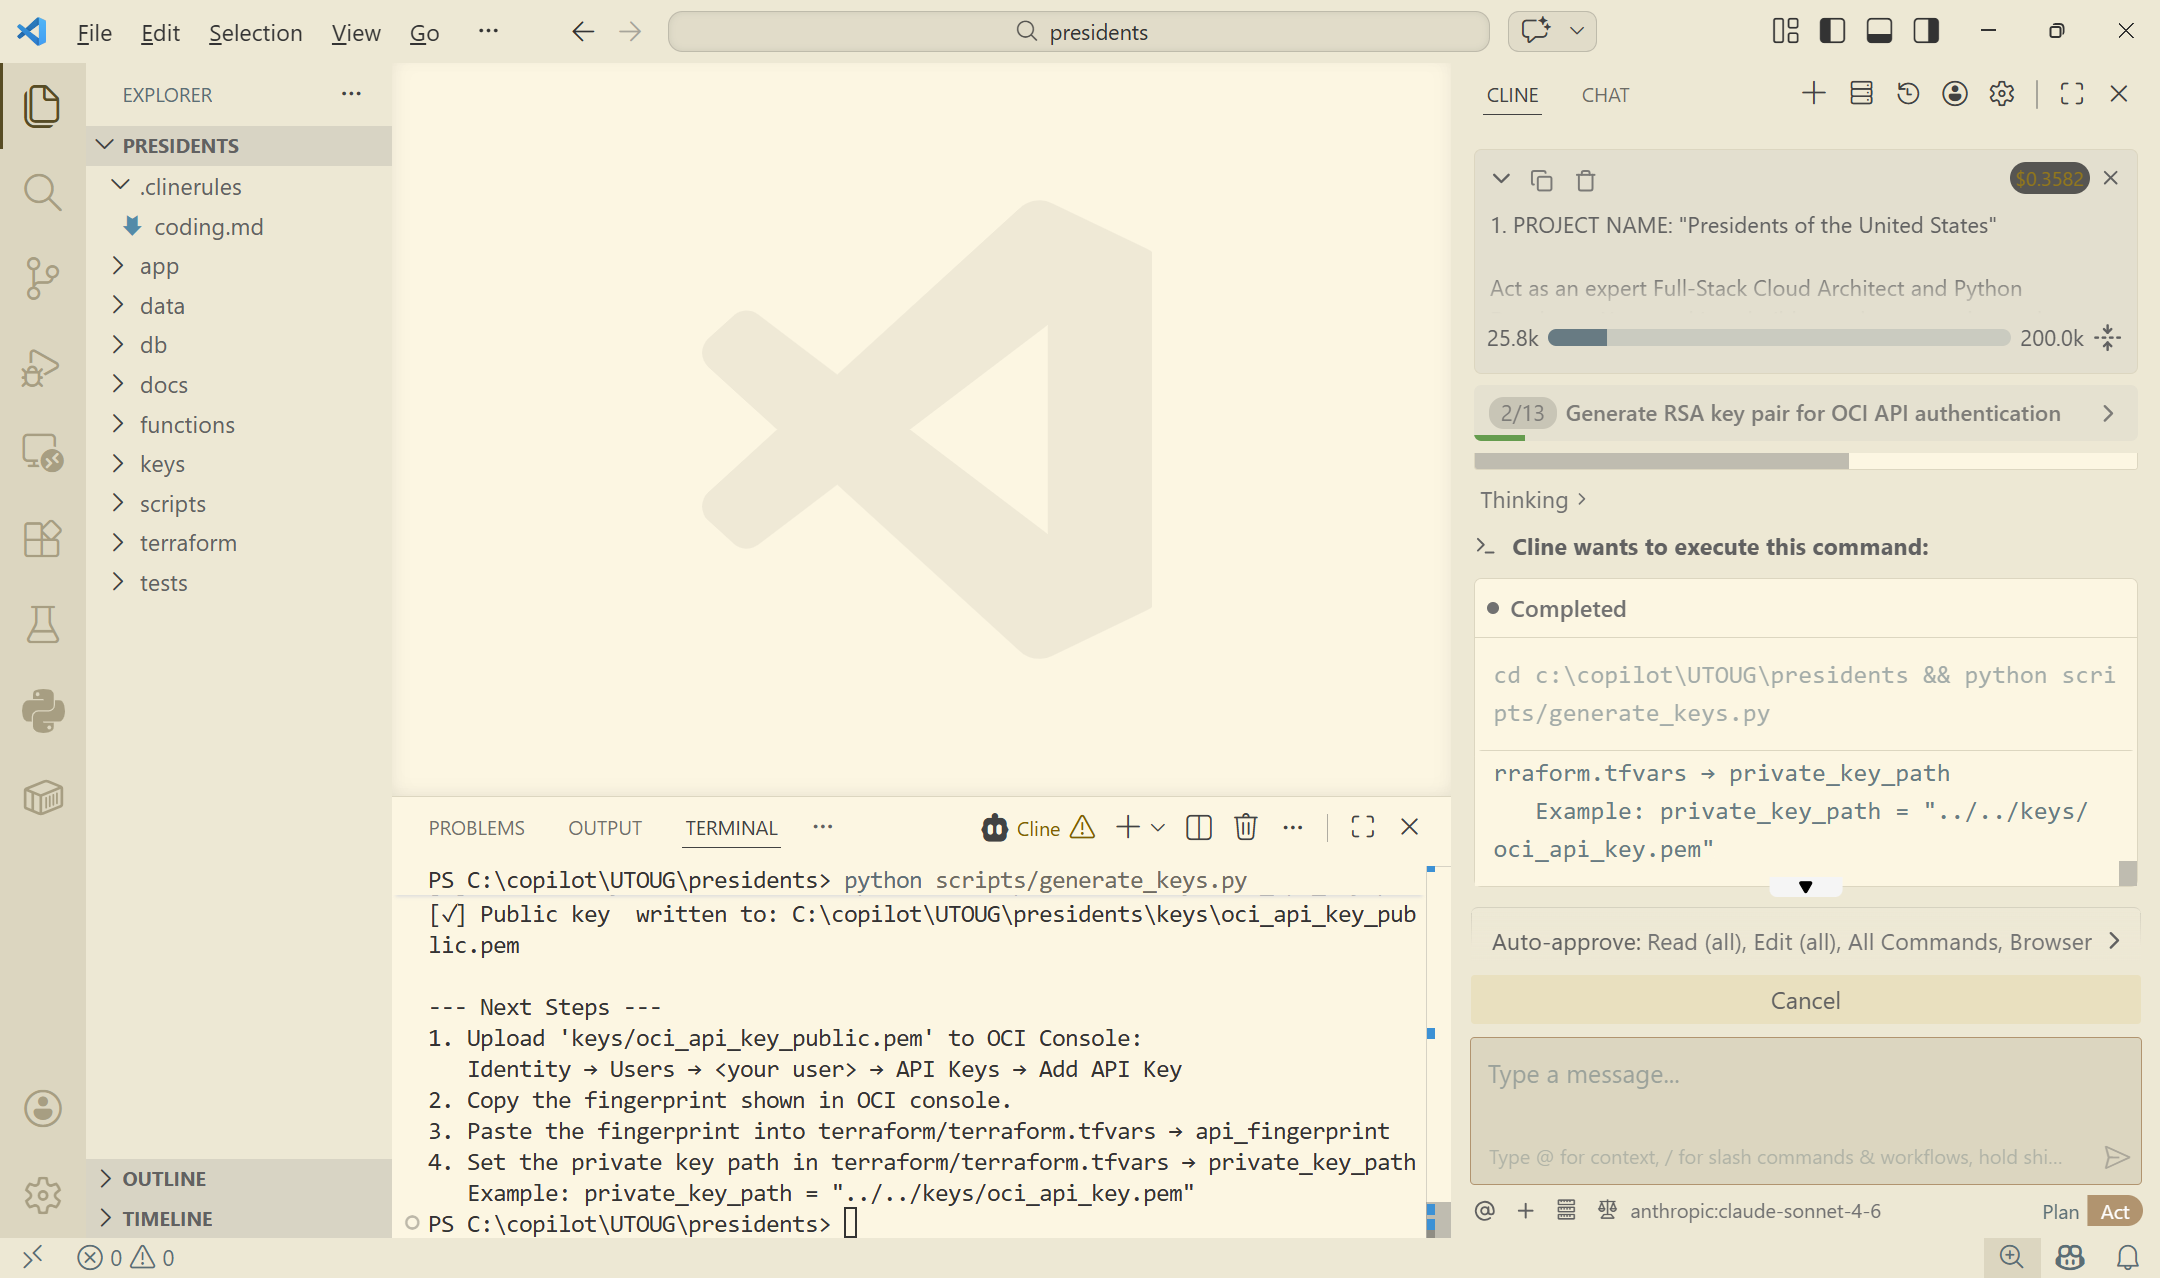
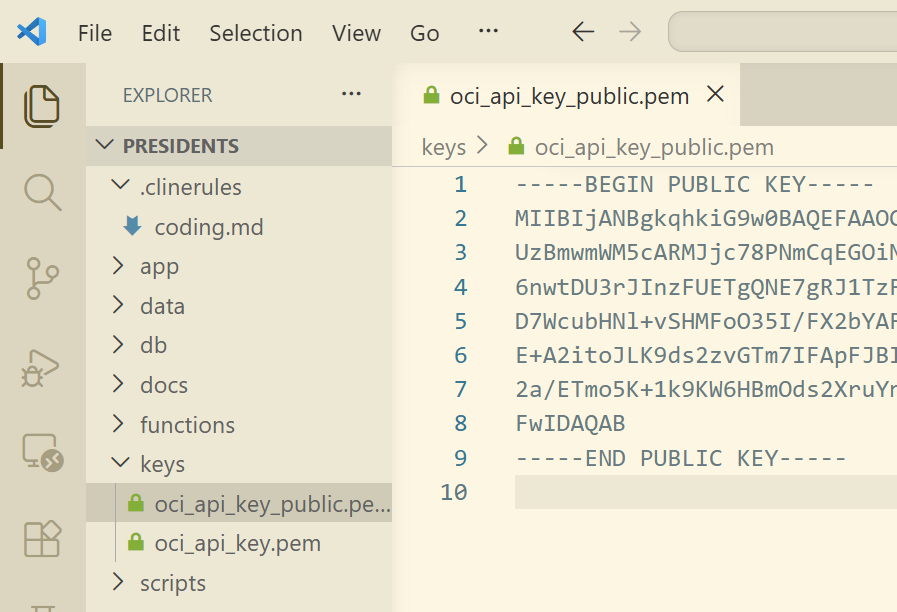
I see here that the public key was created. That's exactly what I needed.
- Copy the public key.
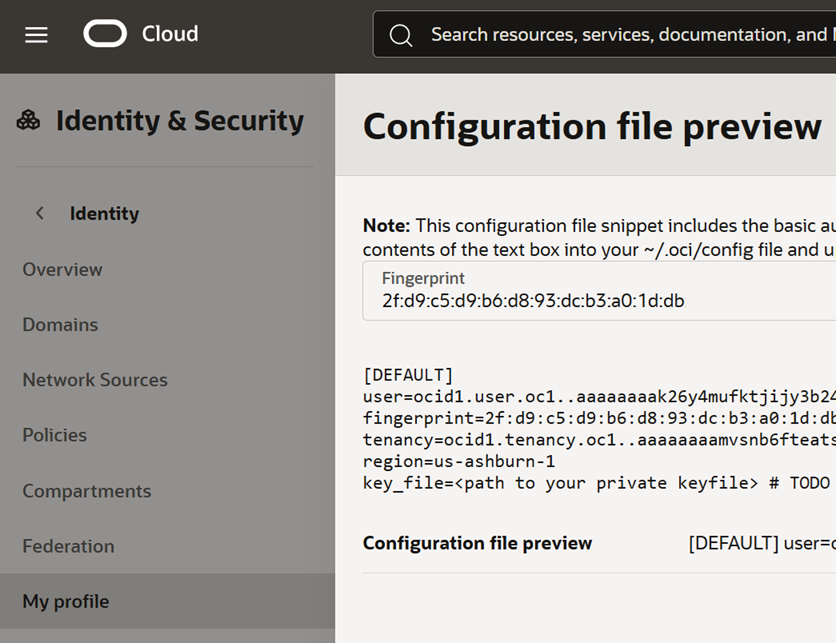
11. Get the required API tokens from the OCI Console (manual step)
Now that the public key was created on my local machine, I need to paste it in the OCI console to get all my API tokens. These tokens will eventually be saved into my local client so that Cline can run the Terraform scripts to create my cloud resources.
- Login to the your cloud.oracle.com account.
- Click on the profile icon.
- Click on "User settings".
- Navigate to the "Tokens and keys" subtab.
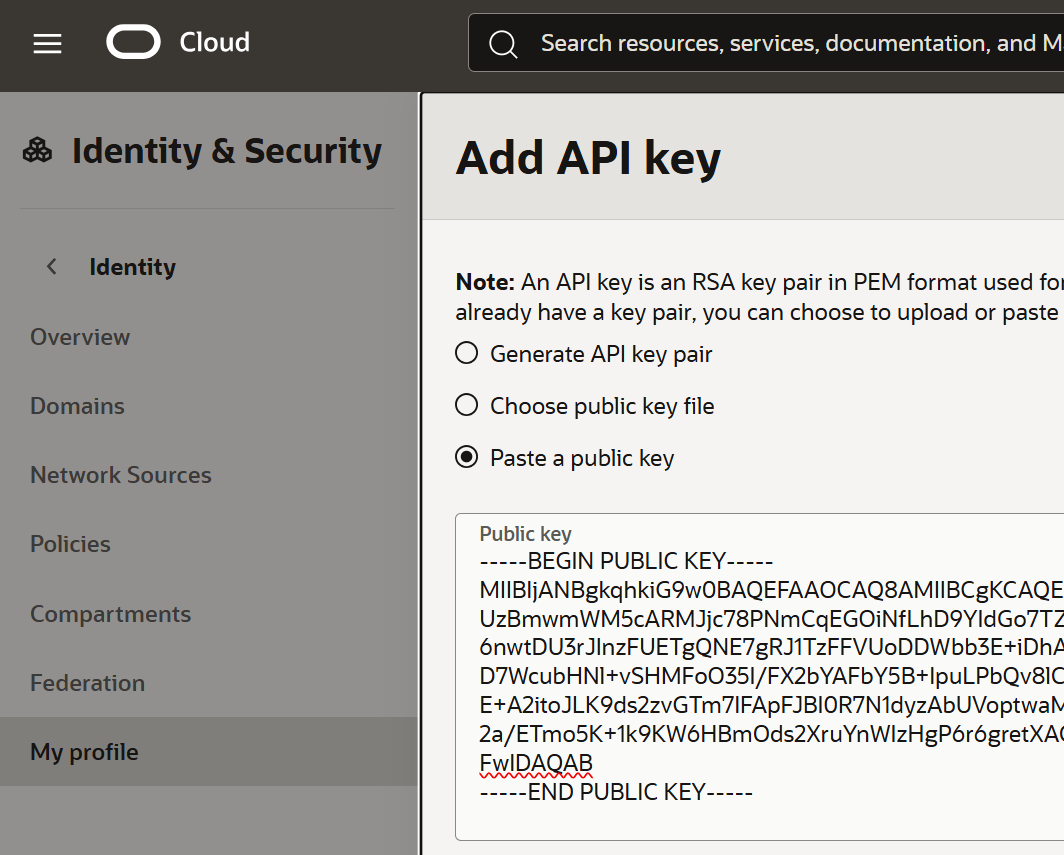
- Click on "Add API key".

- Select "Paste a public key", paste the key, and submit.
- Copy all these values, as they will be needed later.
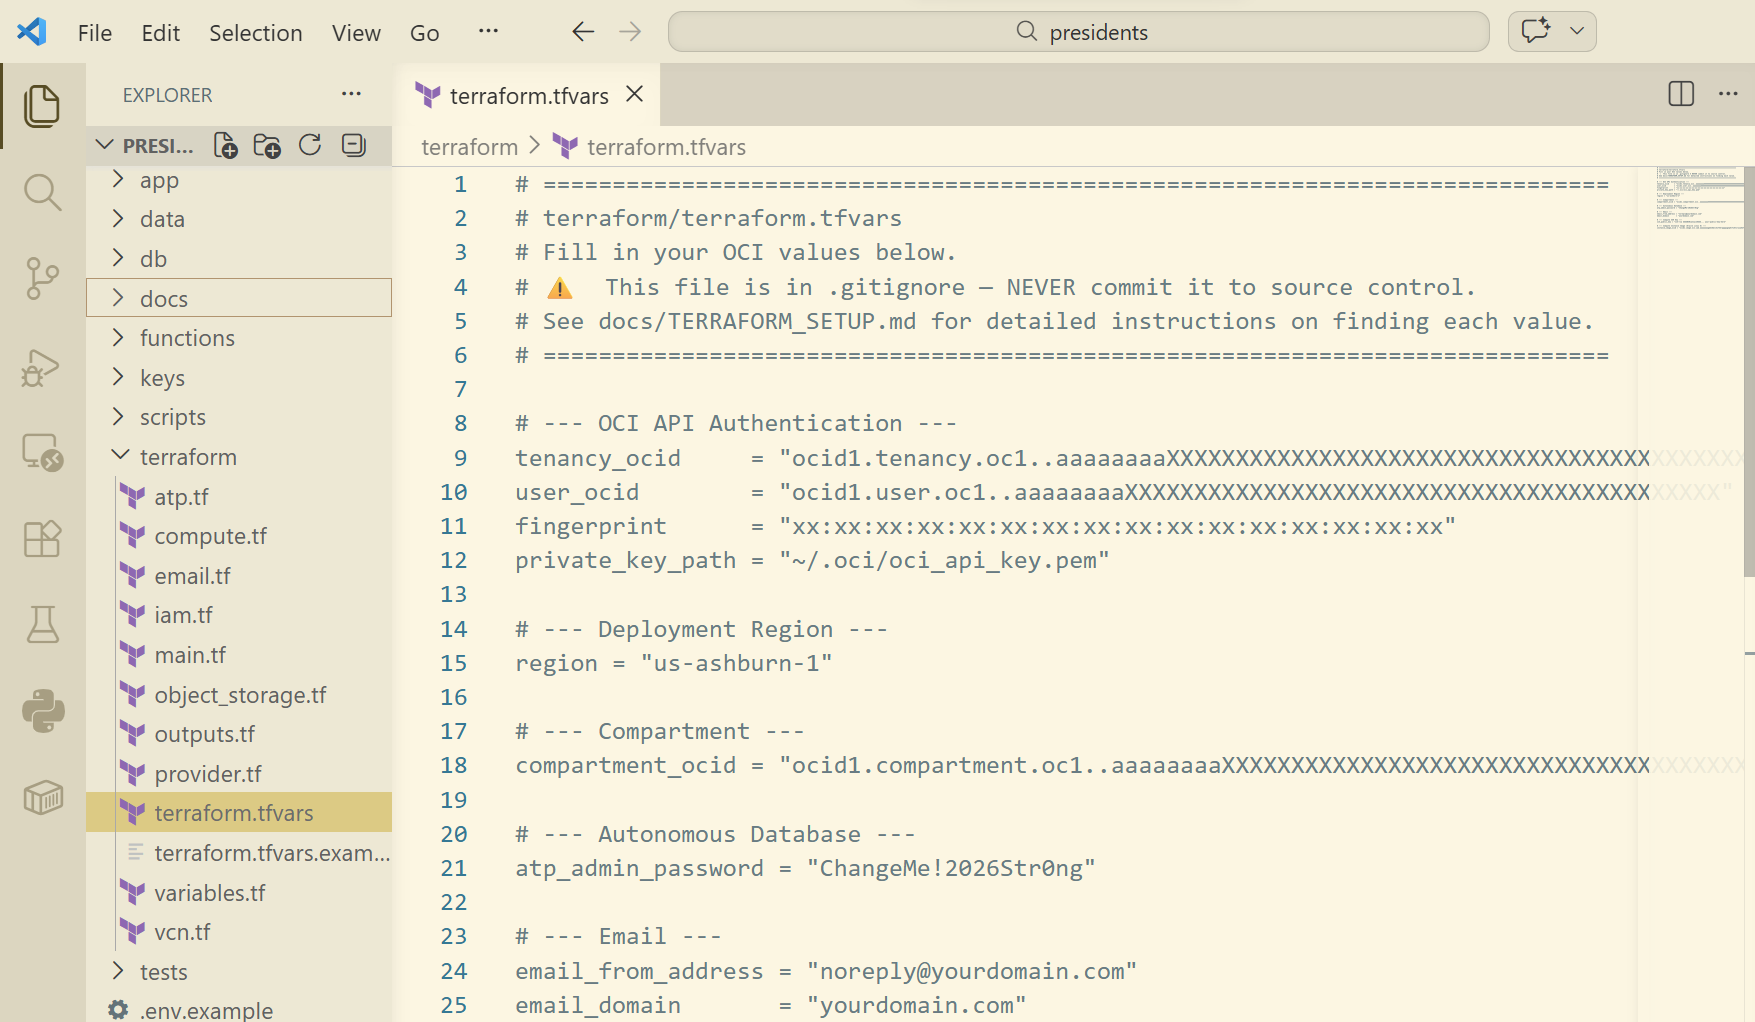
- Now under the
/terraformfolder in VS Code, create a file calledterraform.tfvarsand paste your values as shown. You will need to add your Compartment ID as well.
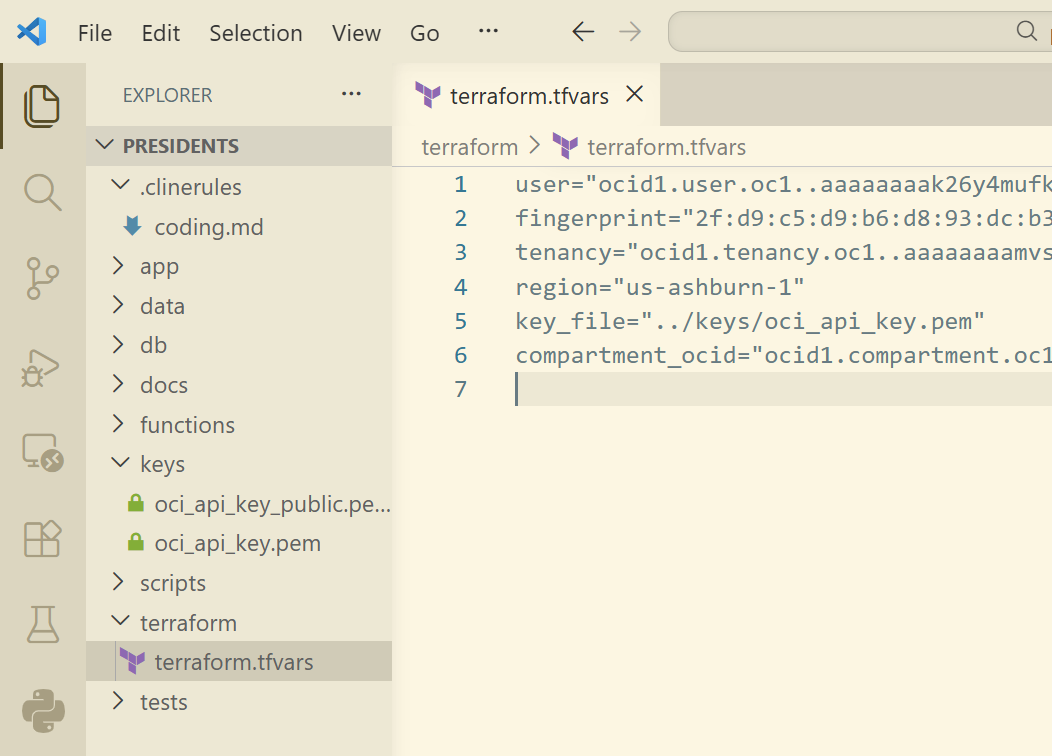
WARNING: This file was overwritten later on when Cline started created all the files. So I had to redo this step later.
Why does Cline hang sometimes?
Every so often, Cline would appear to hang. It looks like it's still "Thinking..." but there is no indication of activity. Even submitting a prompt does nothing.

It is safe to click on "Cancel" and then "Resume Task". But more often than not, it's not hung and it's just the model thinking and reasoning behind the scenes. Don't be surprised with having to wait an hour plus to see some activity.
Also, every now and then you may run out of tokens and receive this message.

Simply login to the Claude platform at platform.claude.com and purchase some credits. Though it may look it, it won't be made available immediately, so come back an hour later before trying to continue.
12. Let Cline provision the cloud resources autonomously
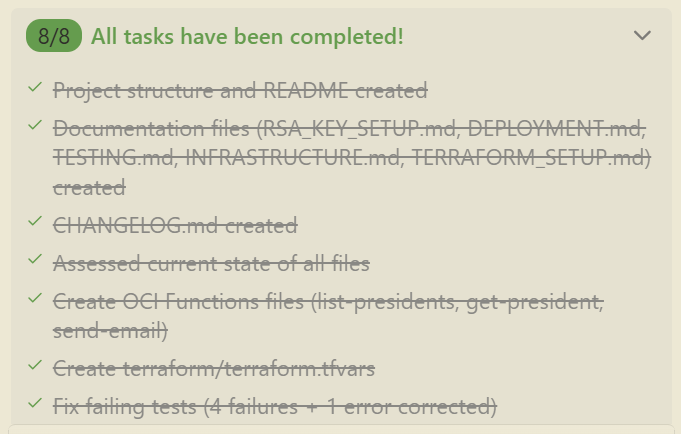
Cline will continue creating all the files in the project (155 of them total!). Depending on the complexity of your project and the model you've chosen, times may vary. The good thing is that on the top of the chat window you can see a list of the main tasks.
- Let Cline continue working.
- Observe the status on the top of the Cline chatbar until you see that all tasks have been completed (as shown in the following snippet).
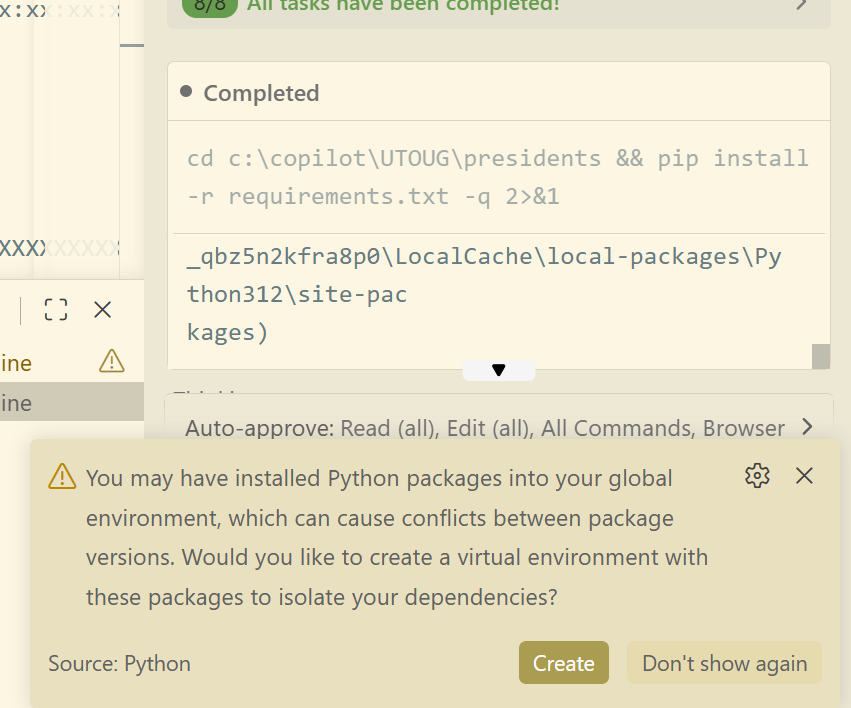
Every now and then, Cline may ask you a question such as the following. In most cases, accepting the answer is acceptable.
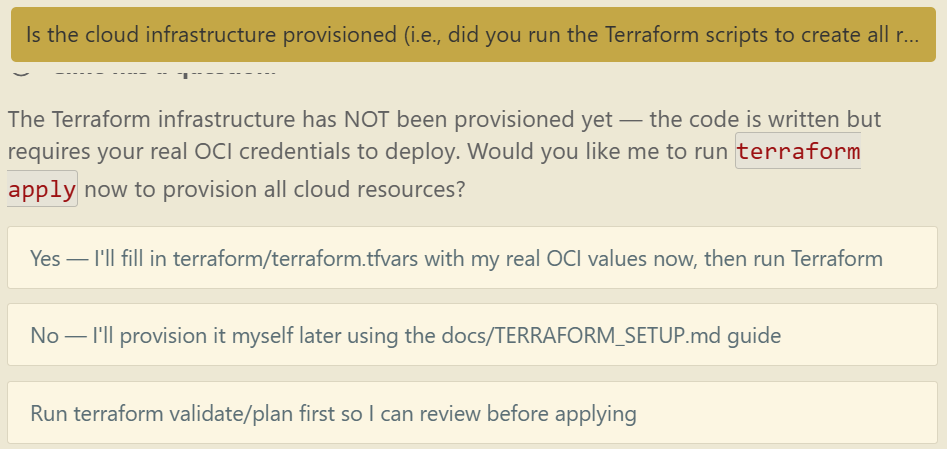
After my 8 tasks were completed, I wasn't sure whether the cloud services and resources were created by Cline (i.e., Did Cline run the Terraform scripts to create all the cloud resources?). I do recall that in the Plan phase, it said that I needed to run it manually, but there's no harm in asking my AI agent:
Is the cloud infrastructure provisioned (i.e., did you run the Terraform scripts to create all resources in the cloud)?
Cline confirmed that it had not run it, and gave me three options to choose from. I did not select any one of those options (yet).
That's because I noticed that my terraform.tfvars file was overwritten. So I went and re-pasted my API token values again and saved the file.
But what value should I use for the compute SSH key that was in the file (not shown above)? Let's ask Cline!
Where do I get the "Compute SSH key" from? It is a required value in "terraform.tfvars"?
Cline decided to figure it out and do it all itself, thankfully.
After about 5 minutes, it finally got the key.
Now here is the part where all it needed to do was to copy the key from the terminal and paste it into the terraform.tfvars configuration file. This led to incredible struggles by the AI agent. It had issues with Windows wrapping the string, faced challenges with special characters, and so on. After struggling for quite some time, Cline finally decided to write a whole Python script just to copy the key value from the terminal prompt and paste it into the configuration file. But it worked, and that's what mattered. I could have saved 15 minutes of AI thinking if I just copied and pasted it myself though.
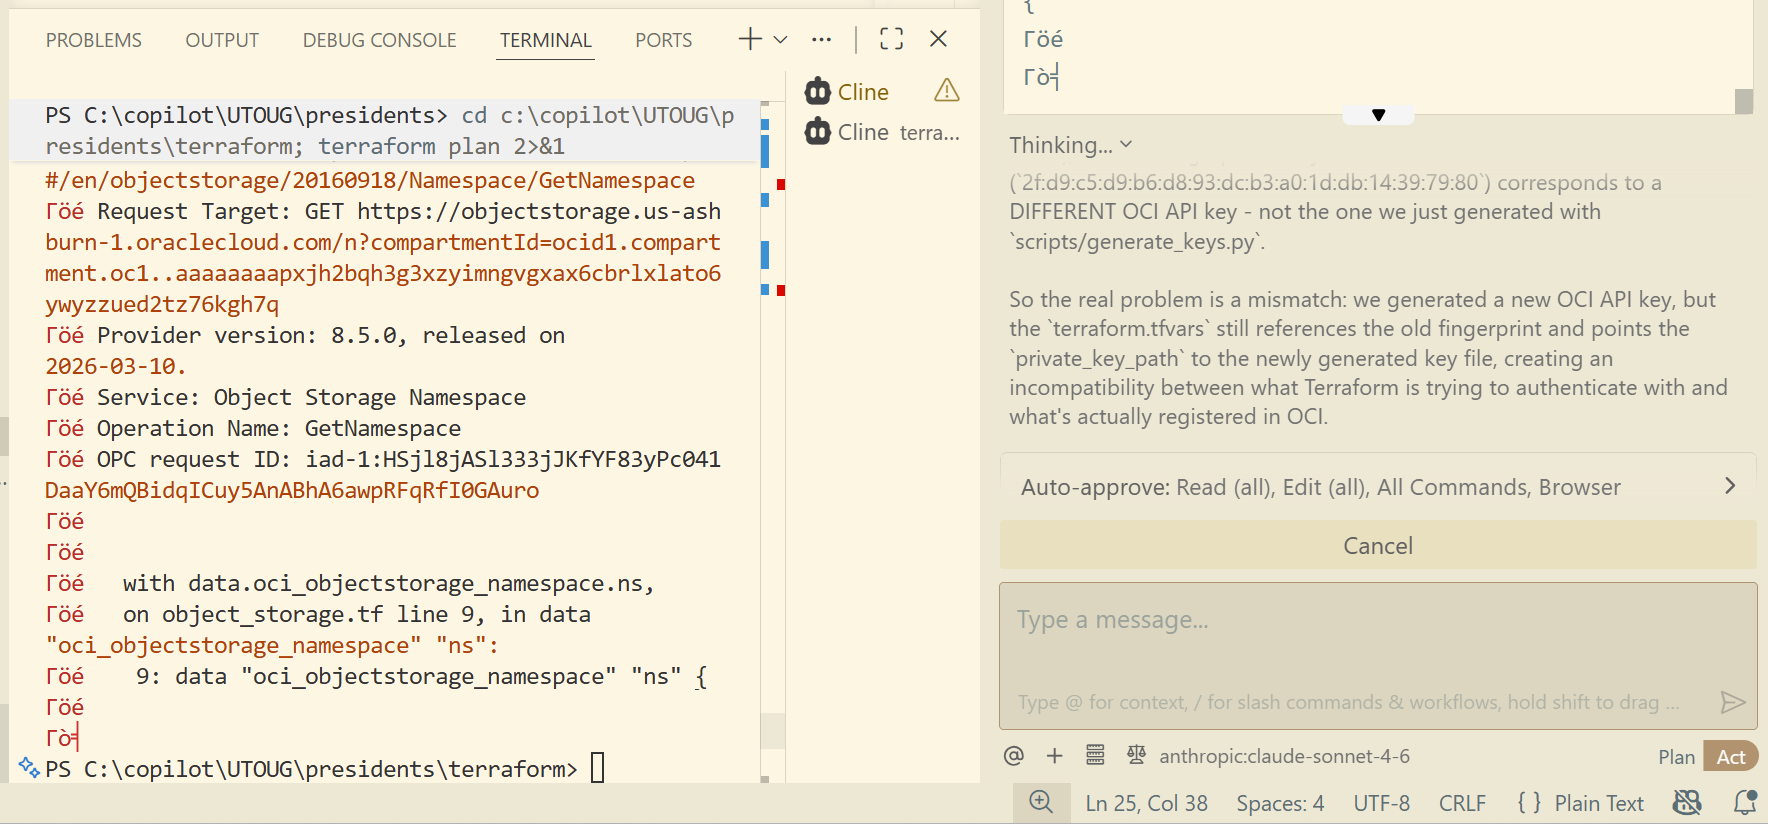
Cline then decided to mess everything up and must have created a new private key or something. Who knows. Because the Terraform script wasn't authenticating. So I just followed its lead and answered its questions when it asked me to check certain values in the OCI console.
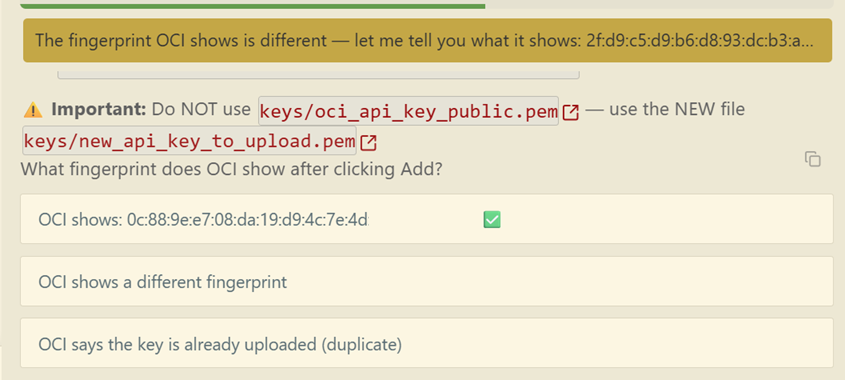
It eventually worked in the end. Yes, it did in fact create a new private key for some odd reason.
Cline continued proceeding with running the Terraform scripts via terraform apply and observing the output. In the following screenshot, it seems it ran into an issue. In this case, it tried to use a feature that was not available in the free tier of the Oracle Autonomous AI Database, so it updated the script to remove this feature.
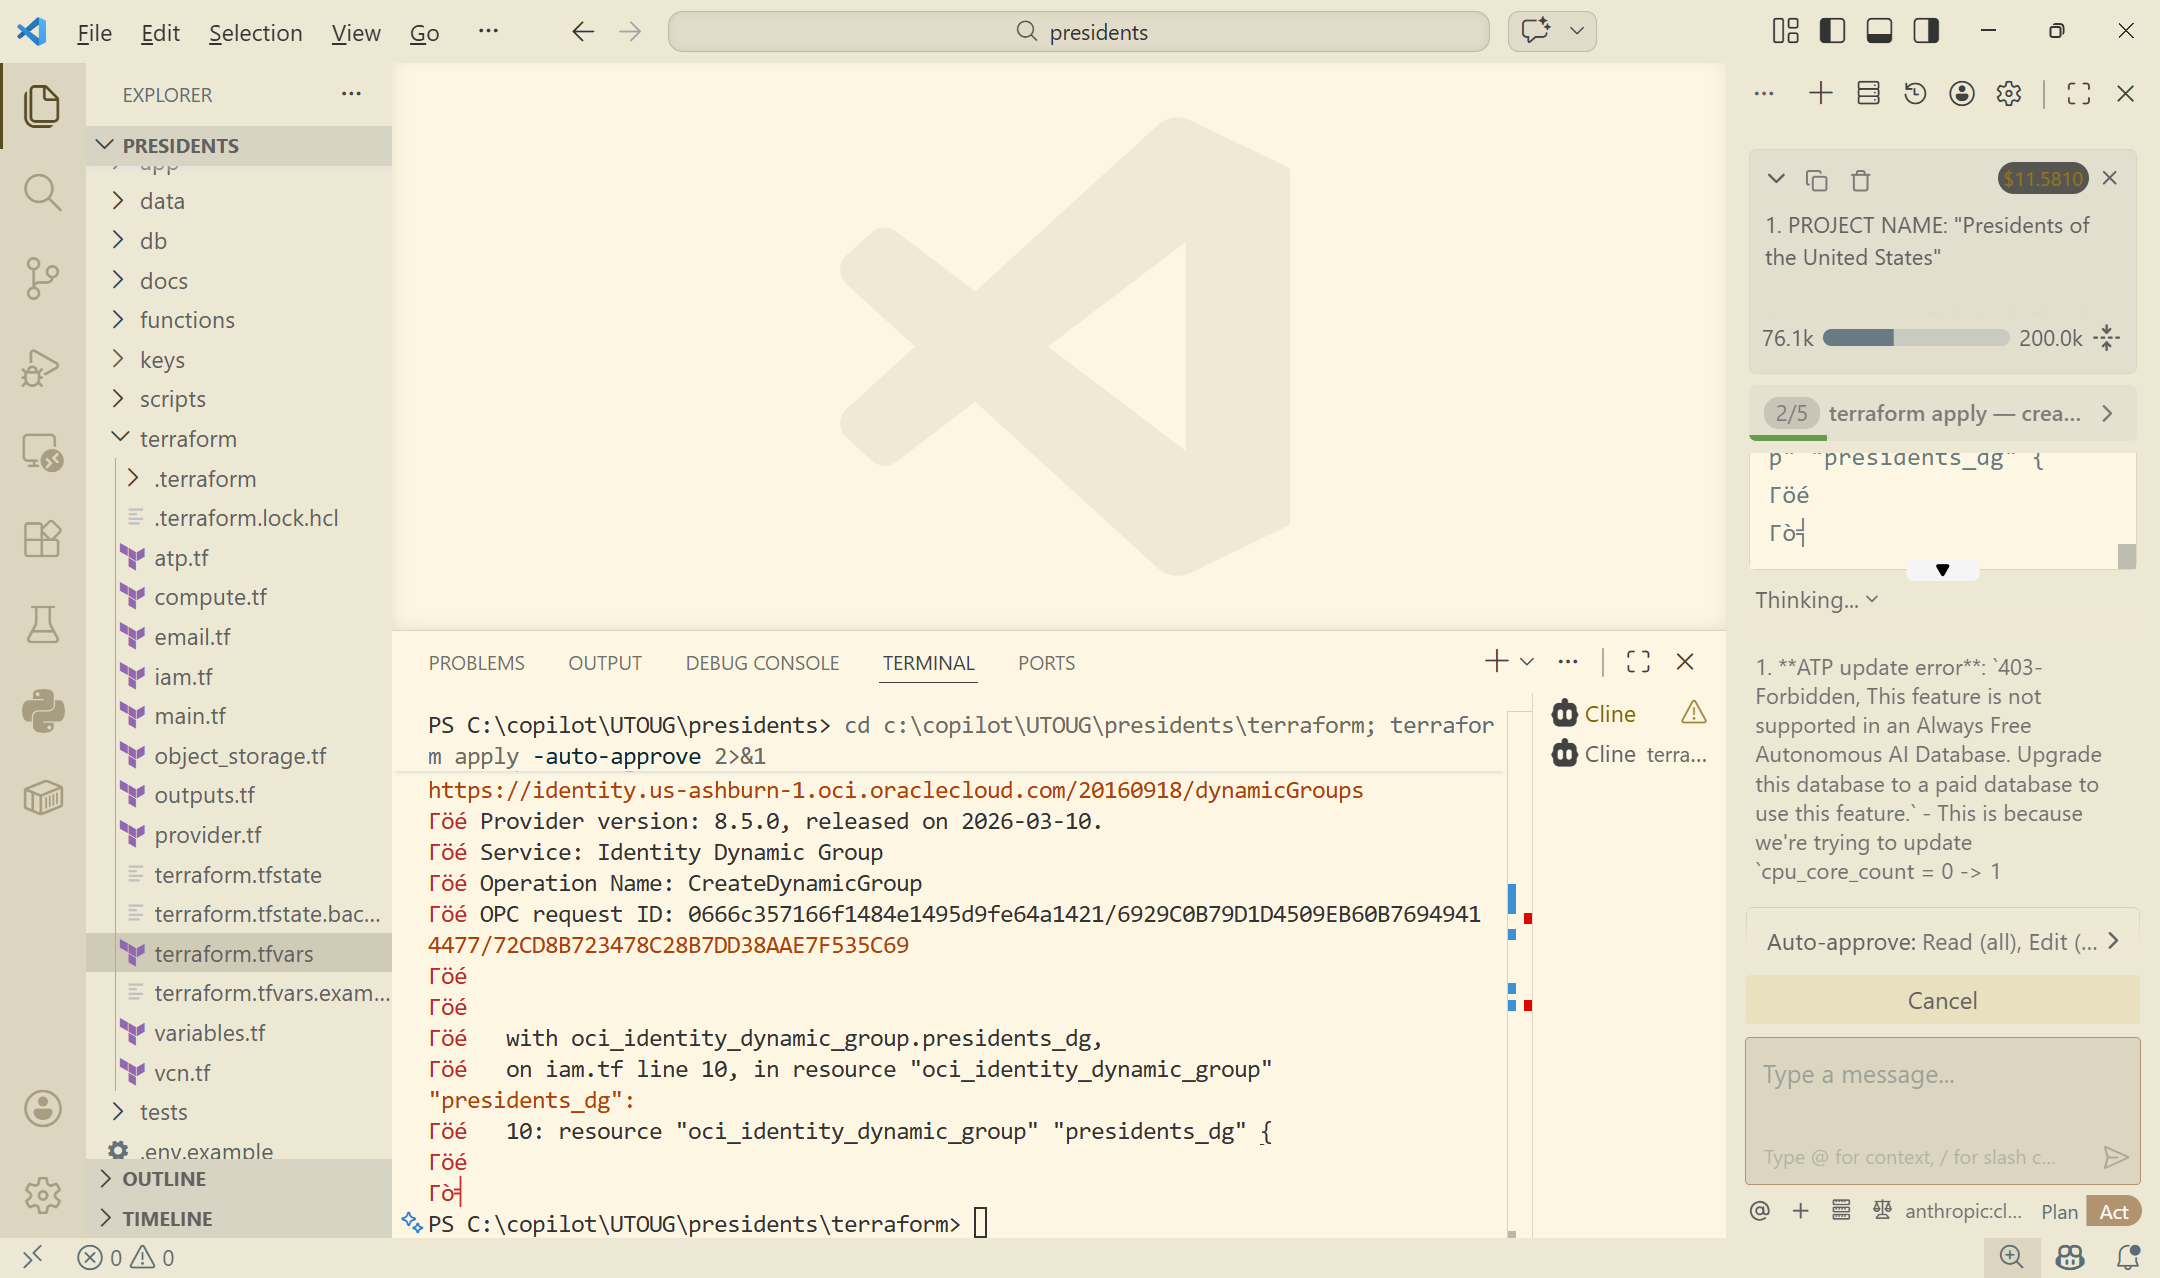
Keep in mind that these are merely a few glimpses into the issues that Cline experienced (there were many!), but it worked through them all autonomously and rarely needed my input.
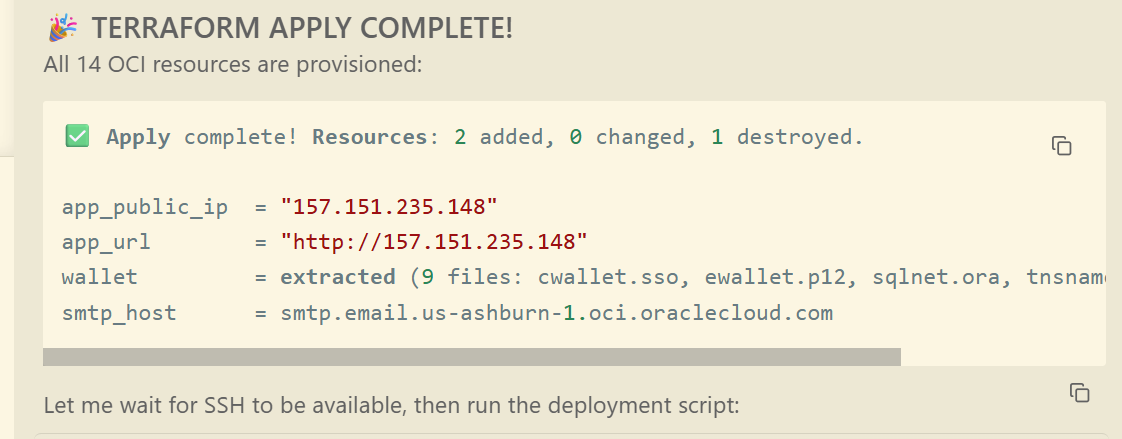
Though the Terraform scripts were completed, as you can see in the following screenshot, it did give me a public URL of the application. The cloud resources were now fully provisioned, but the application was actually not deployed yet.
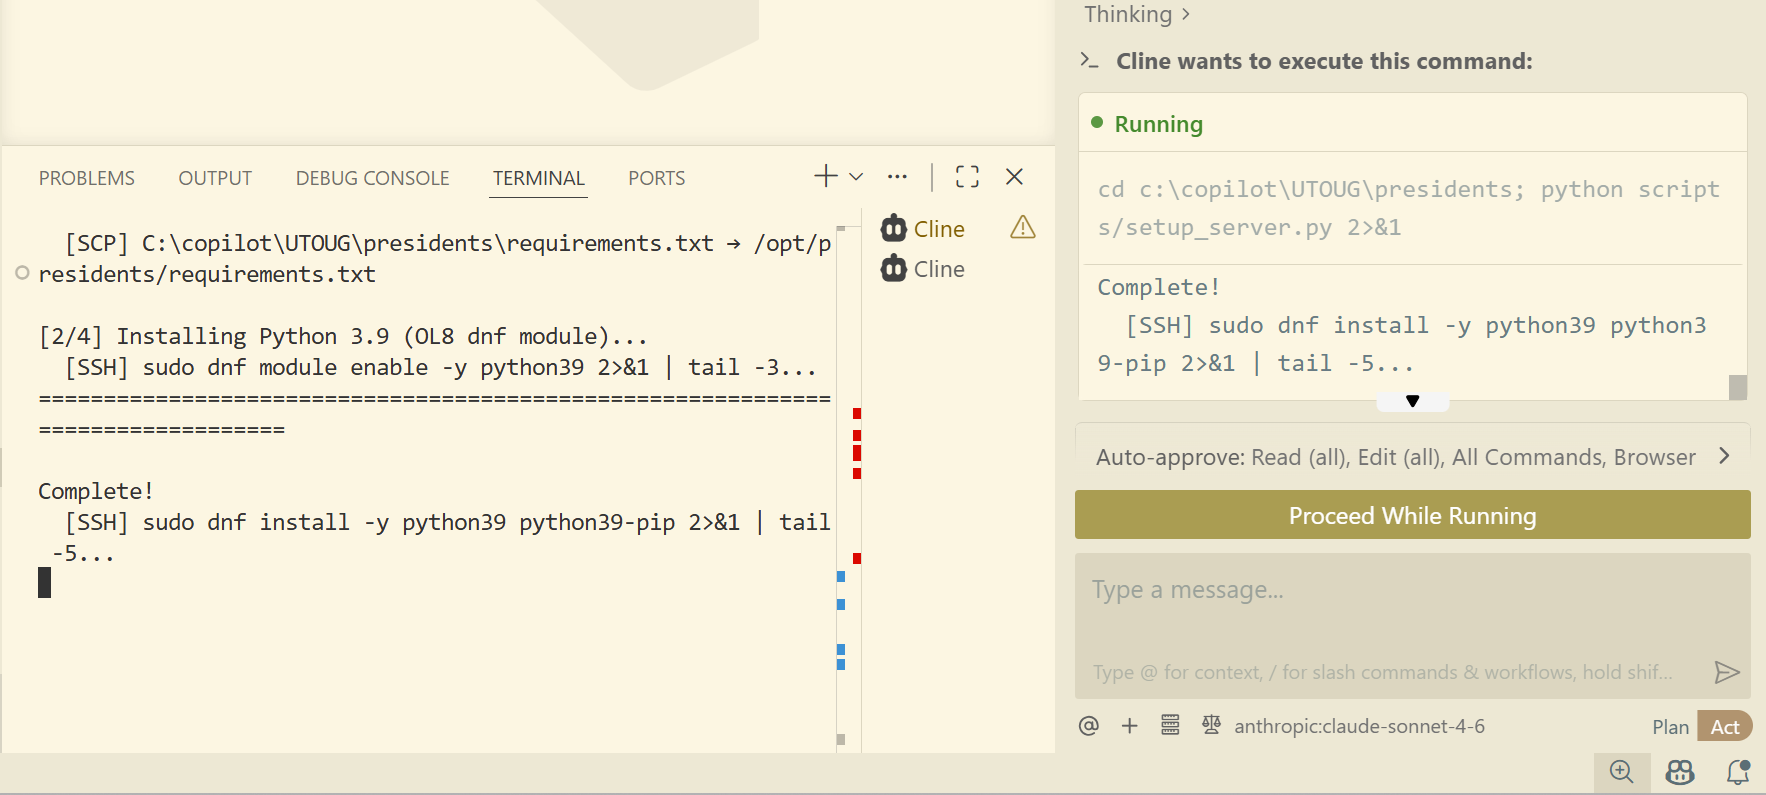
That is where Cline began a lengthy process of installing nginx, Gunicorn, and deploying my Python Flask application onto a compute instance. The following screenshot is just a progress point.
At this time, I must have missed why Cline decided to switch up the architecture that it had originally planned. Instead of deploying the code onto a serverless OCI Function fronted by an API Gateway, it decided drop those and deploy the application on a compute instance instead.
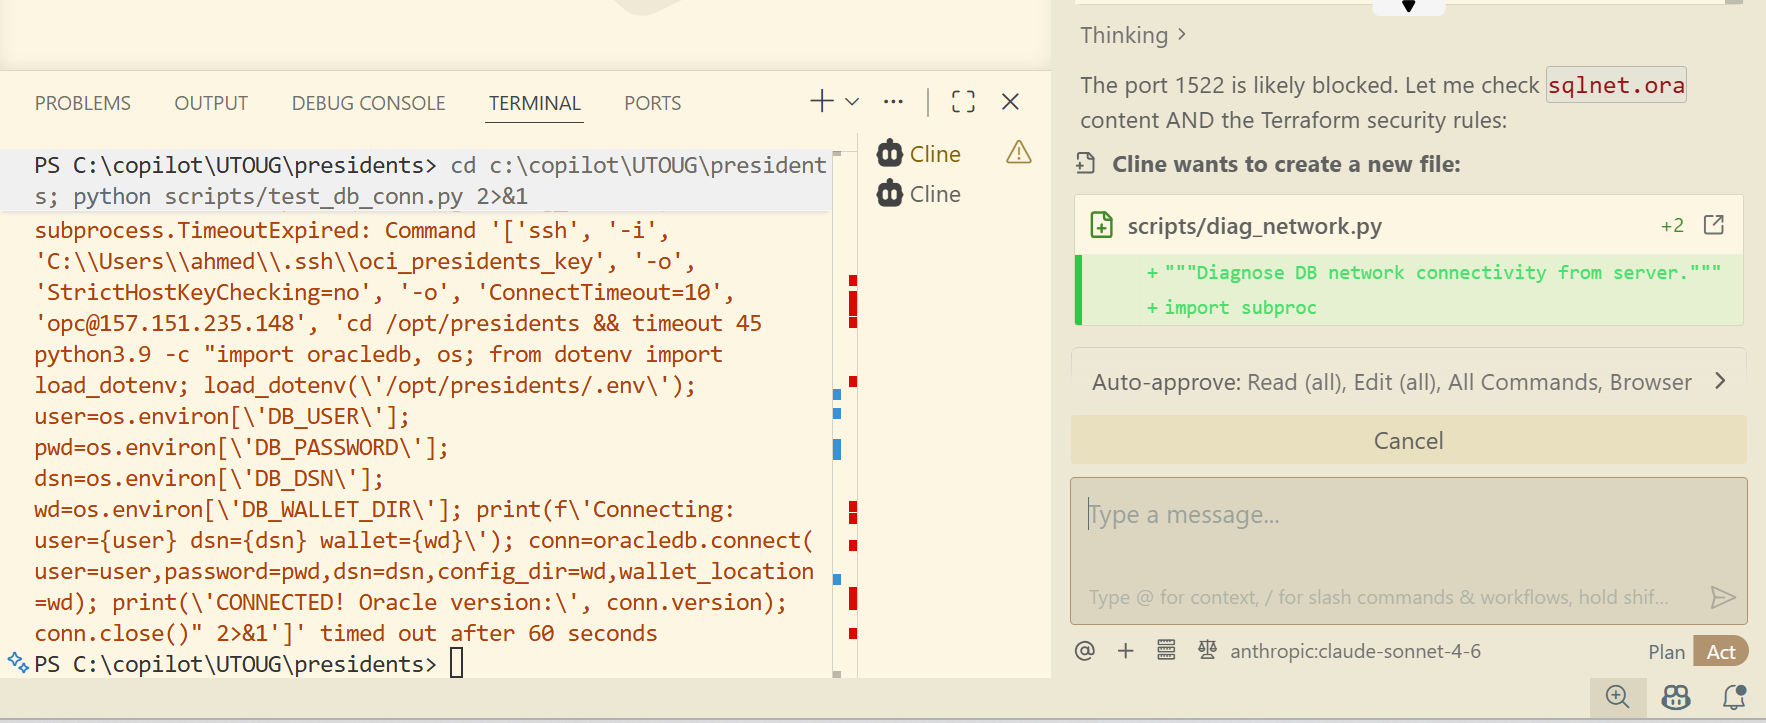
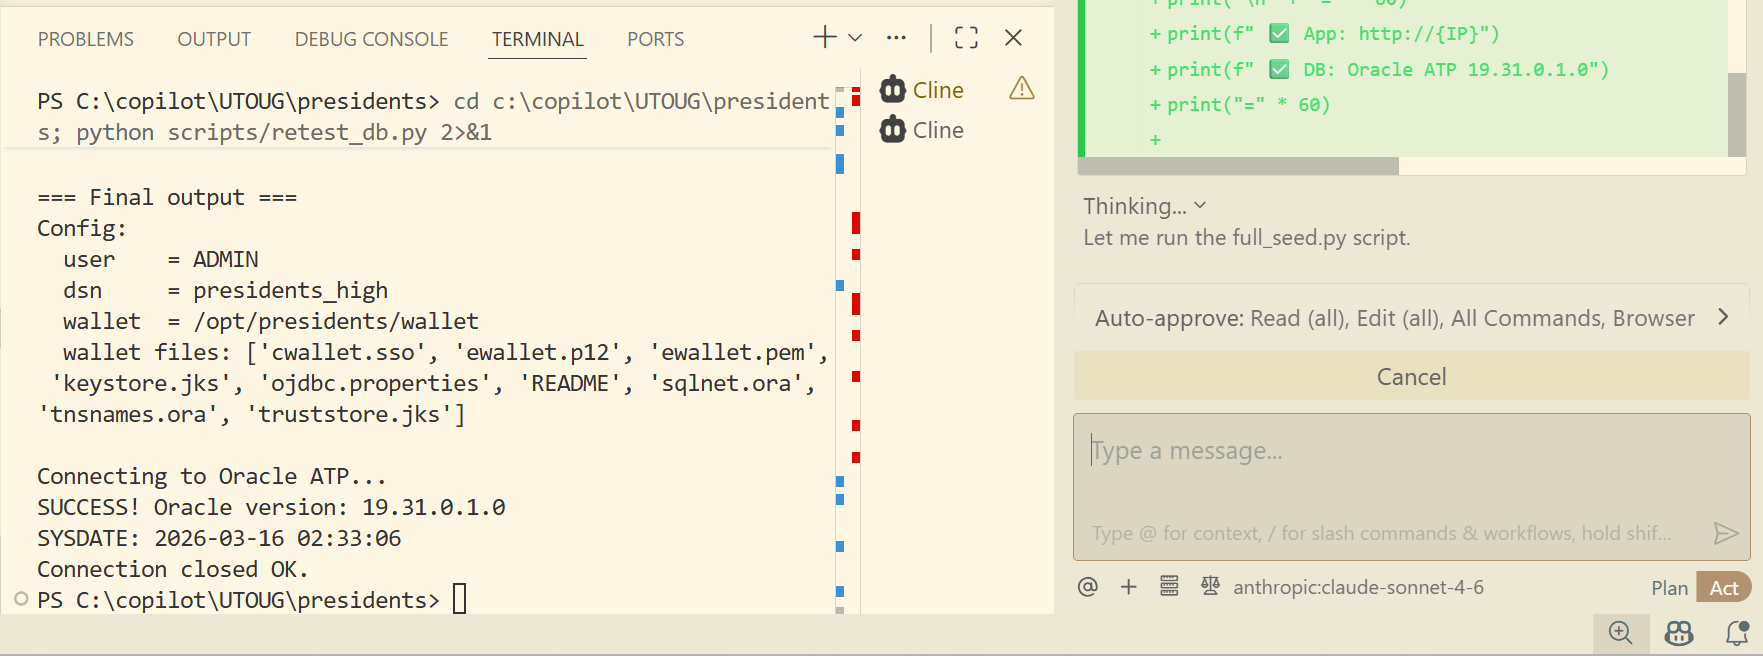
Here is another issue where Cline tried to connect to the database but failed. However, after 15 minutes of autonomous troubleshooting, it was successful in the end.
It now was able to successfully connect to the database!
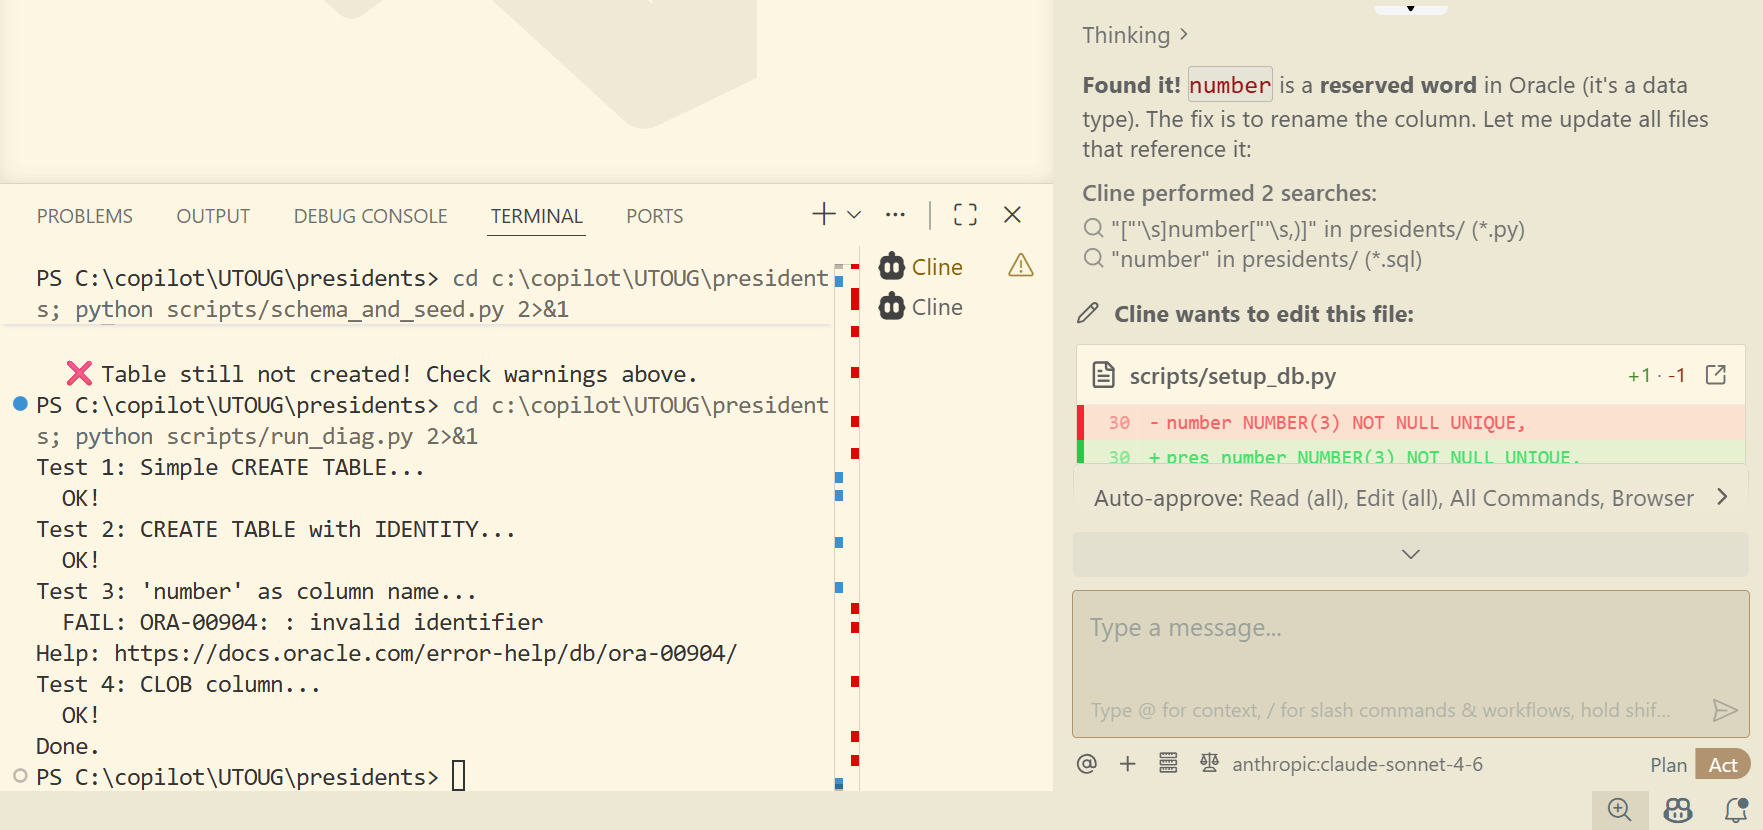
Cline wanted to insert the seeded data, but ran into yet another issue. Apparently, in the CREATE TABLE script, it named one of the columns "number" but NUMBER is a reserved word in the database. As with all other errors, it managed to rewrite the script, and retry the process again.
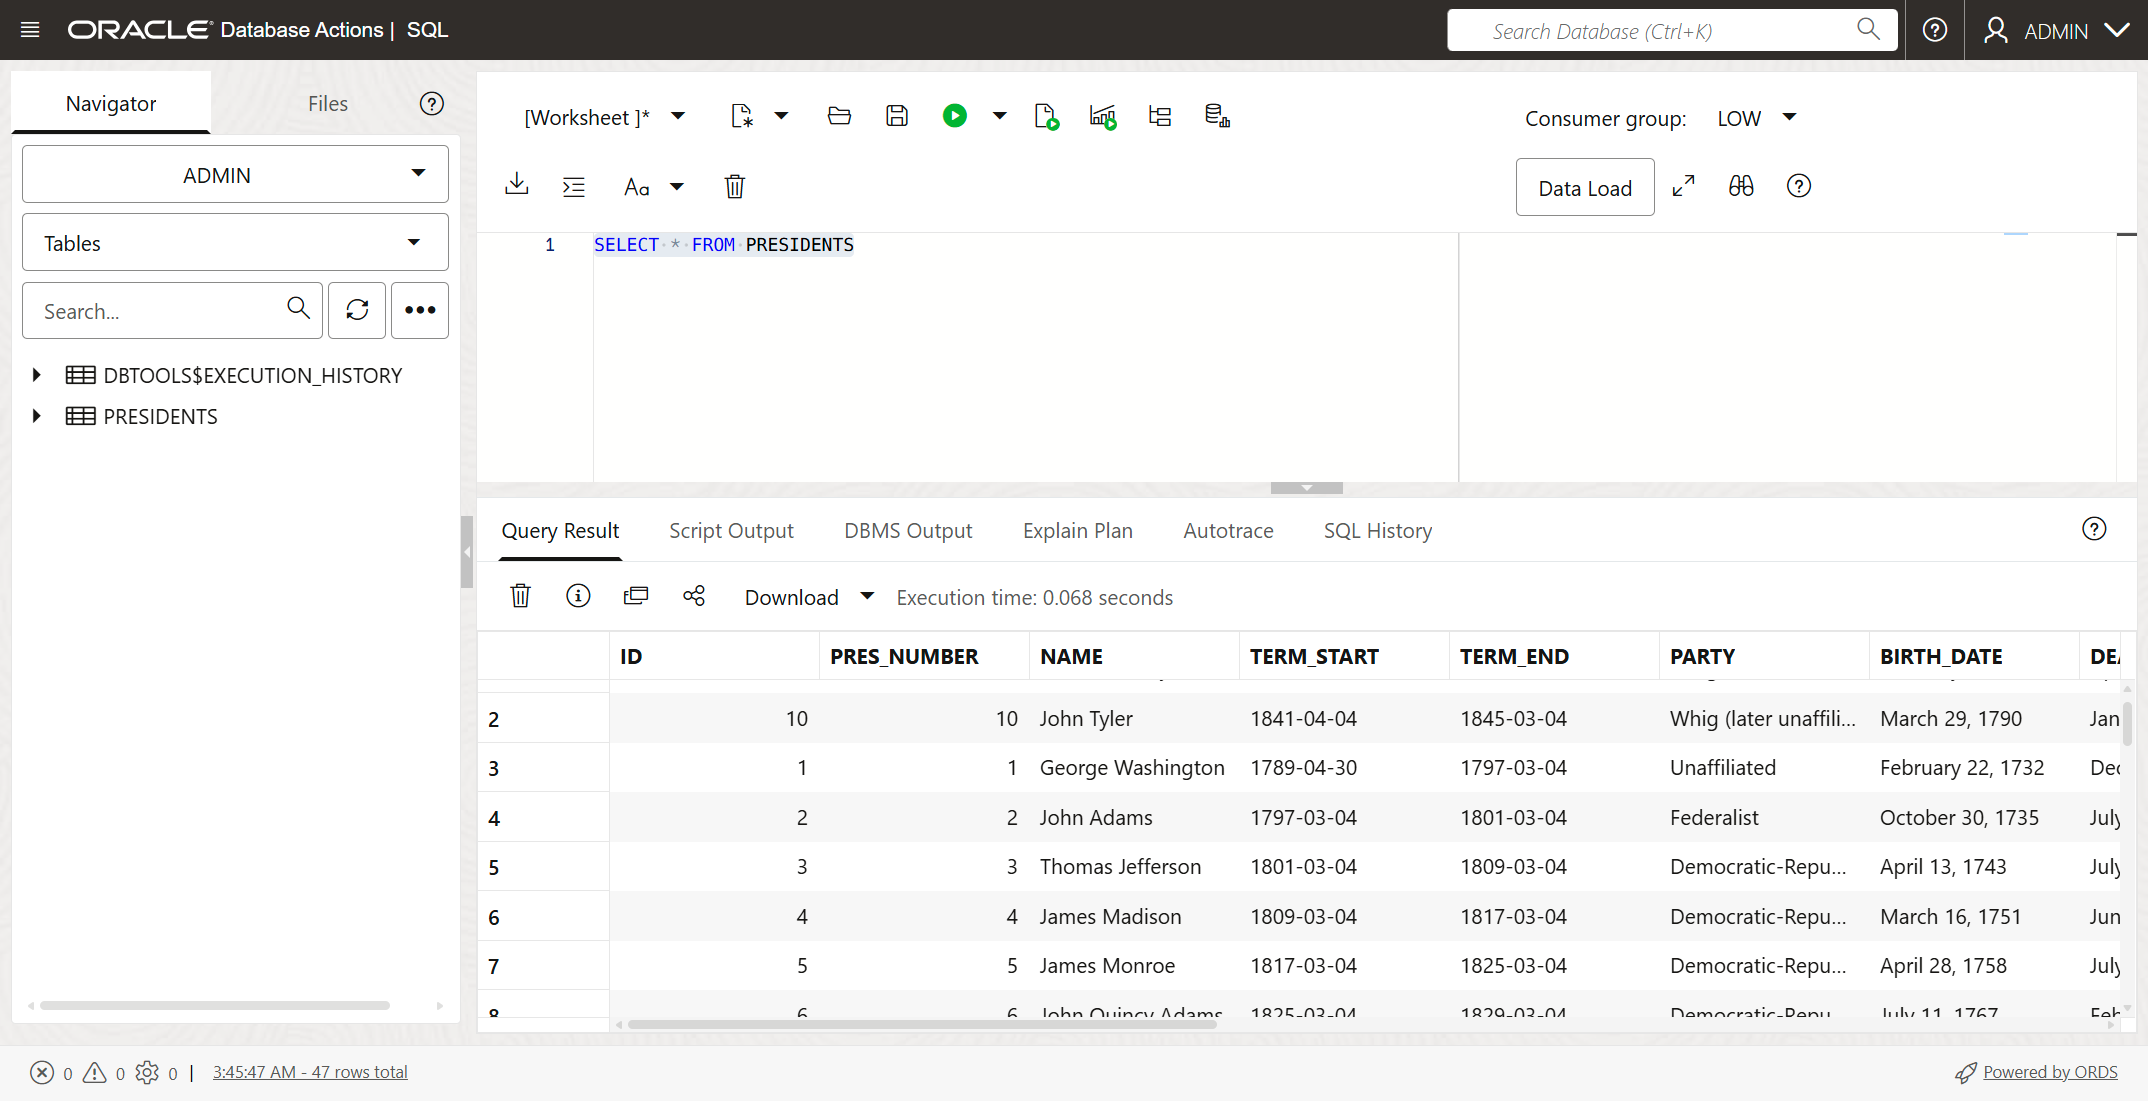
13. Manually verify the database objects (optional)
I wanted to verify and make sure that the database objects and data were in the database. The Oracle Autonomous AI Database in the OCI console gives you the ability to run SQL statements against the database. Here you can see that all was good.
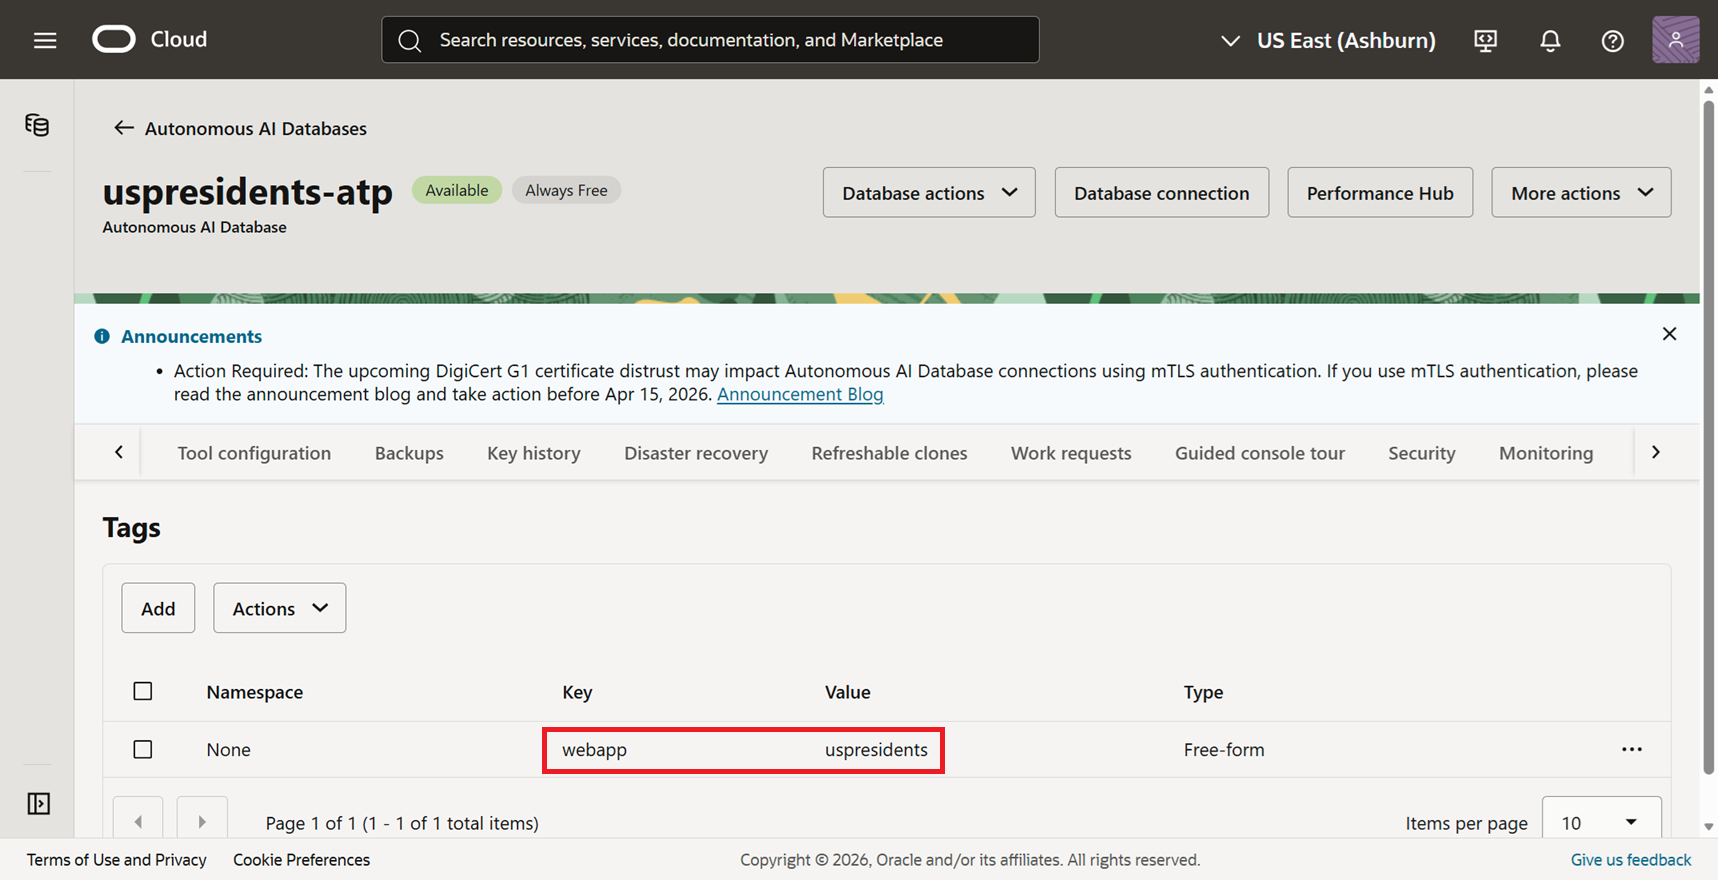
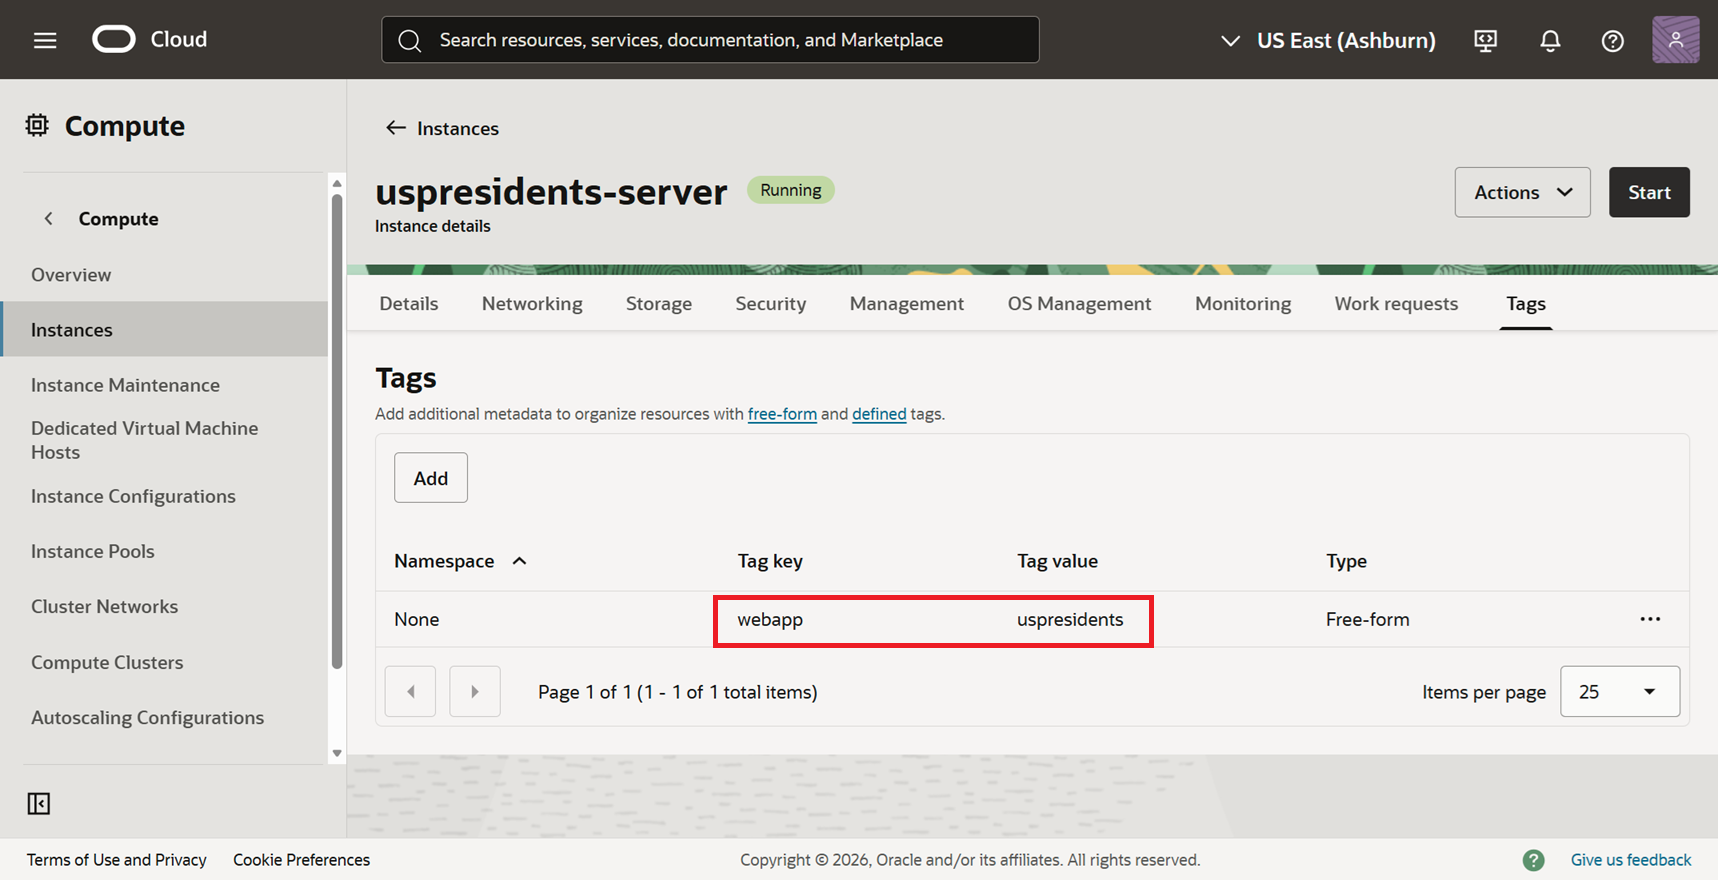
One of my requirements was to tag every cloud resource with a custom name:value pair of webapp:uspresidents. You can see that the database has this tag.
I was able to confirm that my compute instance also had the tag.
14. Test the application
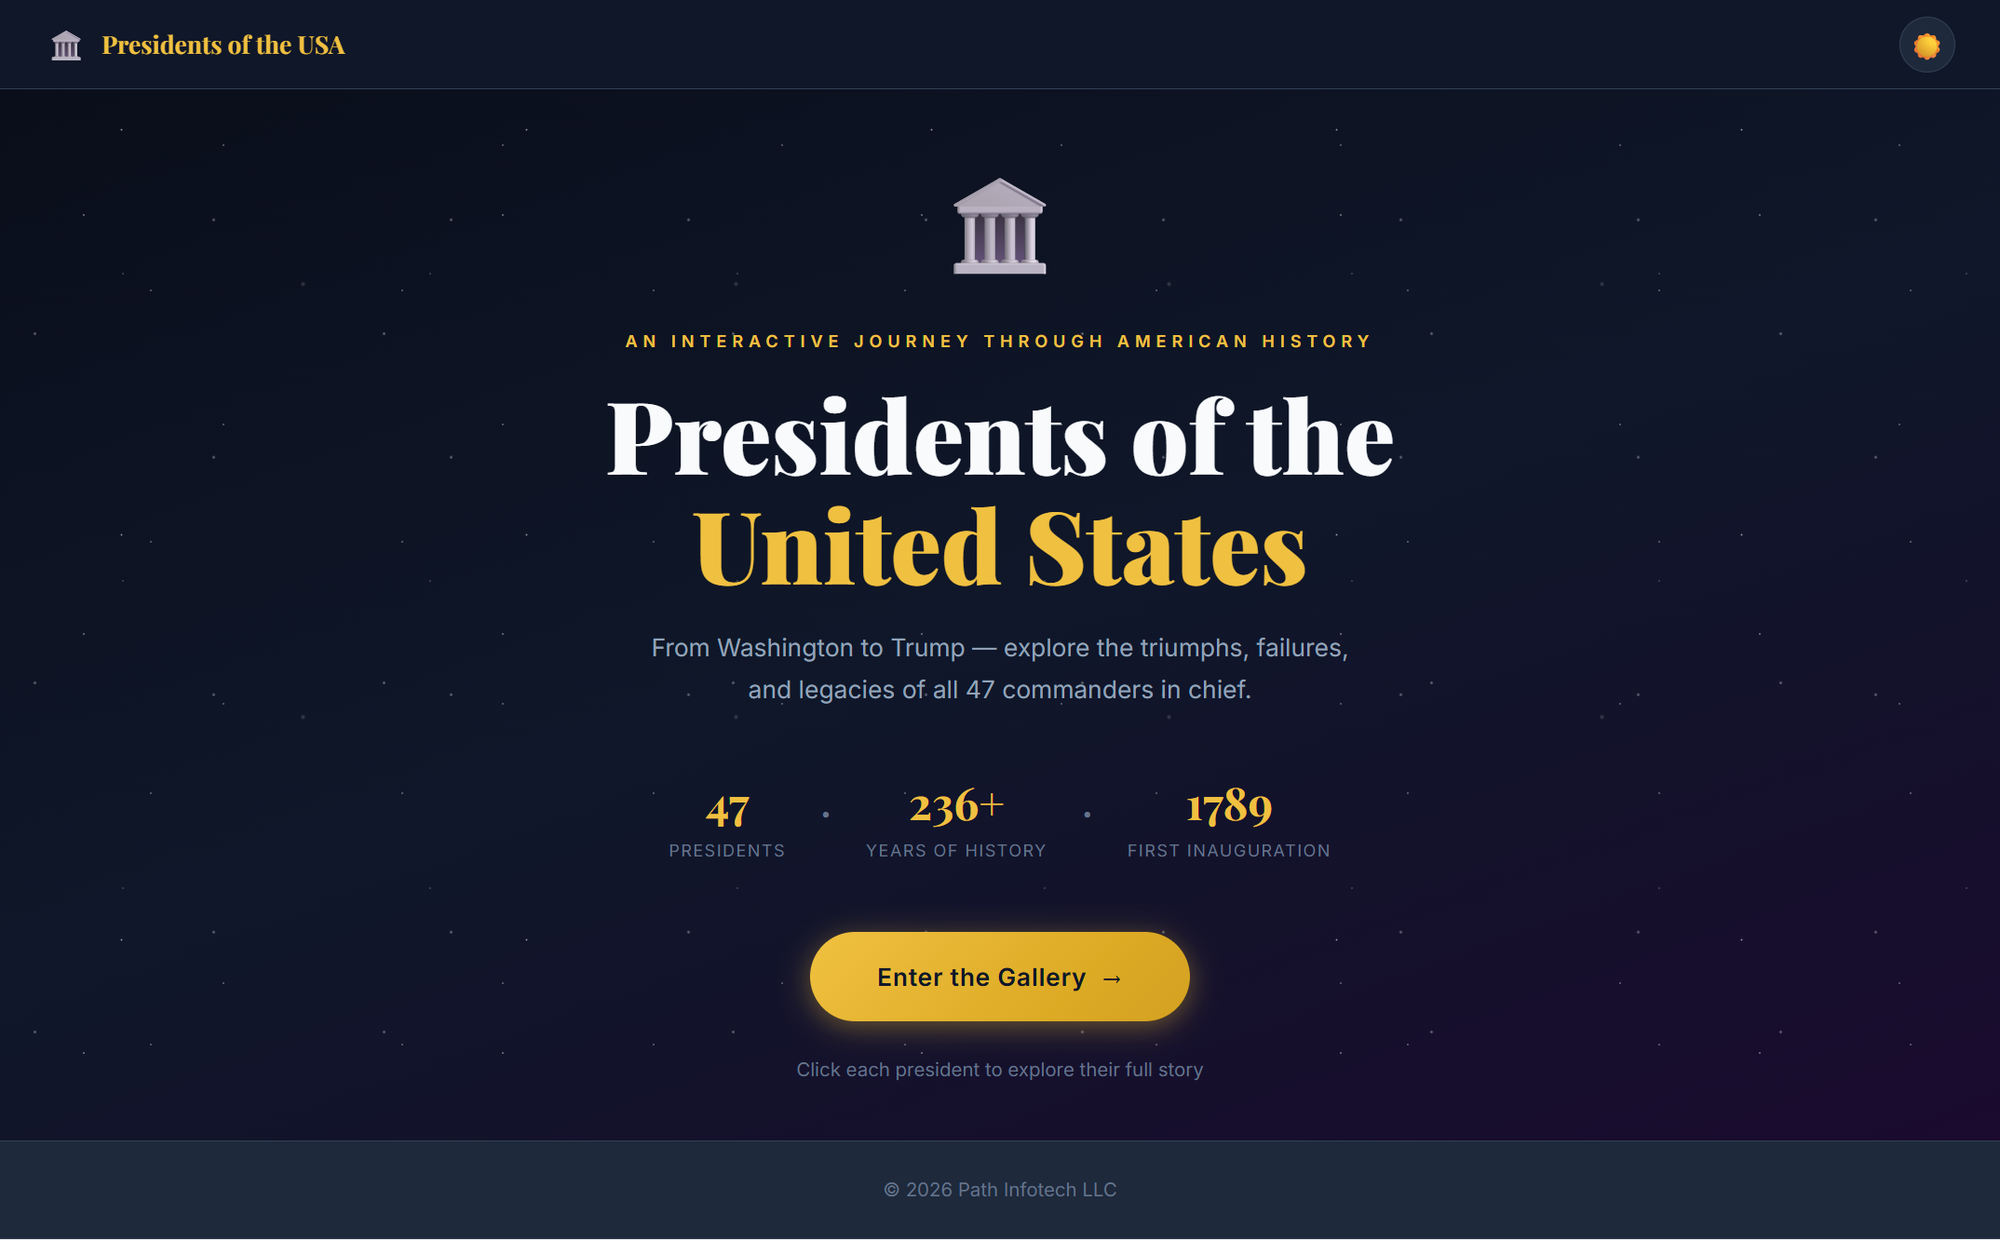
Cline gave me a link to the public IP address and here's the final application. It looked professional, sharp, clean, and modern. I was impressed.
I told Cline about that the images were not showing up. This is what I said:
When I navigate to http://157.151.235.148, everything works fine. However, none of the portraits for the presidents are showing up. It seems that the direct URL of the images are all "http://157.151.235.148/static/images/presidents/placeholder.jpg" which appears to be a placeholder.
Cline had issues linking to, and even downloading, approved for-use images from Wikimedia. Cline finally found out that Wikimedia places restrictions on robots and had rate limits. It tried using their API to get the images, but was unsuccessful.
So Cline ended up putting placeholders initials as you see here.
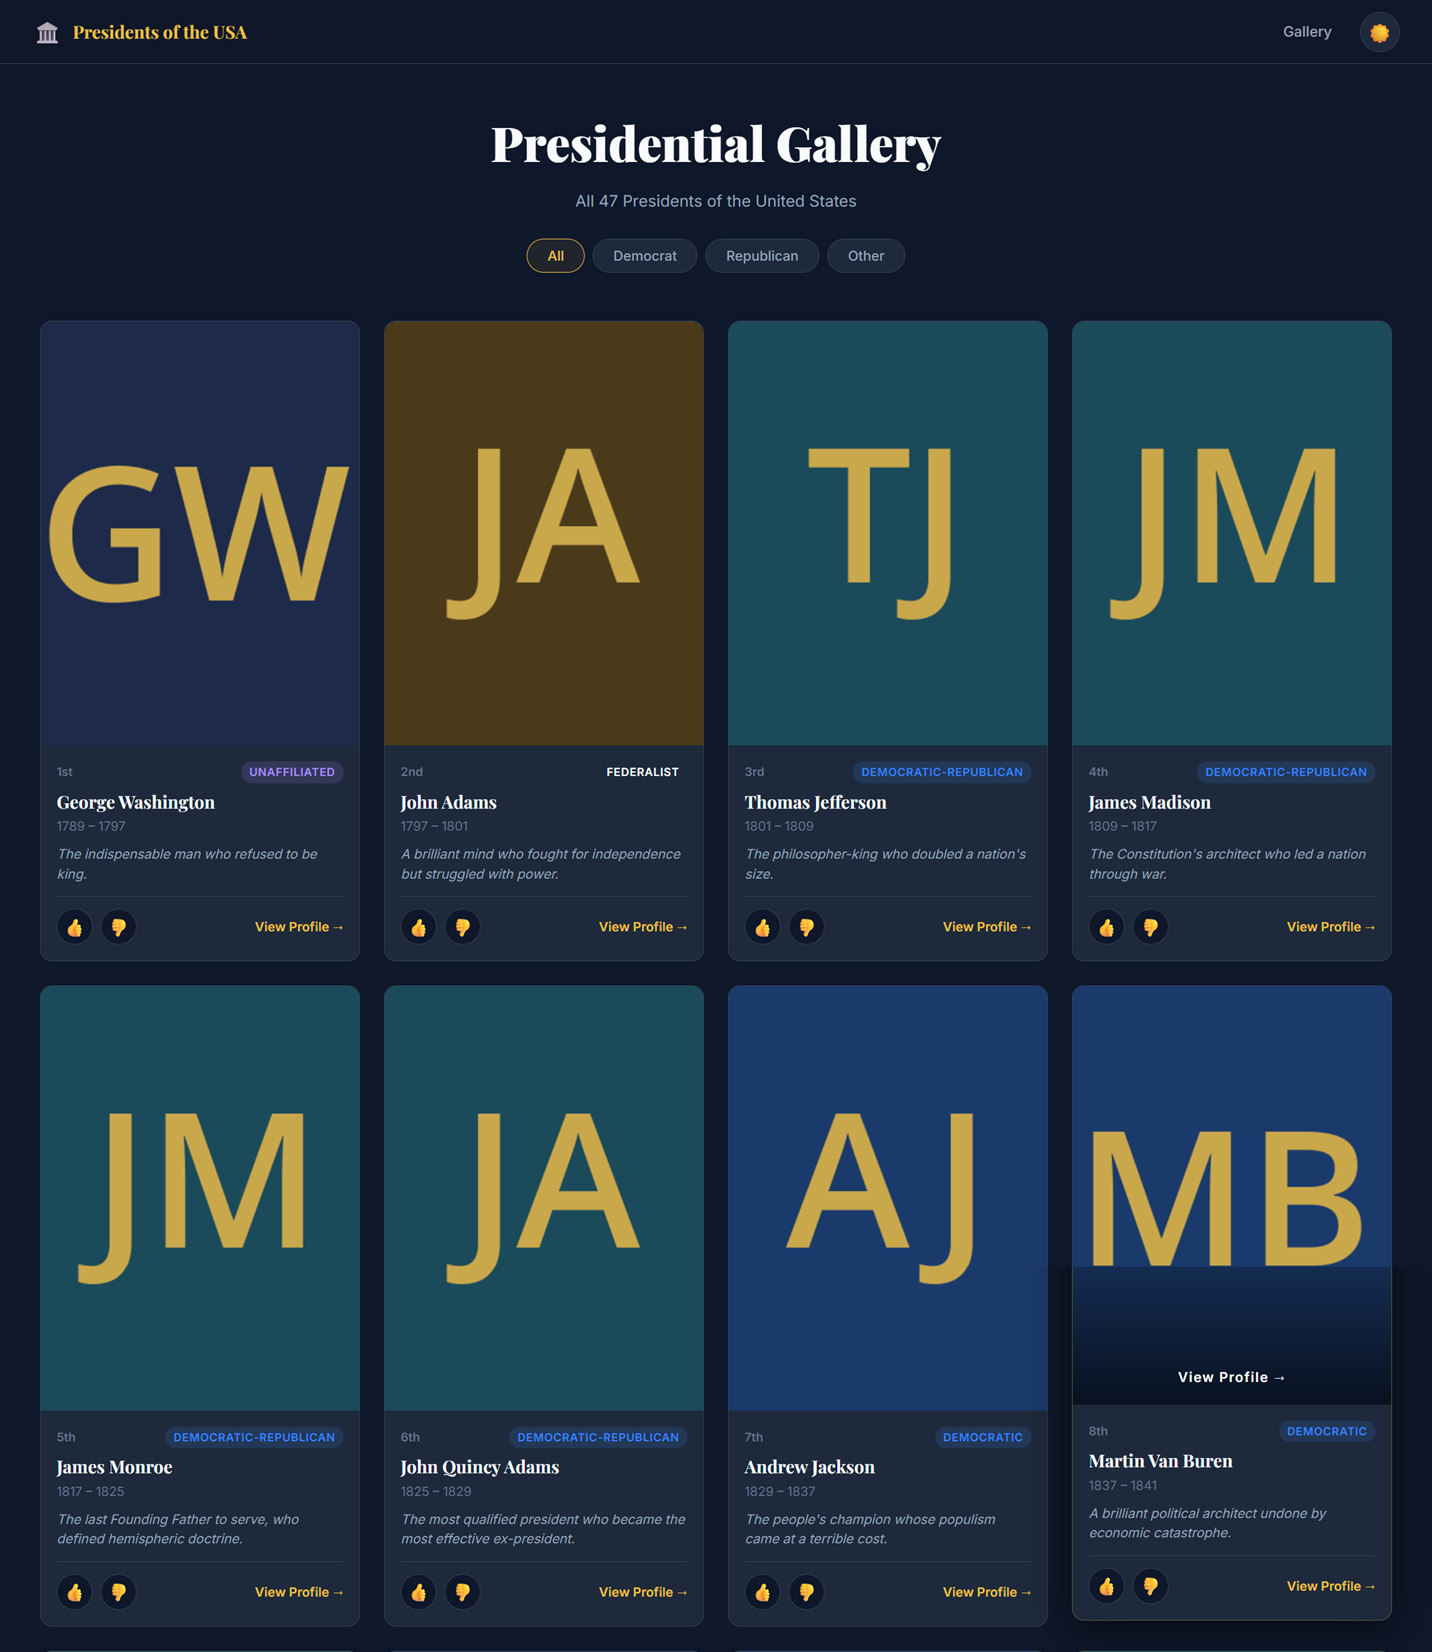
All my requirements were satisfied and the application was working as expected (mostly).
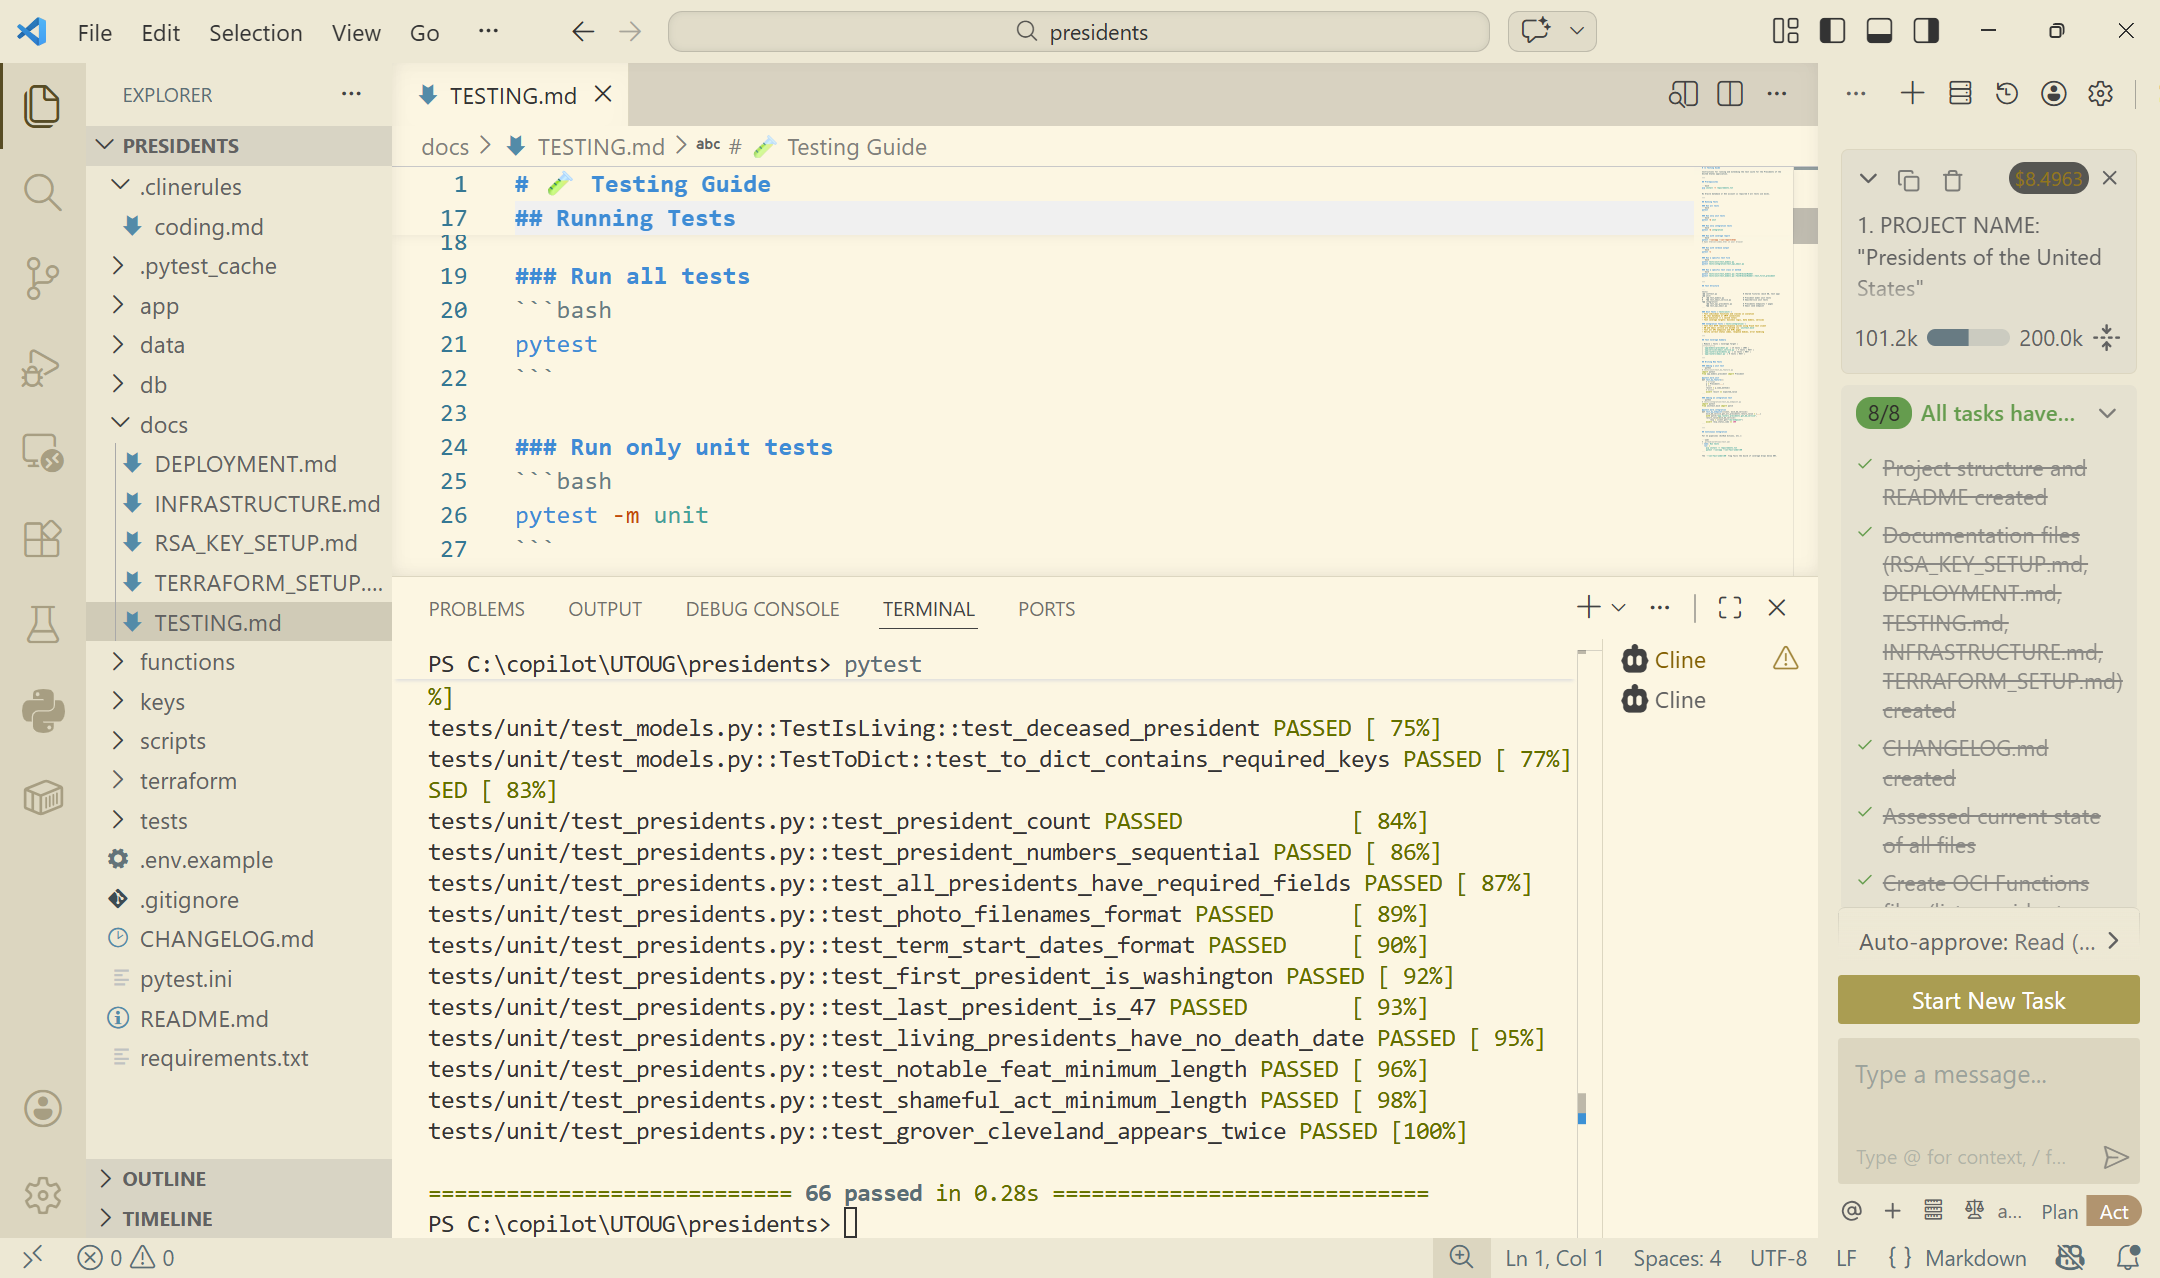
Though Cline had already run its test cases, I wanted to run the full suite of tests manually myself, so I opened up TESTING.md document the instructions stated that all I needed to do was simply type pytest in the terminal window.
All test cases that Cline had created passed.
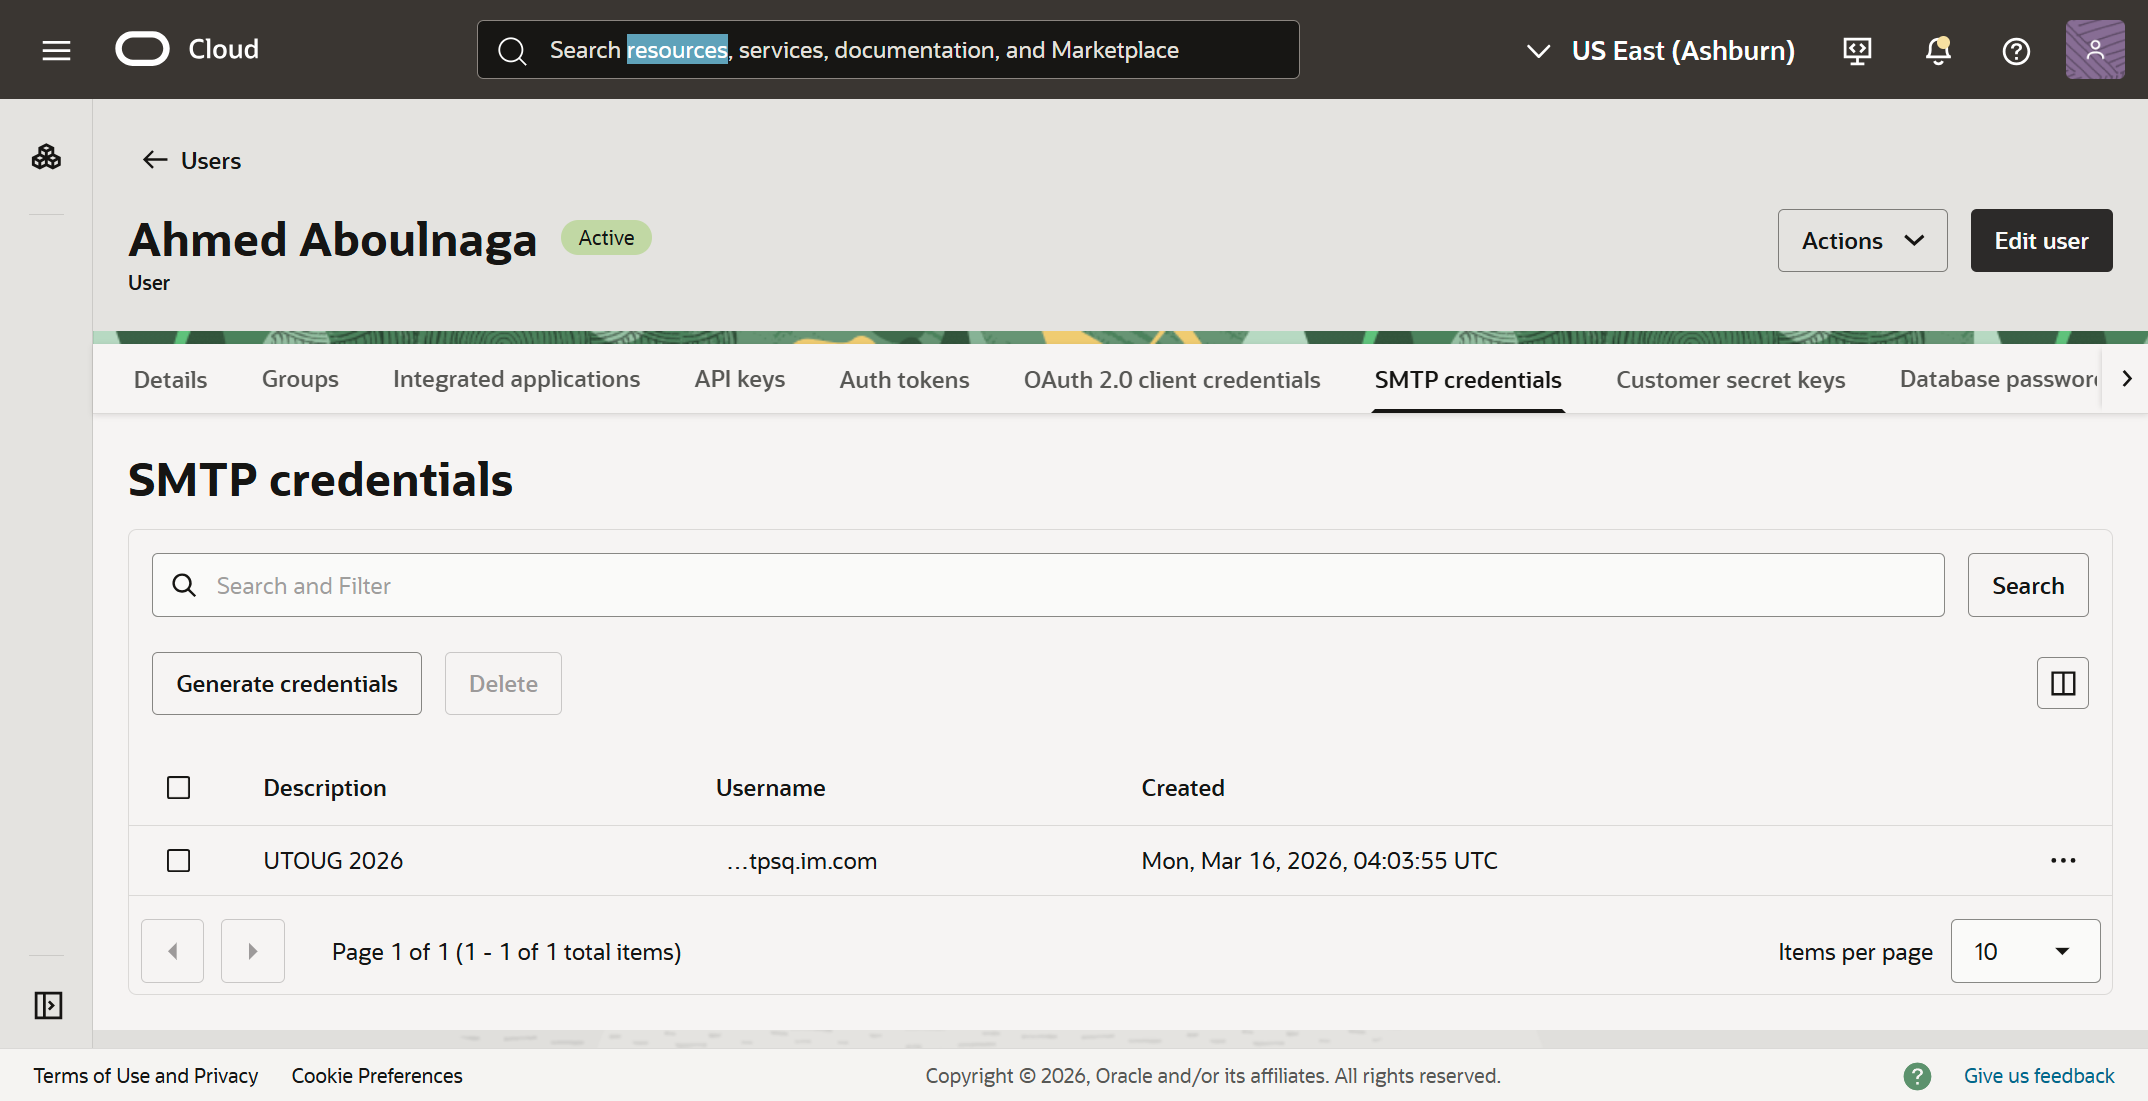
15. Generate SMTP credentials (manual)
The email functionality in the application wasn't working though. I would get an error on the web page when I submitted my email address. So I let Cline know:
When I try to send the email, upon clicking on "Send Details", I receive the error "Failed to send email. Please try again later."
Cline offered some suggestions:
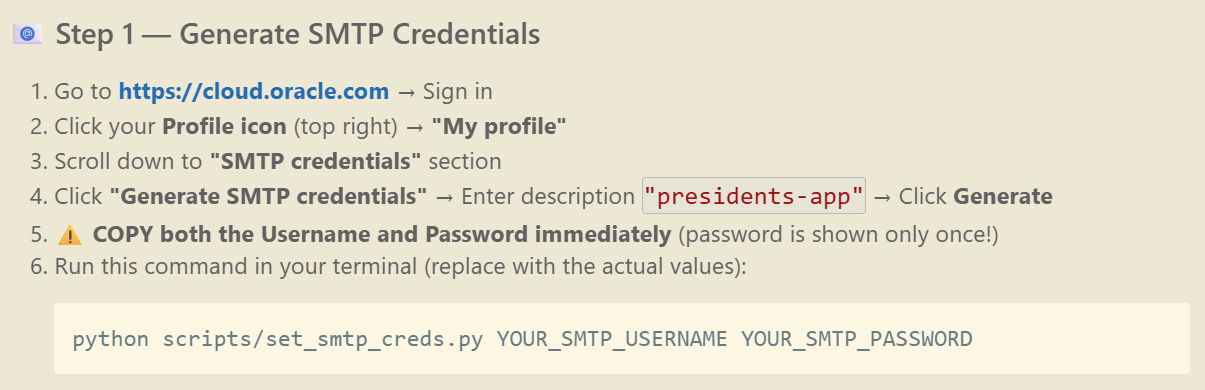
The problem is, these steps were not accurate. The suggested navigation in the OCI console didn't exist and I couldn't find where to generate the SMTP credentials.
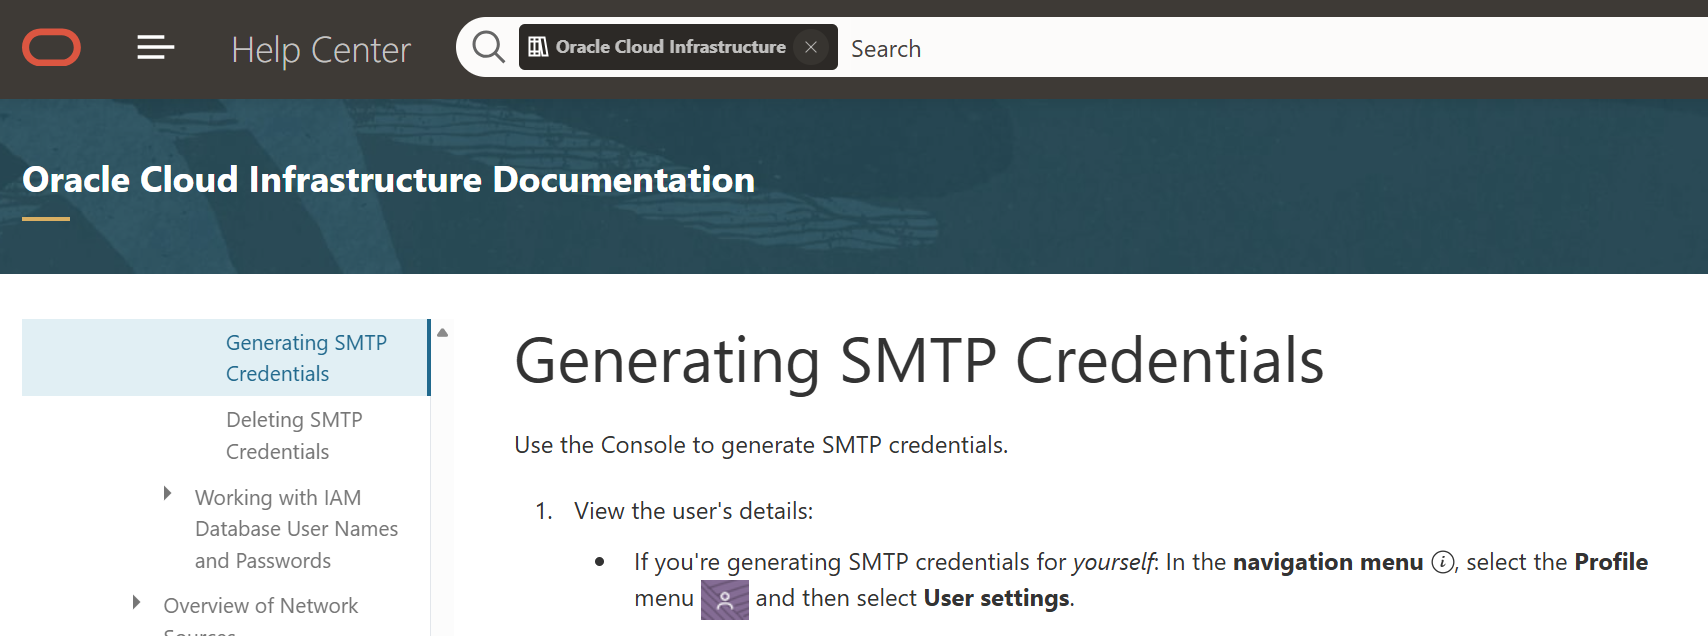
I referred to the Oracle documentation. And guess what? It wasn't accurate either. I wasn't sure what was going on. But at least Cline was consistent with the Oracle documentation.
So I asked ChatGPT. Now the instructions from ChatGPT weren't exact or perfect either, but it had the right idea. As ChatGPT suspected, I was indeed using the newer Identity Domains, and I was finally able to generate the SMTP credentials.
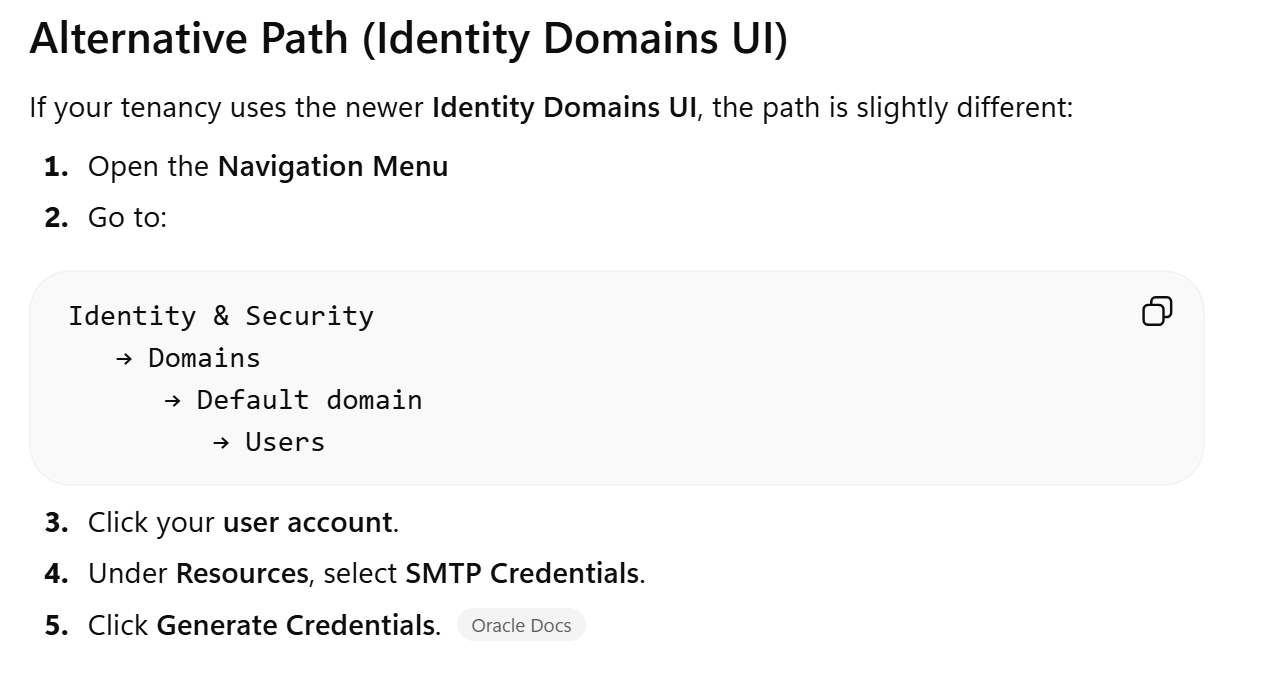
Here's the page on the OCI console where the SMTP credential was finally created.
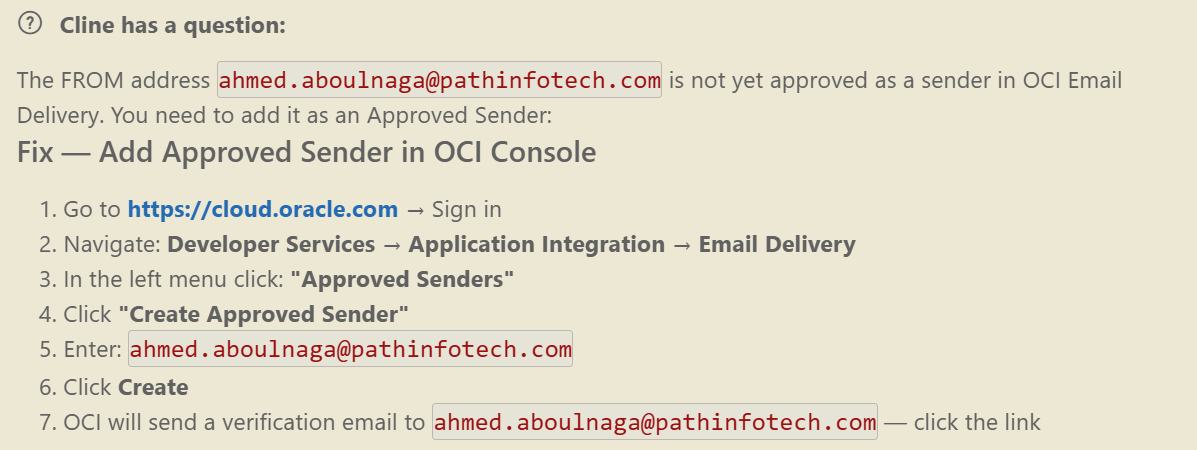
It still wasn't working, so Cline stated that I had to add an approved sender in the OCI console, and gave me the appropriate instructions to do so.
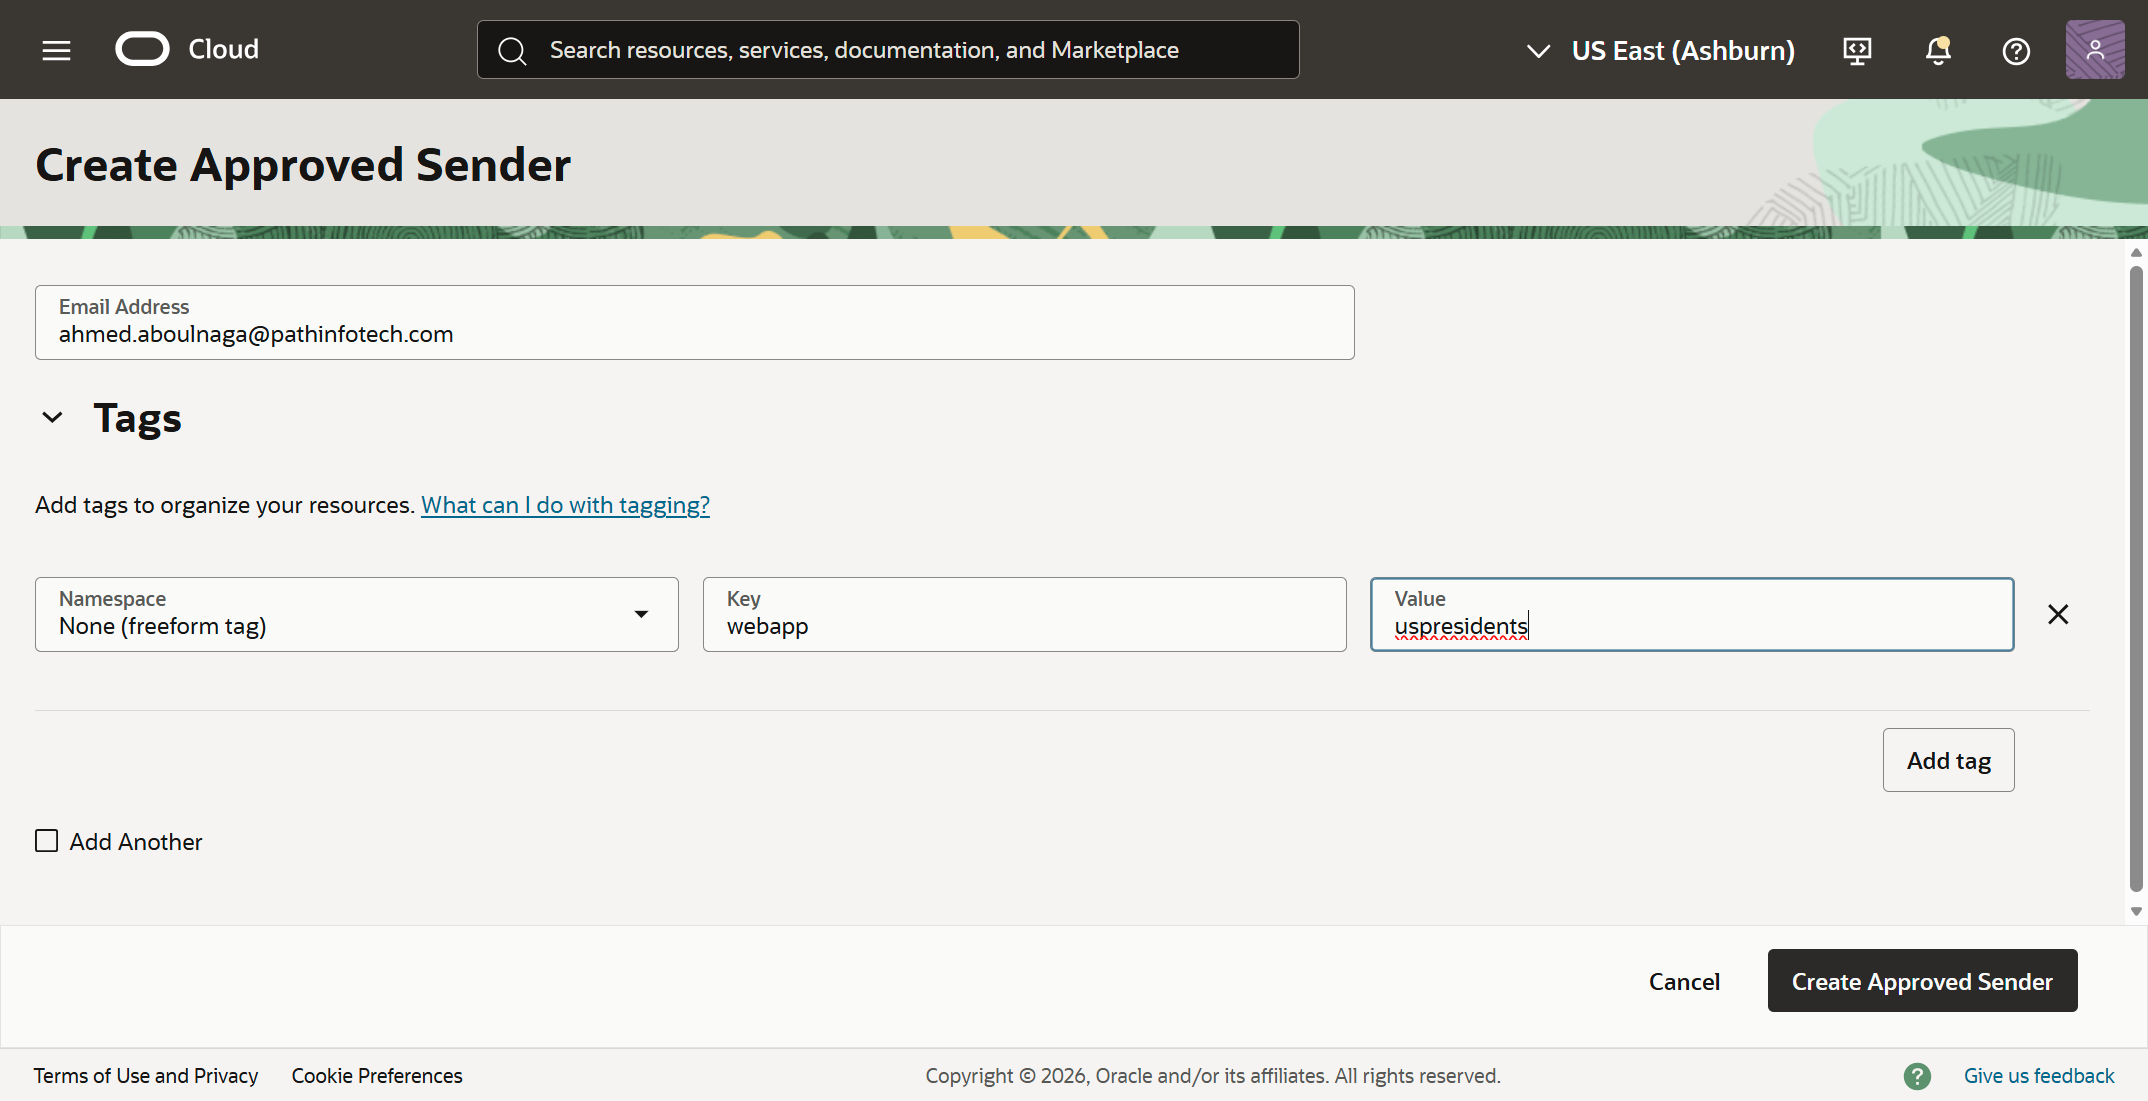
The approved sender was added on the OCI console, and I manually added my tag as well as shown.
Now when I submit my email address in the web application, I no longer received an error. But did I actually receive the email?
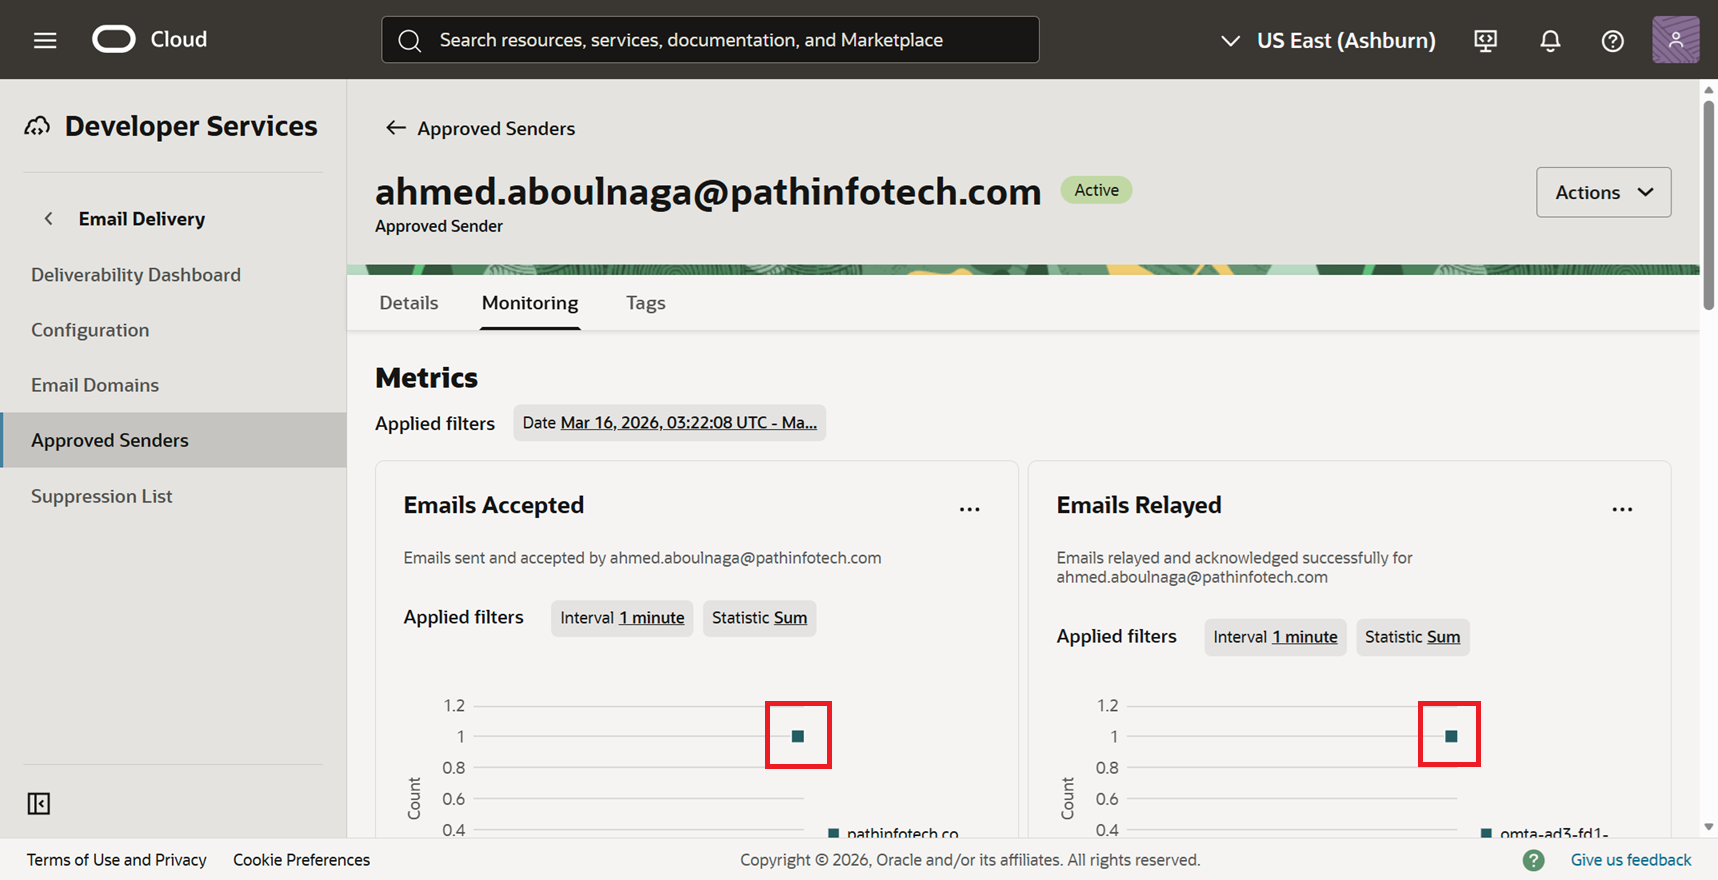
The OCI Email Delivery service seemed to confirm that 1 email was received by the service and 1 email was relayed, so that was a good sign.
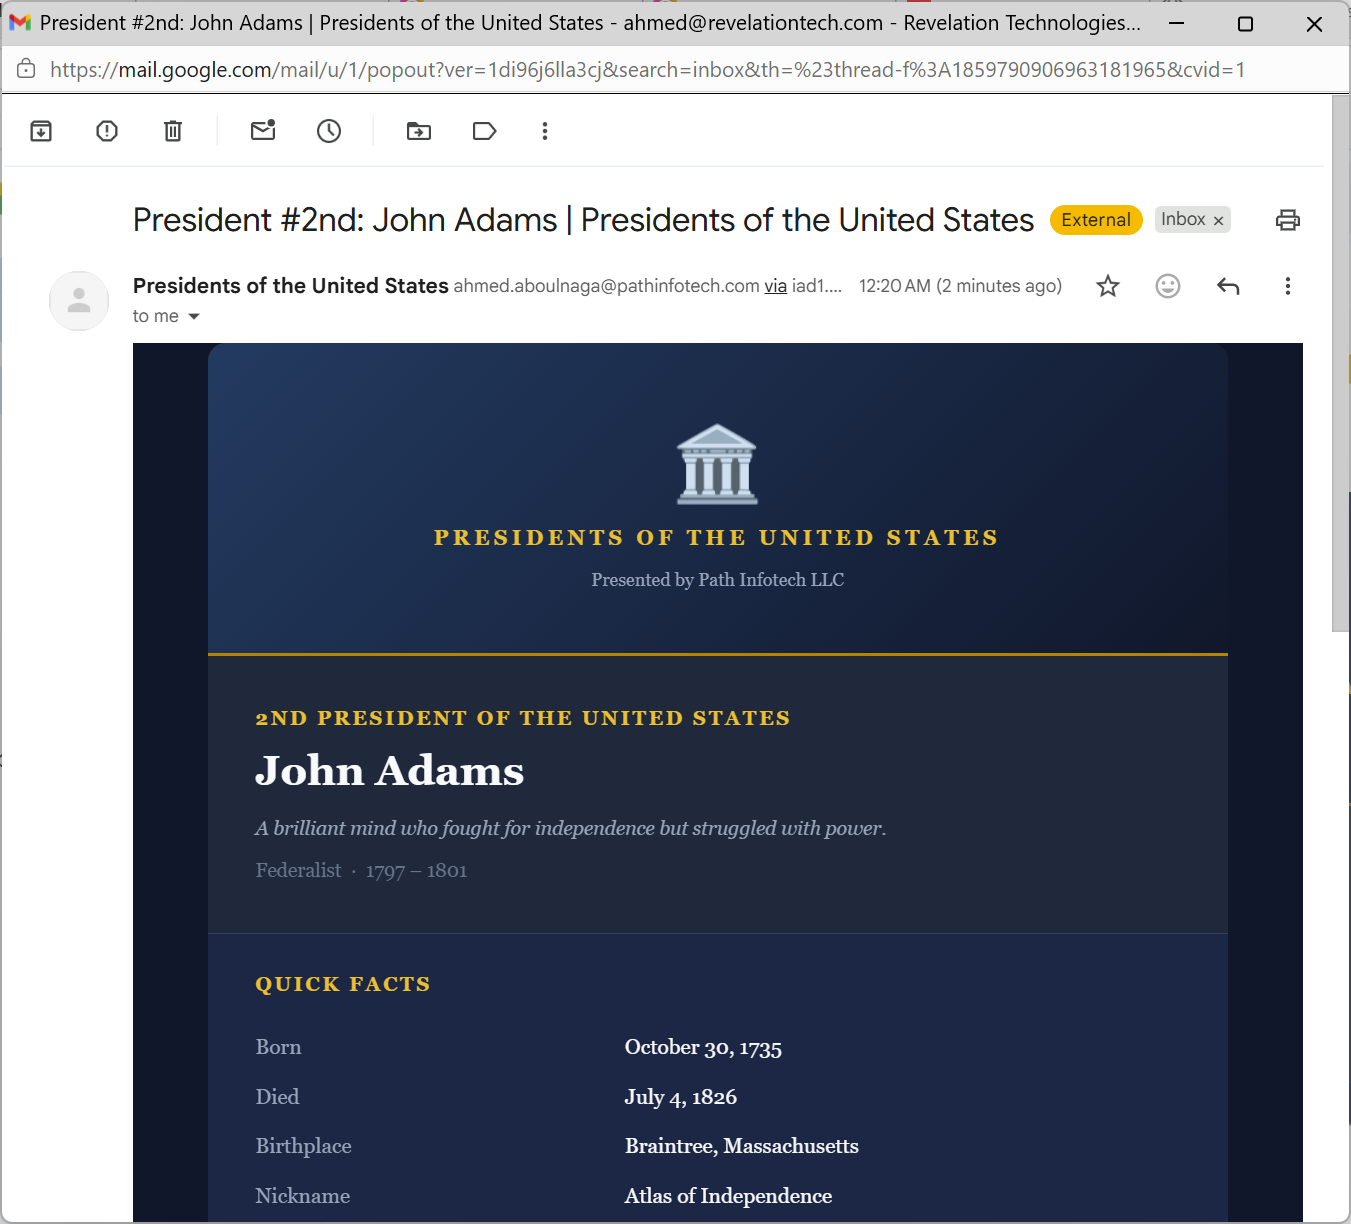
The email was actually in my Spam folder, and the resulting output was very nice.
16. Refine the application (optional)
I still wasn't happy with the fact that I had placeholder initials in lieu of official portraits of the presidents. I know Cline had spent a significant amount of time trying to pull them from Wikimedia (unsuccessfully), but I made this request nonetheless:
I don't like the current placeholder for the portraits which just shows the initials of each president. Are there alternate resources you can use to get actual portrait photos of each president?
After much churning, somehow, somewhere, Cline was able to get some photos and it was looking great as you can see!
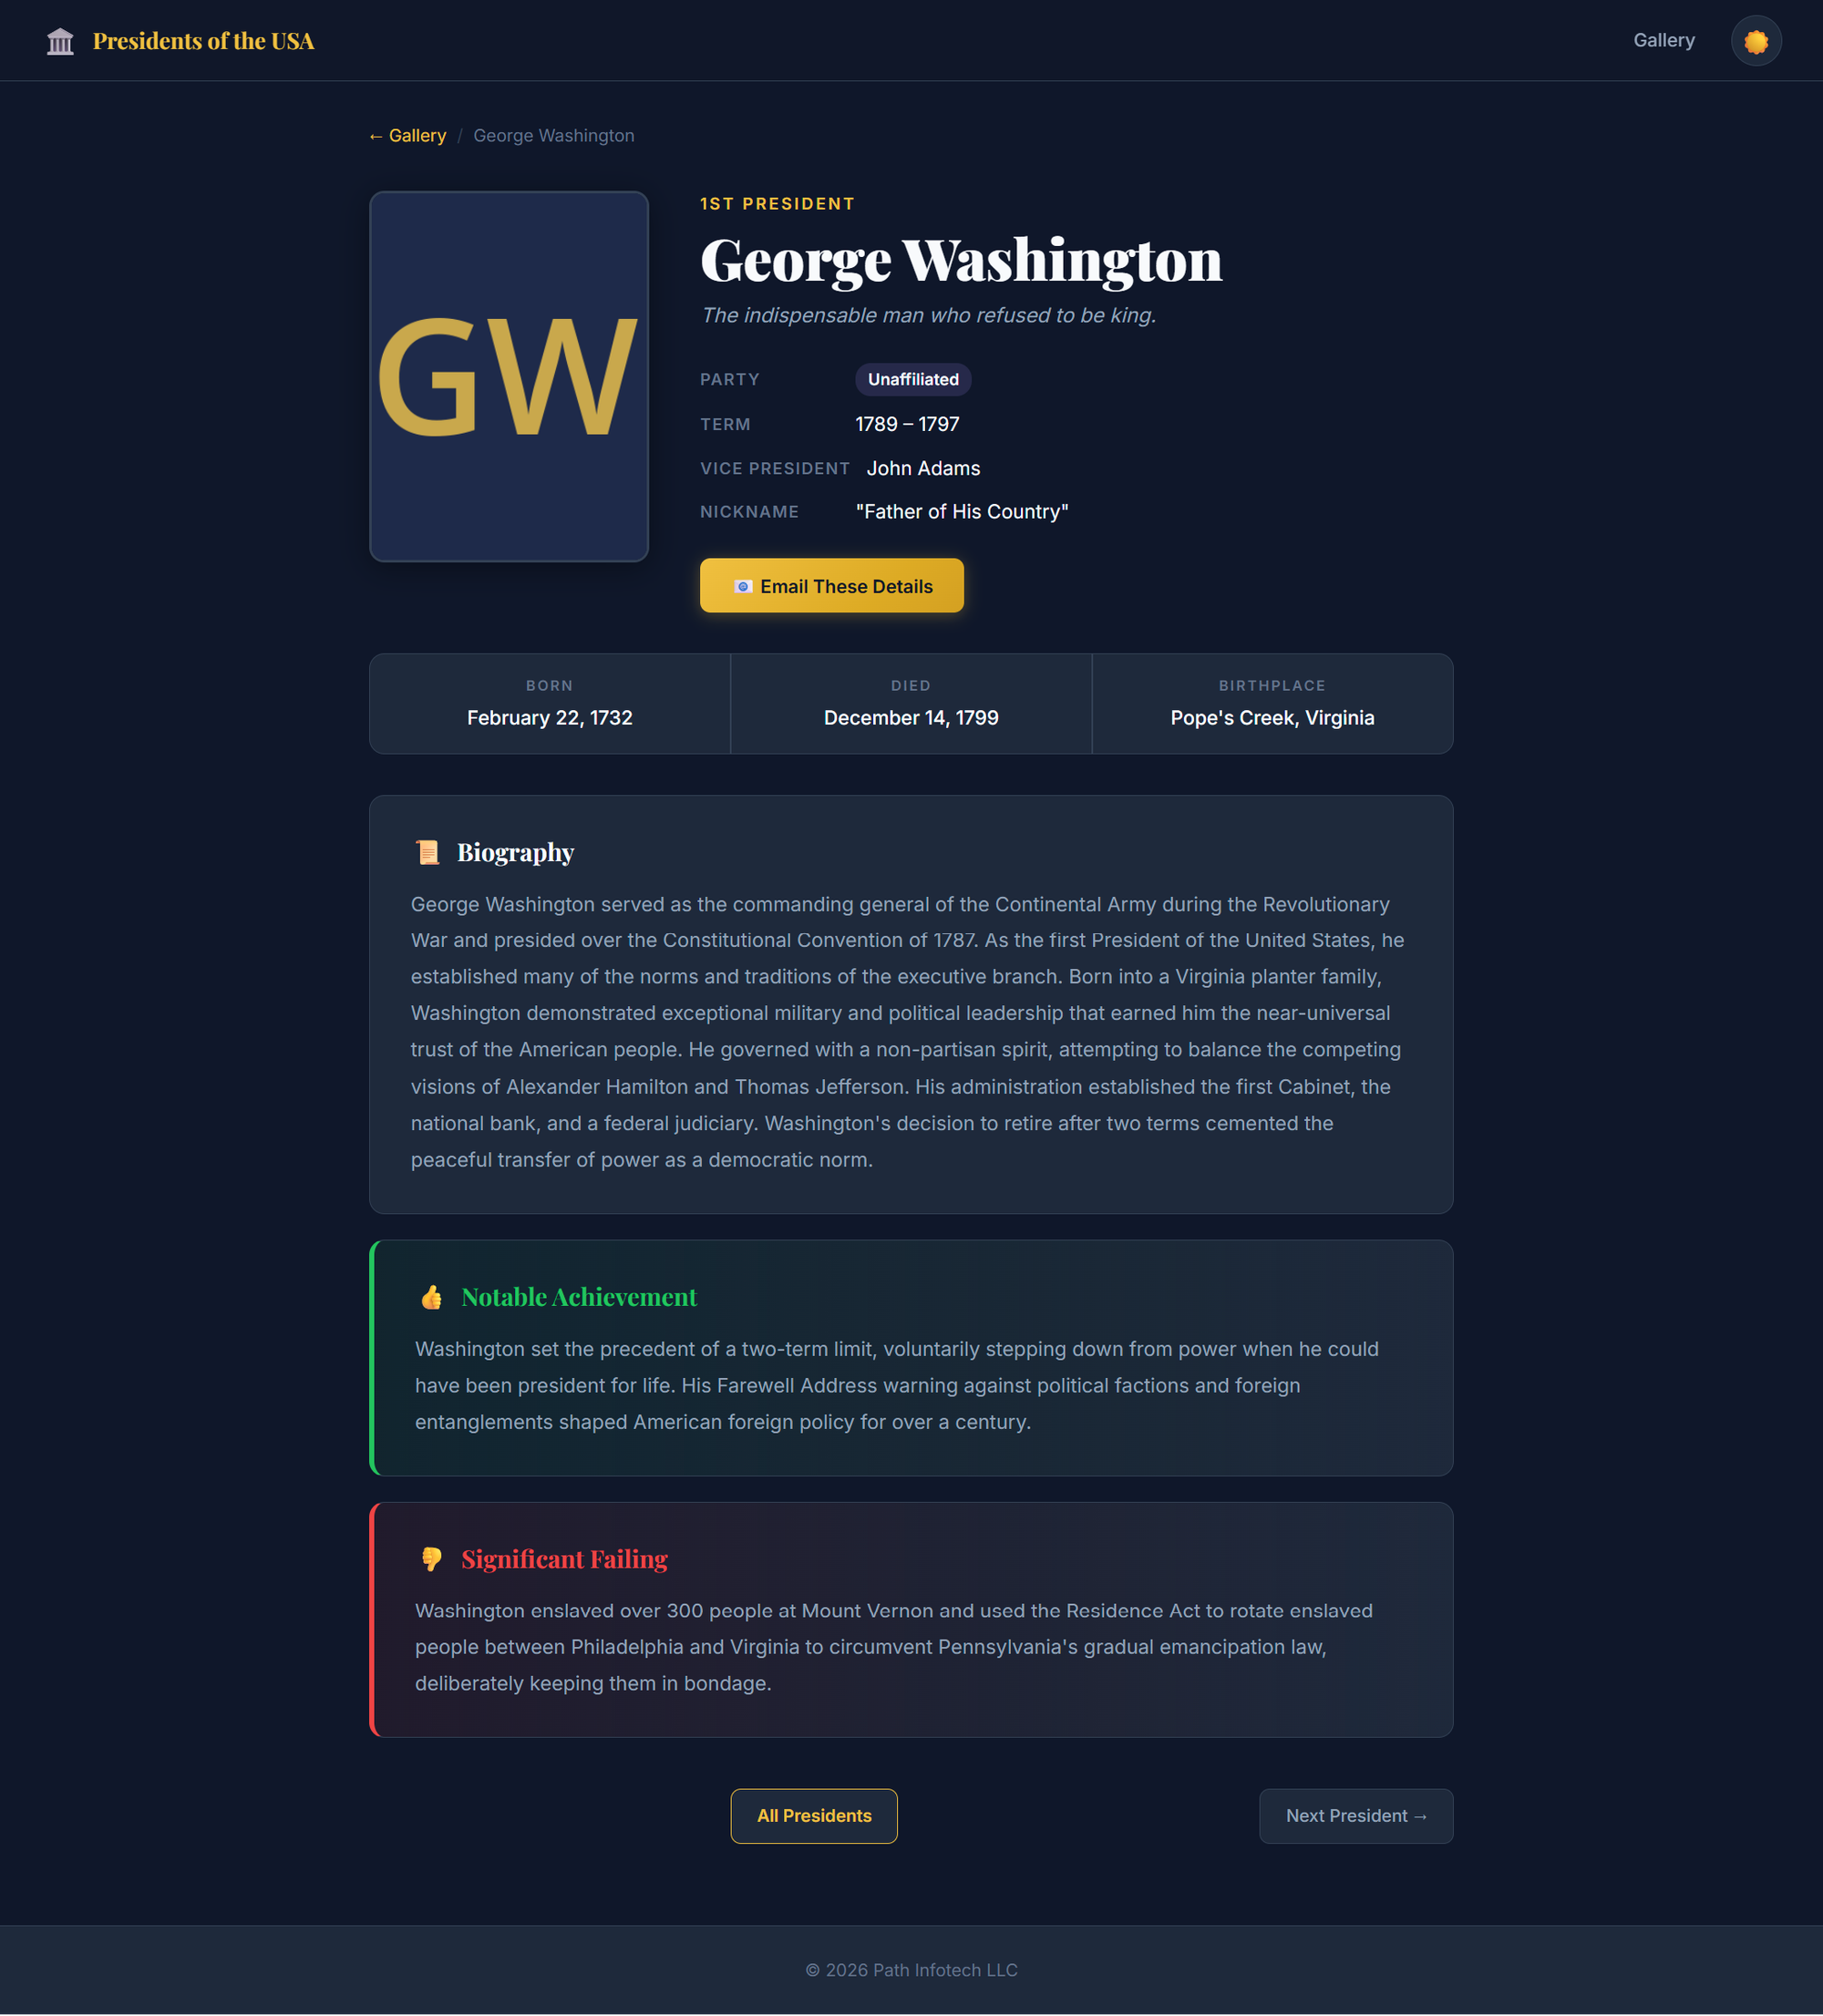
And here's the detail page.

16. Create a cloud architecture diagram (optional)
Now, when Cline was in the Act phase executing the Plan that we had developed together, I noticed that it really didn't follow the original Plan, specifically in regards to the cloud architecture. I know this because as I was observing the AI agent perform its actions over the course of two hours, I noticed it was constantly pushing code to a compute instance, but there was no mention of a compute instance in the original plan.
So here I asked Cline to generate an architecture diagram for me using OCI format standards:
Create a custom architecture diagram that shows the cloud architecture in place and its components/services/resources. It should follow the standard OCI format and service icons as documented here: https://docs.oracle.com/en-us/iaas/Content/General/Reference/graphicsfordiagrams.htm
This was the final architecture. It wasn't what I would consider a pretty "cloud" architecture diagram, as it included details often not found in these types of diagrams, but it provided sufficient detail for me to understand the overall design.

I preferred the original architecture, and I suppose I could have insisted that it re-architect the entire application to go full serverless, leveraging OCI Functions and add an API Gateway to front the application. But I didn't go that route.
17. Generate documentation summary (optional)
There's unfortunately no way to export the entire chat history with Cline. It would be incredibly useful to go through all the actions that Cline took offline. That way, I'd know exactly what the AI agent performed.
So my other best option is to ask it to generate something:
Export this entire chat session, maintaining all formatting and include all responses, and save it in an HTML file under the /docs folder. Additionally, include a section with some basic statistics such as total number of files in the project, frameworks used, OCI services used, patterns used, total session duration, and other relevant metrics. Include results of the testing. Includes key errors and steps to resolve them. Also include suggested future recommendations.
Cline generated a detailed export, but it's more of a session summary than a word-for-word chat export. This summary was still incredibly useful.

18. Shutdown the cloud servers to save money (optional)
Cline based the cloud design on a single compute instance and a single Autonomous AI Database. When browsing the OCI console, I was able to confirm that the database was indeed the free tier option, so I would not be paying anything for it. However, I had noticed during the Act phase that Cline was unsuccessful trying to start up the free tier compute instance, likely because I exhausted my free tier limits.
So after testing, I asked Cline to:
Shutdown the compute instance and the database instance.
Not only did the AI agent get the resource OCIDs from the Terraform state file to shut them both down, but it also created a companion start_oci_resources.py script so that I can easily restart them later.
Even better, when the VM is up, Cline mentioned that the services would auto-start.

Conclusion & Final Thoughts
This effort took quite a while, but not as long as it would have taken had I programmed it all from scratch. This may have taken me anywhere from 20-40 hours to complete manually.
What was the total duration of the session, minus all the wait times of inactivity caused by me? Provide a response in hours and minutes.
Cline estimated the net active AI working time to be 9 hours and 29 minutes, in addition to 52 minutes of human "wait" times, but I don't believe this to be accurate. There was probably a 3 hour pause caused by me as I went out to dinner and putting the kids to bed when I came back. So my rough duration estimate would be 6-7 hours instead.
Though I tout Cline as being "autonomous", it really operates on a permission-based model (i.e., it won't do anything unexpected). The human/developer still needs to approve most actions, unless you decide to auto-approve everything like I did.
One of the biggest risks of fully autonomous code creation is the loss of developer control (I have a whole post on AI code generation risks and mitigations worth reading). As I let the AI agent loose, it created code, encountered errors, troubleshooted the errors, fixed the bugs, and repeated the process hundreds of times. Given that I let the AI agent select the development framework and design the architecture, as time passed, I starting becoming unaware of what it was doing. This was partly due to me keeping auto-approve on, mostly because I didn't want to spend another two days reviewing and validating every single change the AI agent wanted to do before approving it.
Also, 2026 is the year of the MCP Server. I mention nothing of MCP Servers this time around, but stay tuned for a future post.
In conclusion, there are a very few important things worth noting:
- Use AI agents whenever you can during your programming sessions. AI agents (like Cline) are powerful, so don't hesitate taking advantage of them. Ask it to clarify items, refine the code, or perform mundane manual steps for you.
- AI agents can save you an unbelievable amount of time. It can easily reduce the time it would take a human to manually troubleshoot and resolve issues by 99%. It is truly amazing.
- Repeating the same set of instructions will likely not yield the same output. That's because current generative AI models are non-deterministic. AI models will usually produce different outputs even if the input is exactly the same each time. My application above will likely look drastically different if I repeated the same exercise again.
- The AI agent can seem to work in circles when trying to resolve simple problems. But it goes about it methodically and eventually finds a fix.
- AI agents but can be dangerous. Here's a recent article on how an AI agent deleted Meta's AI Alignment Director's entire email inbox irrecoverably.
- Auto-approve is exceptionally dangerous. It is not recommended, though it would take considerably more time to review every proposed course of action by the AI agent.
Try the app here as long while it stays up: http://pathinfotech.app/